Kaa Identity and Access Management
Kaa Identity and Access Management is an identity and access management (IAM) system built on top of iamcore.
Its primary goal is to provide a simple and intuitive interface for managing Kaa platform resources, users, and their permissions.
In this article, we’ll introduce the key terms and concepts used in Kaa IAM, including users, policies, groups, resources, and resource groups.
Understanding these concepts is essential before setting up an access control infrastructure.
Users
A User in Kaa IAM is an individual who can access the platform and interact with its resources.
Users can have different permissions based on their assigned policies, which control their access levels.
Create New User
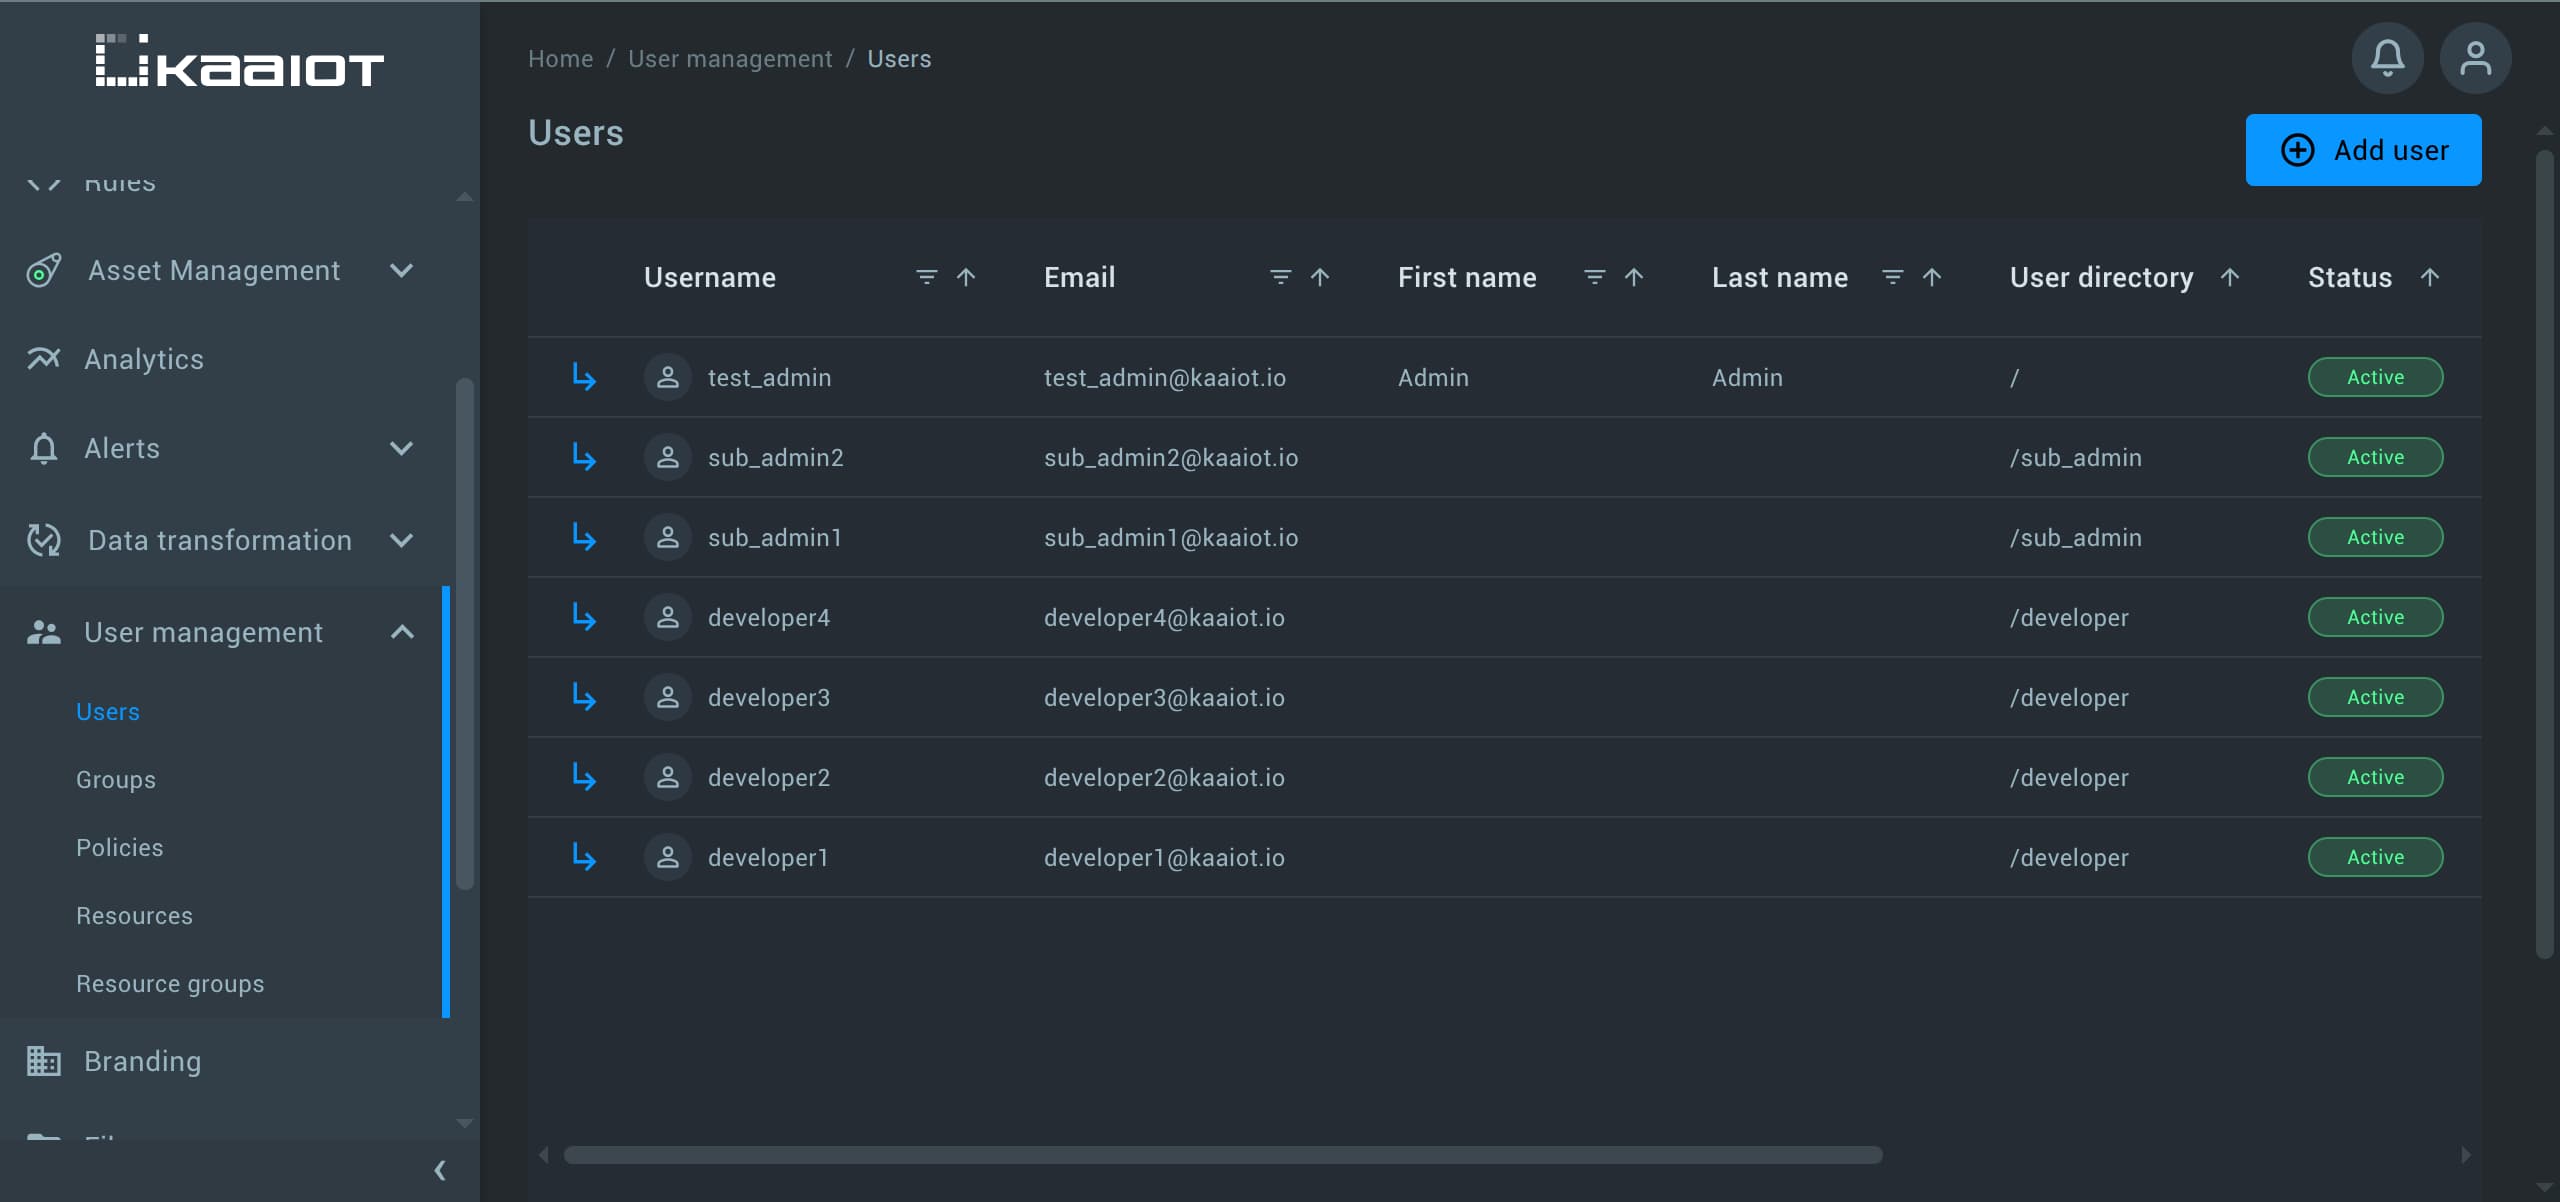
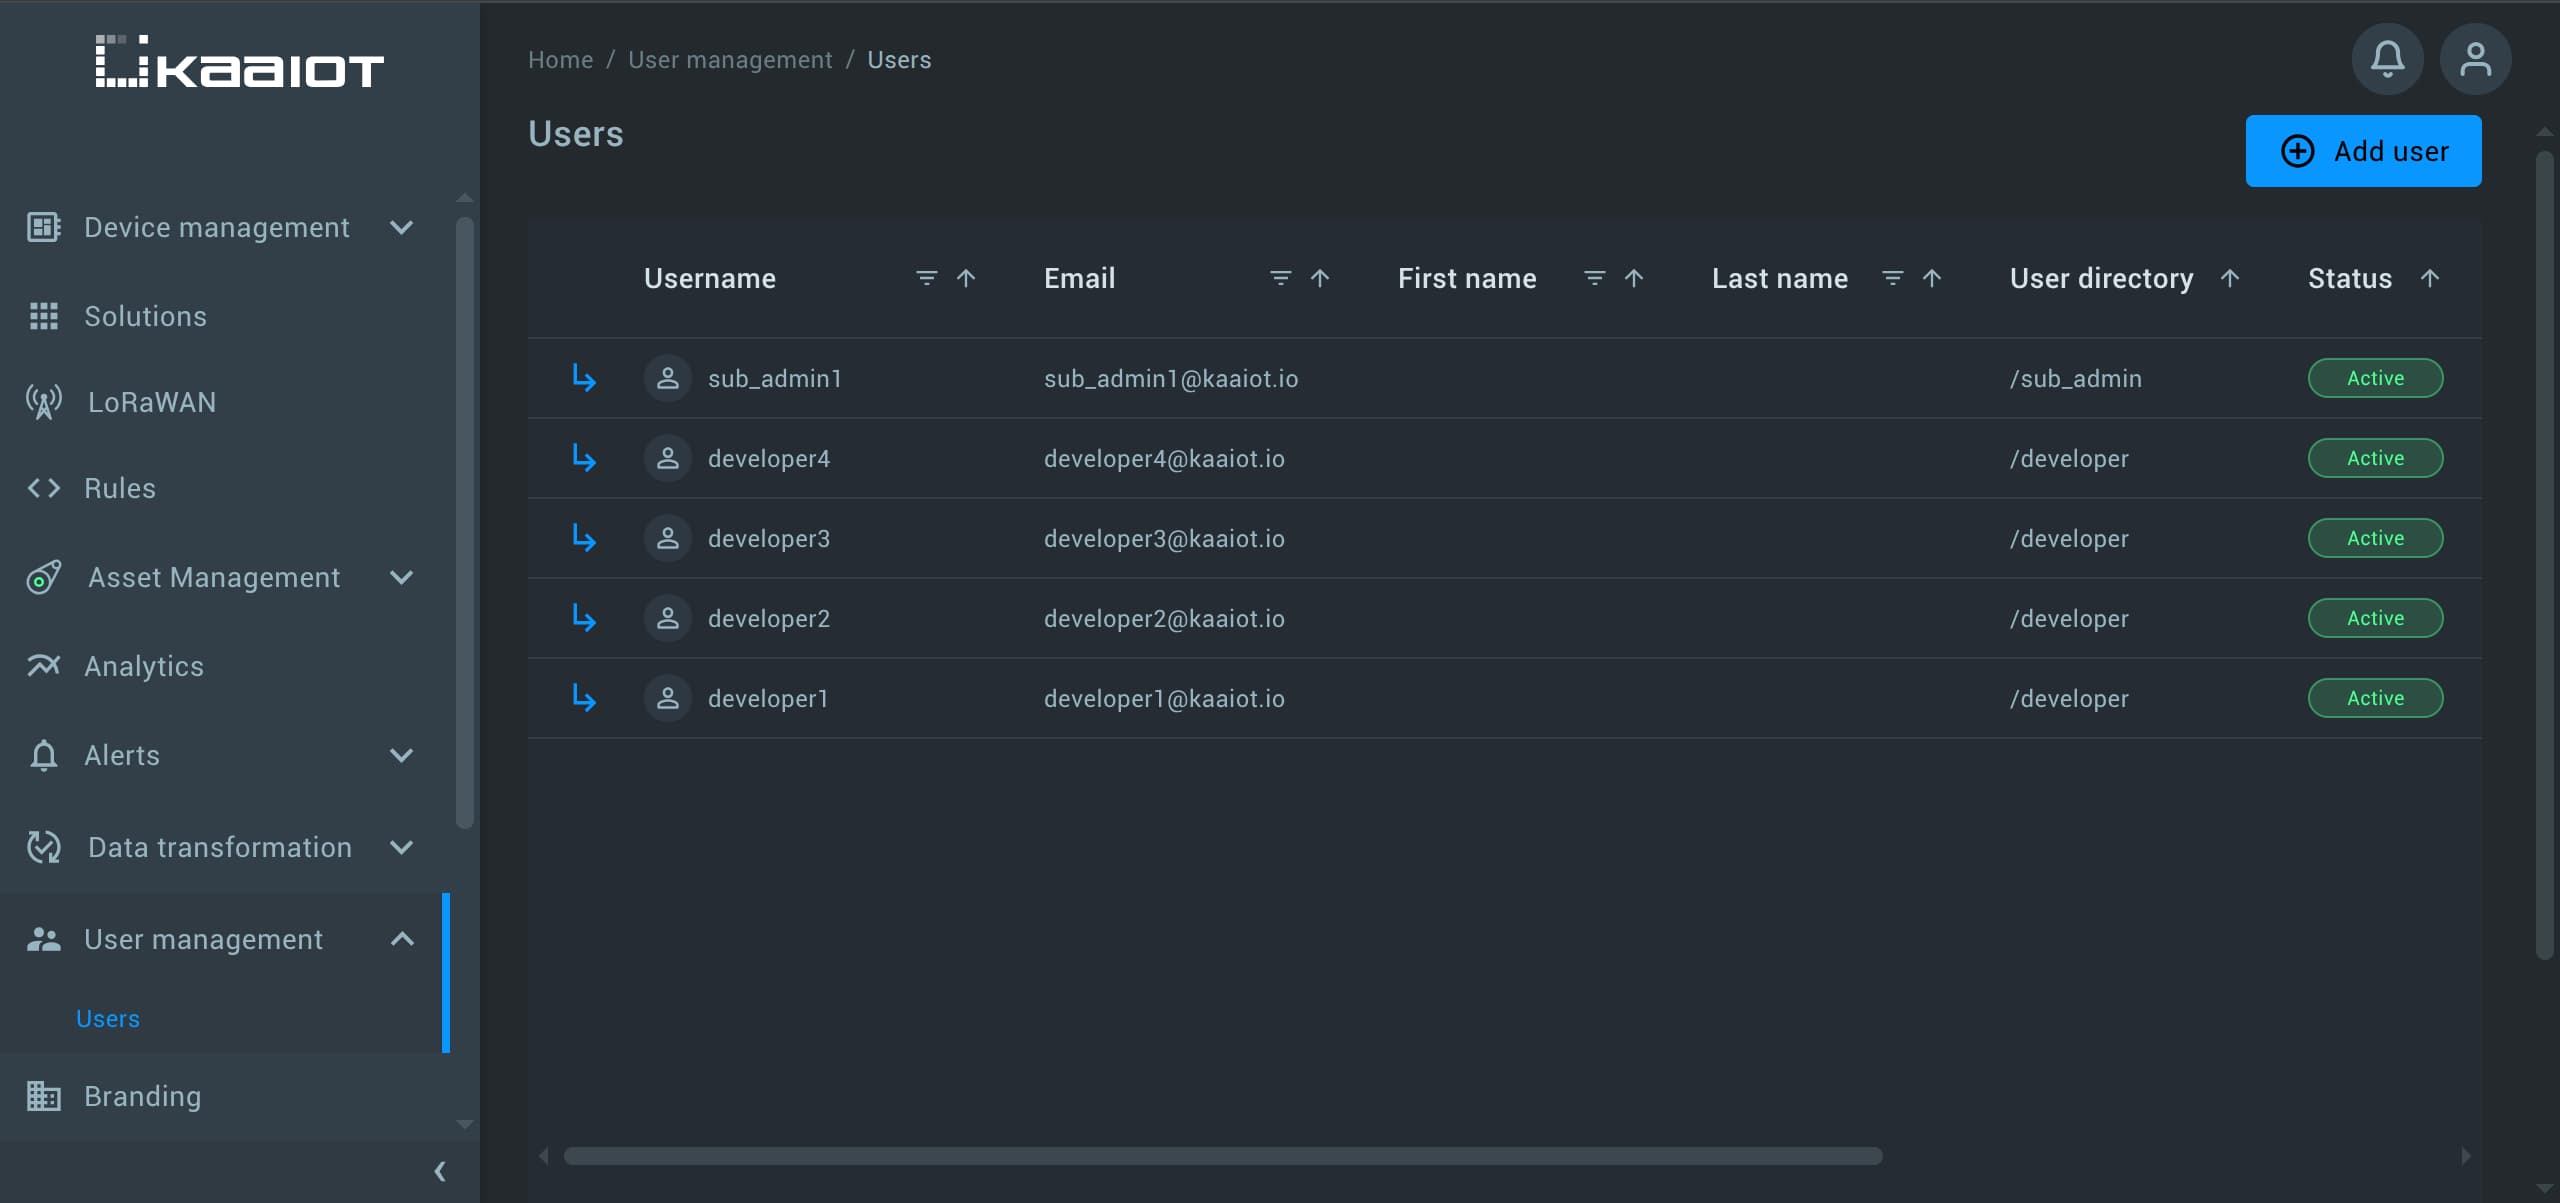
First, log in to your Kaa platform and navigate to “User Management” -> “Users”.
Here, you should see a single user, which is your admin user.
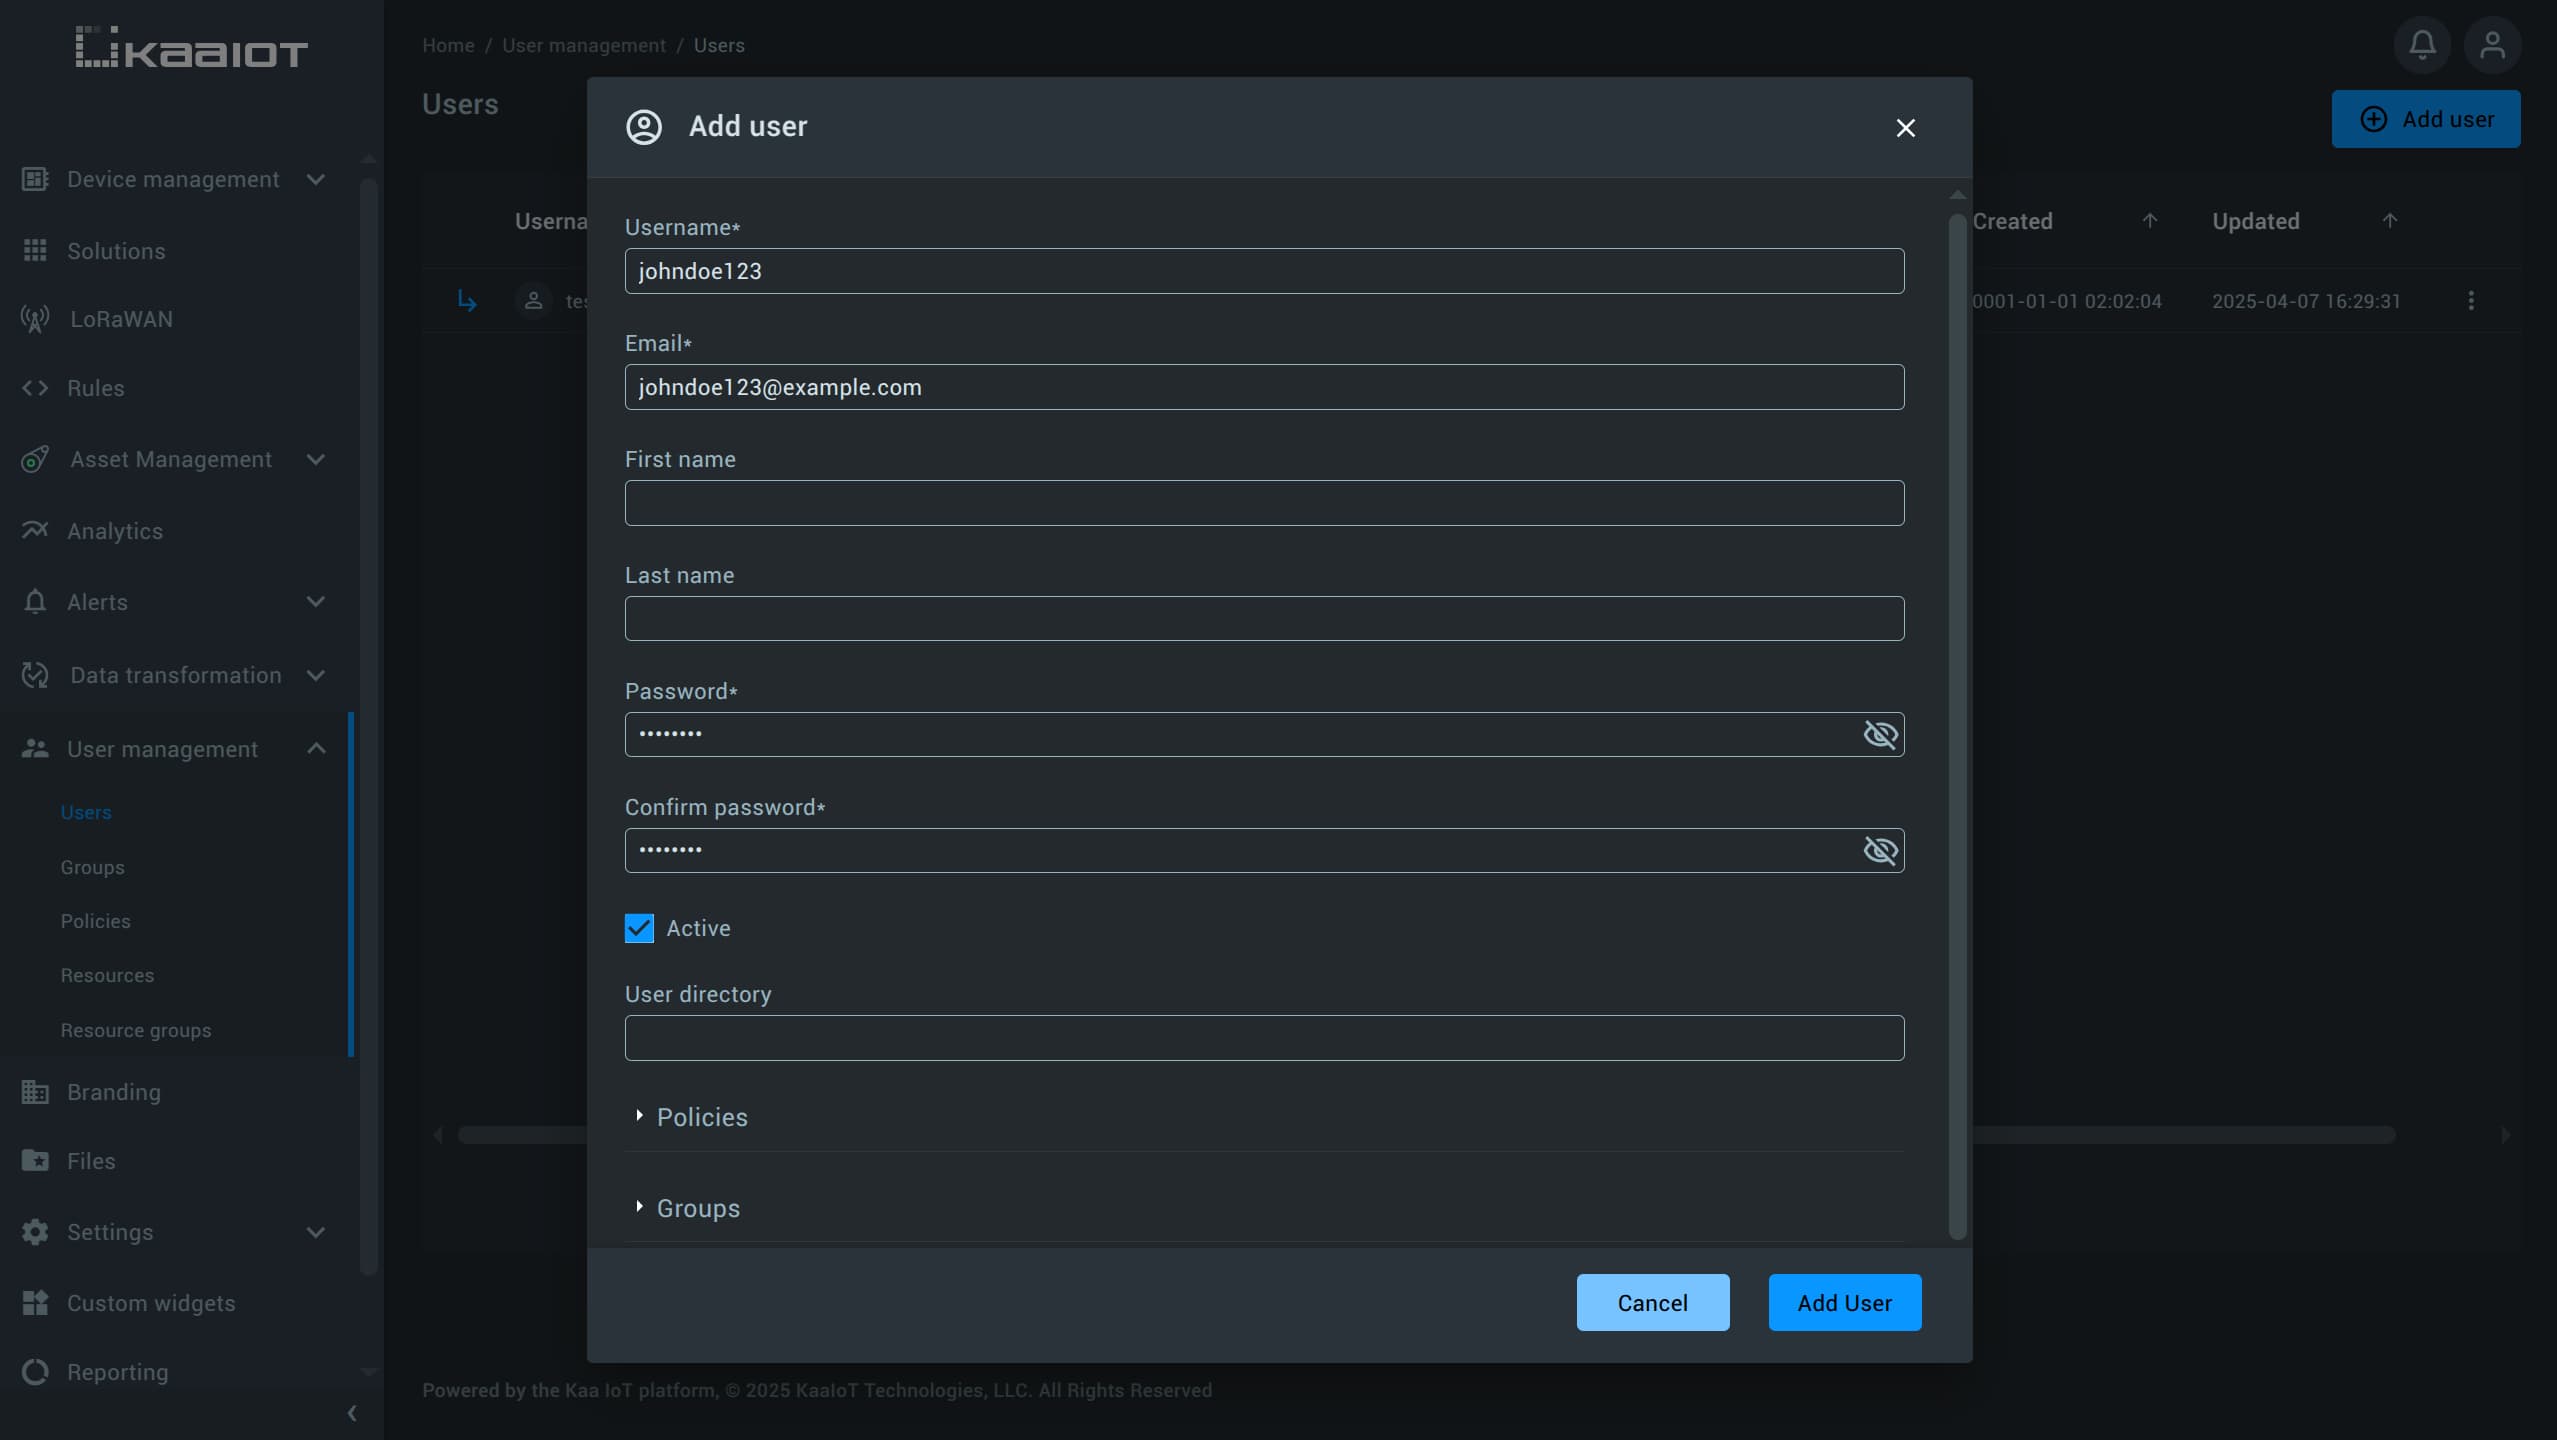
For testing purposes, you’ll need to create a new user. To do so, click on Add user.
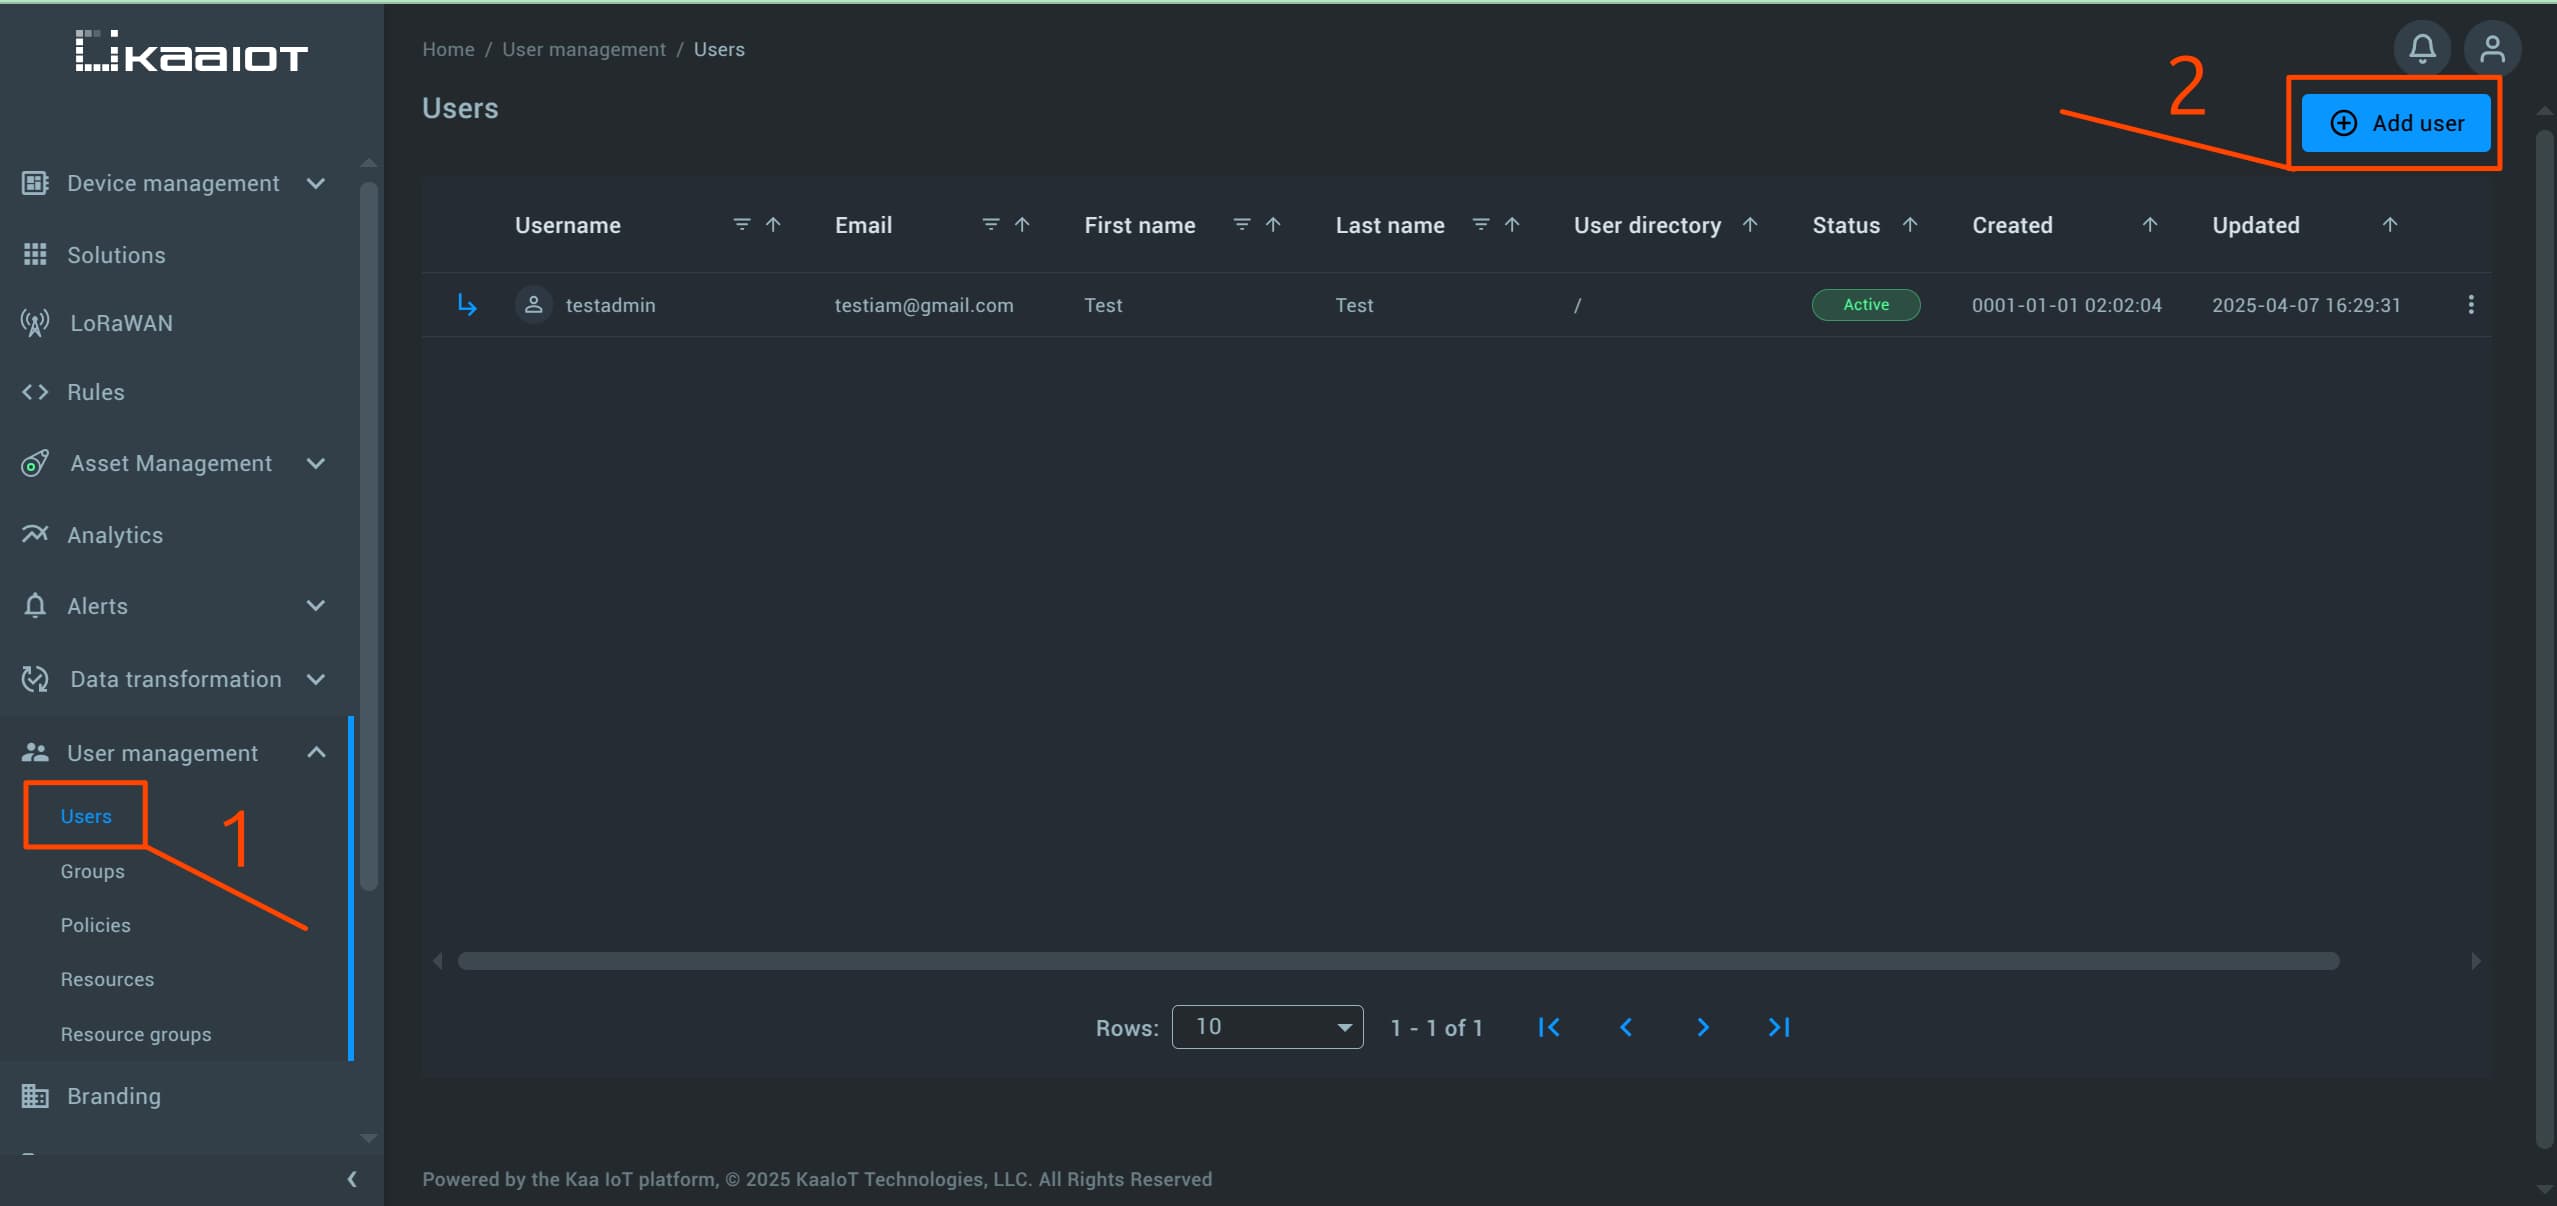
Pick a username for the new account.
The email doesn’t need to be real unless you want to walk through account activation.
The First Name and Last Name fields are optional.
The Active checkbox determines whether the user is active. Leave it checked.
The User Directory field is used for advanced policy management, which will be covered later in this article.
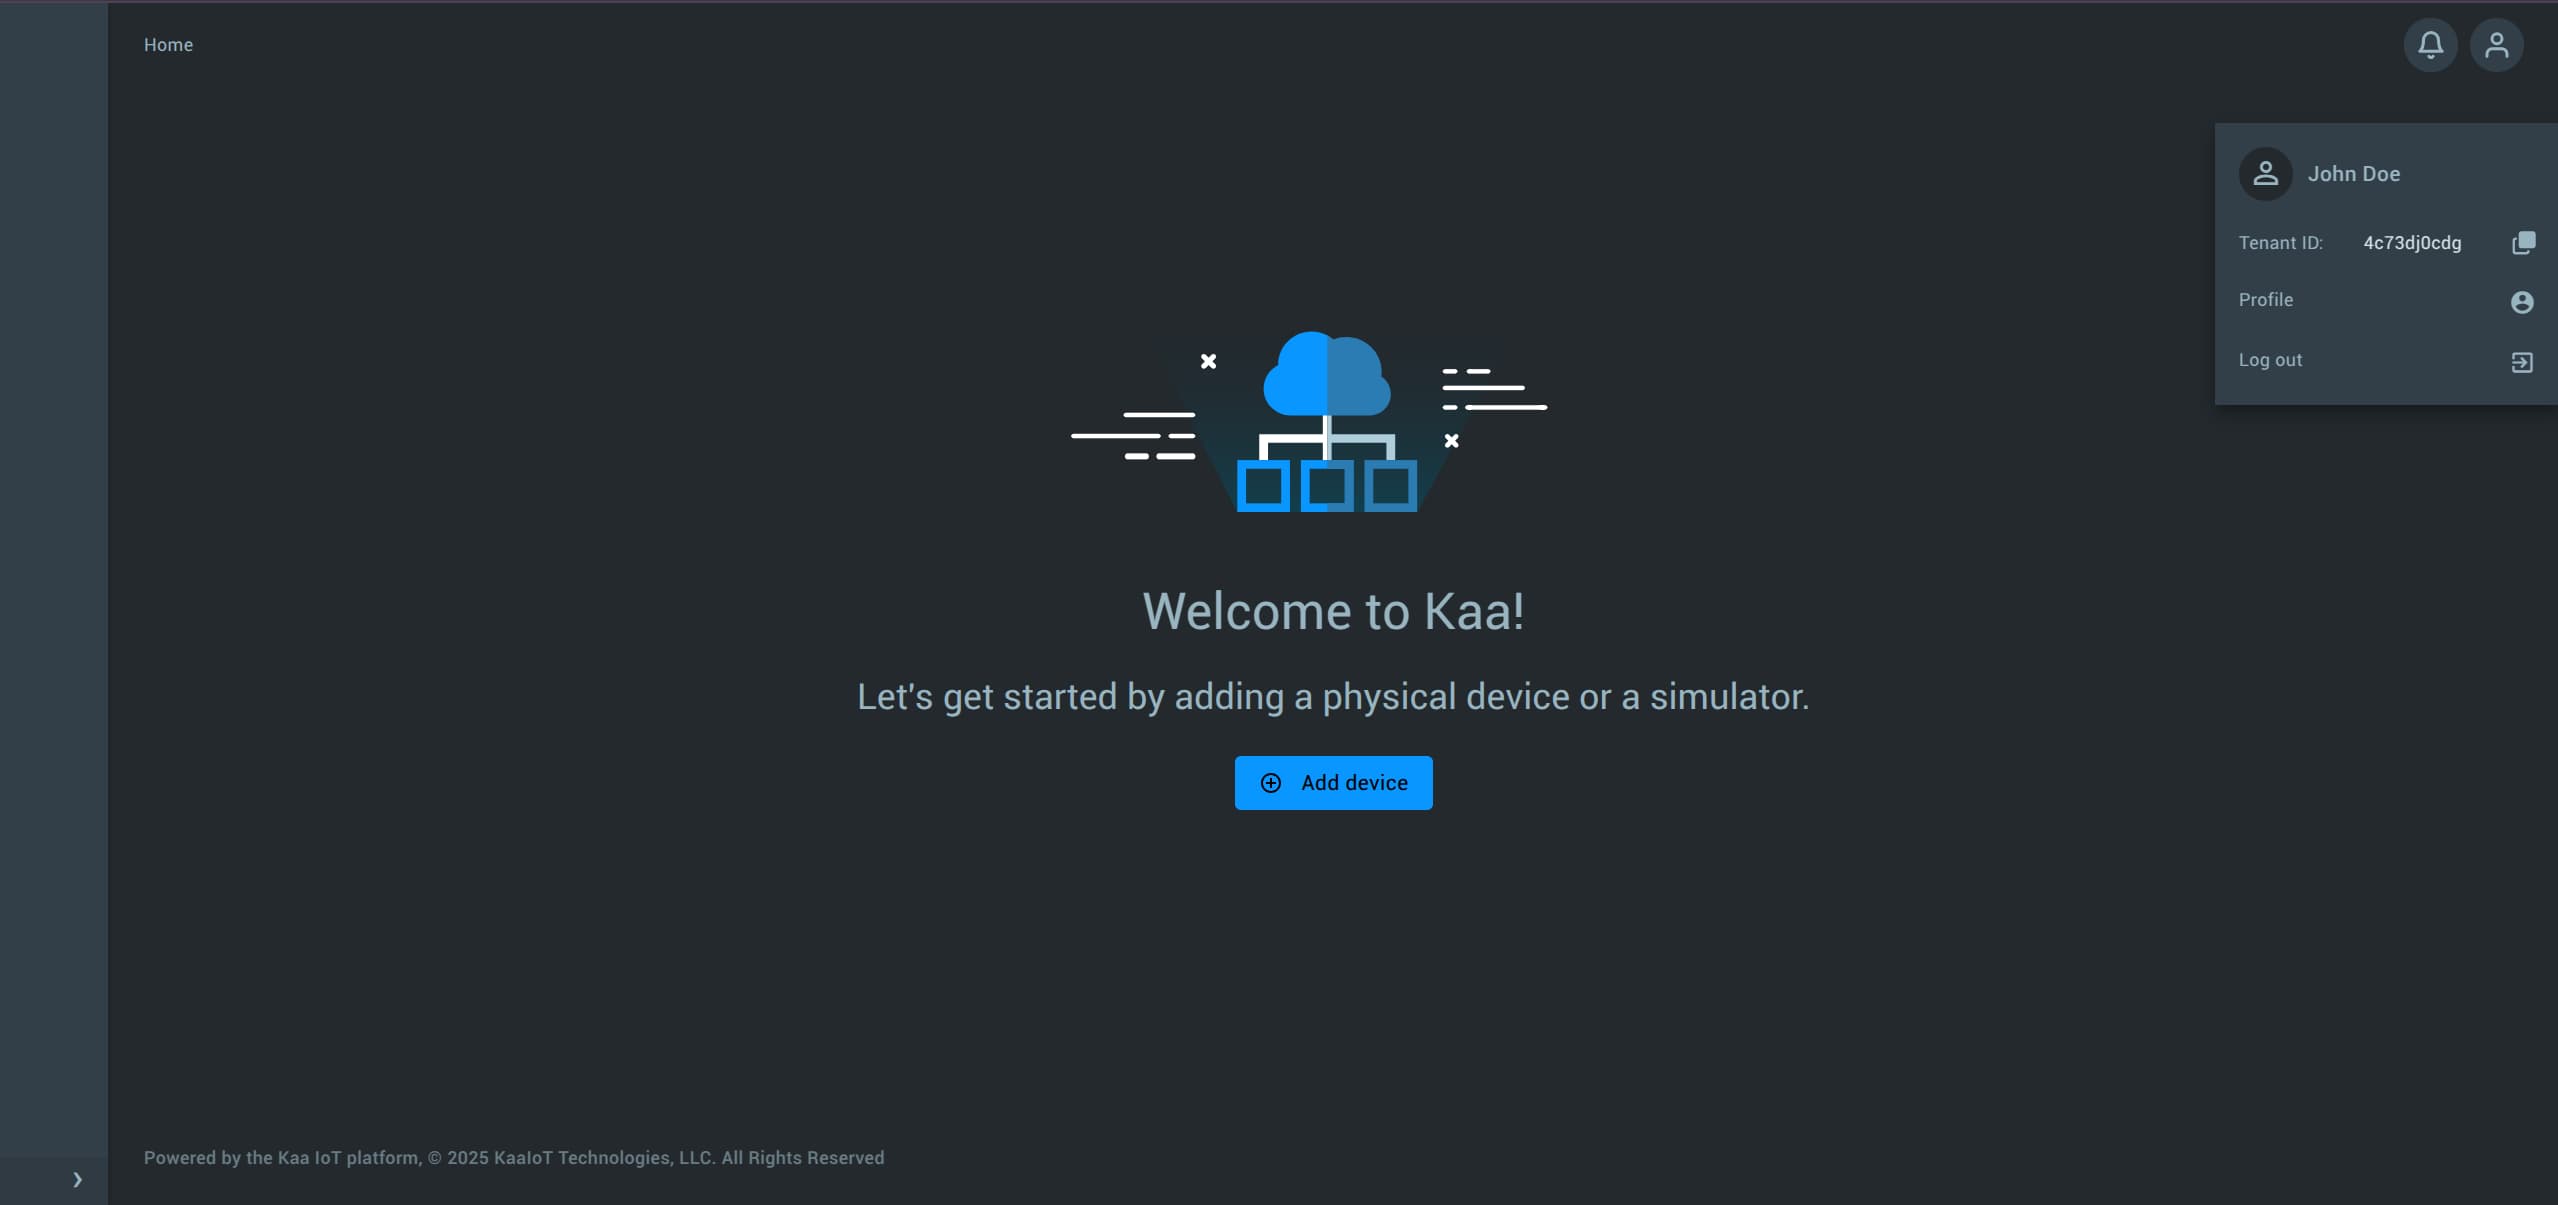
After creating the user, try logging in with his credentials.
Policies
Policy is, generally speaking, a combination of principals (users, groups, applications), resources (documents, assets, users, groups, etc.), possible actions on resources (e.g. read, update, delete, etc.), and effects (allow or deny). Its main responsibility is to permit or decline particular operations on specific resources for a given authenticated principal.
There are two policy types: identity- and resource-based. The key difference between the two is that resource-based policies are always associated with a single resource using a 1:1 relationship and are automatically created for each resource. Identity-based policy manages identity (user, group, application), can have various principals attached, and defines what this identity can do. Resource-based policy is attached to one resource, and defines who and what can do on that one resource.
To assign a policy to your user, log back into your admin account.
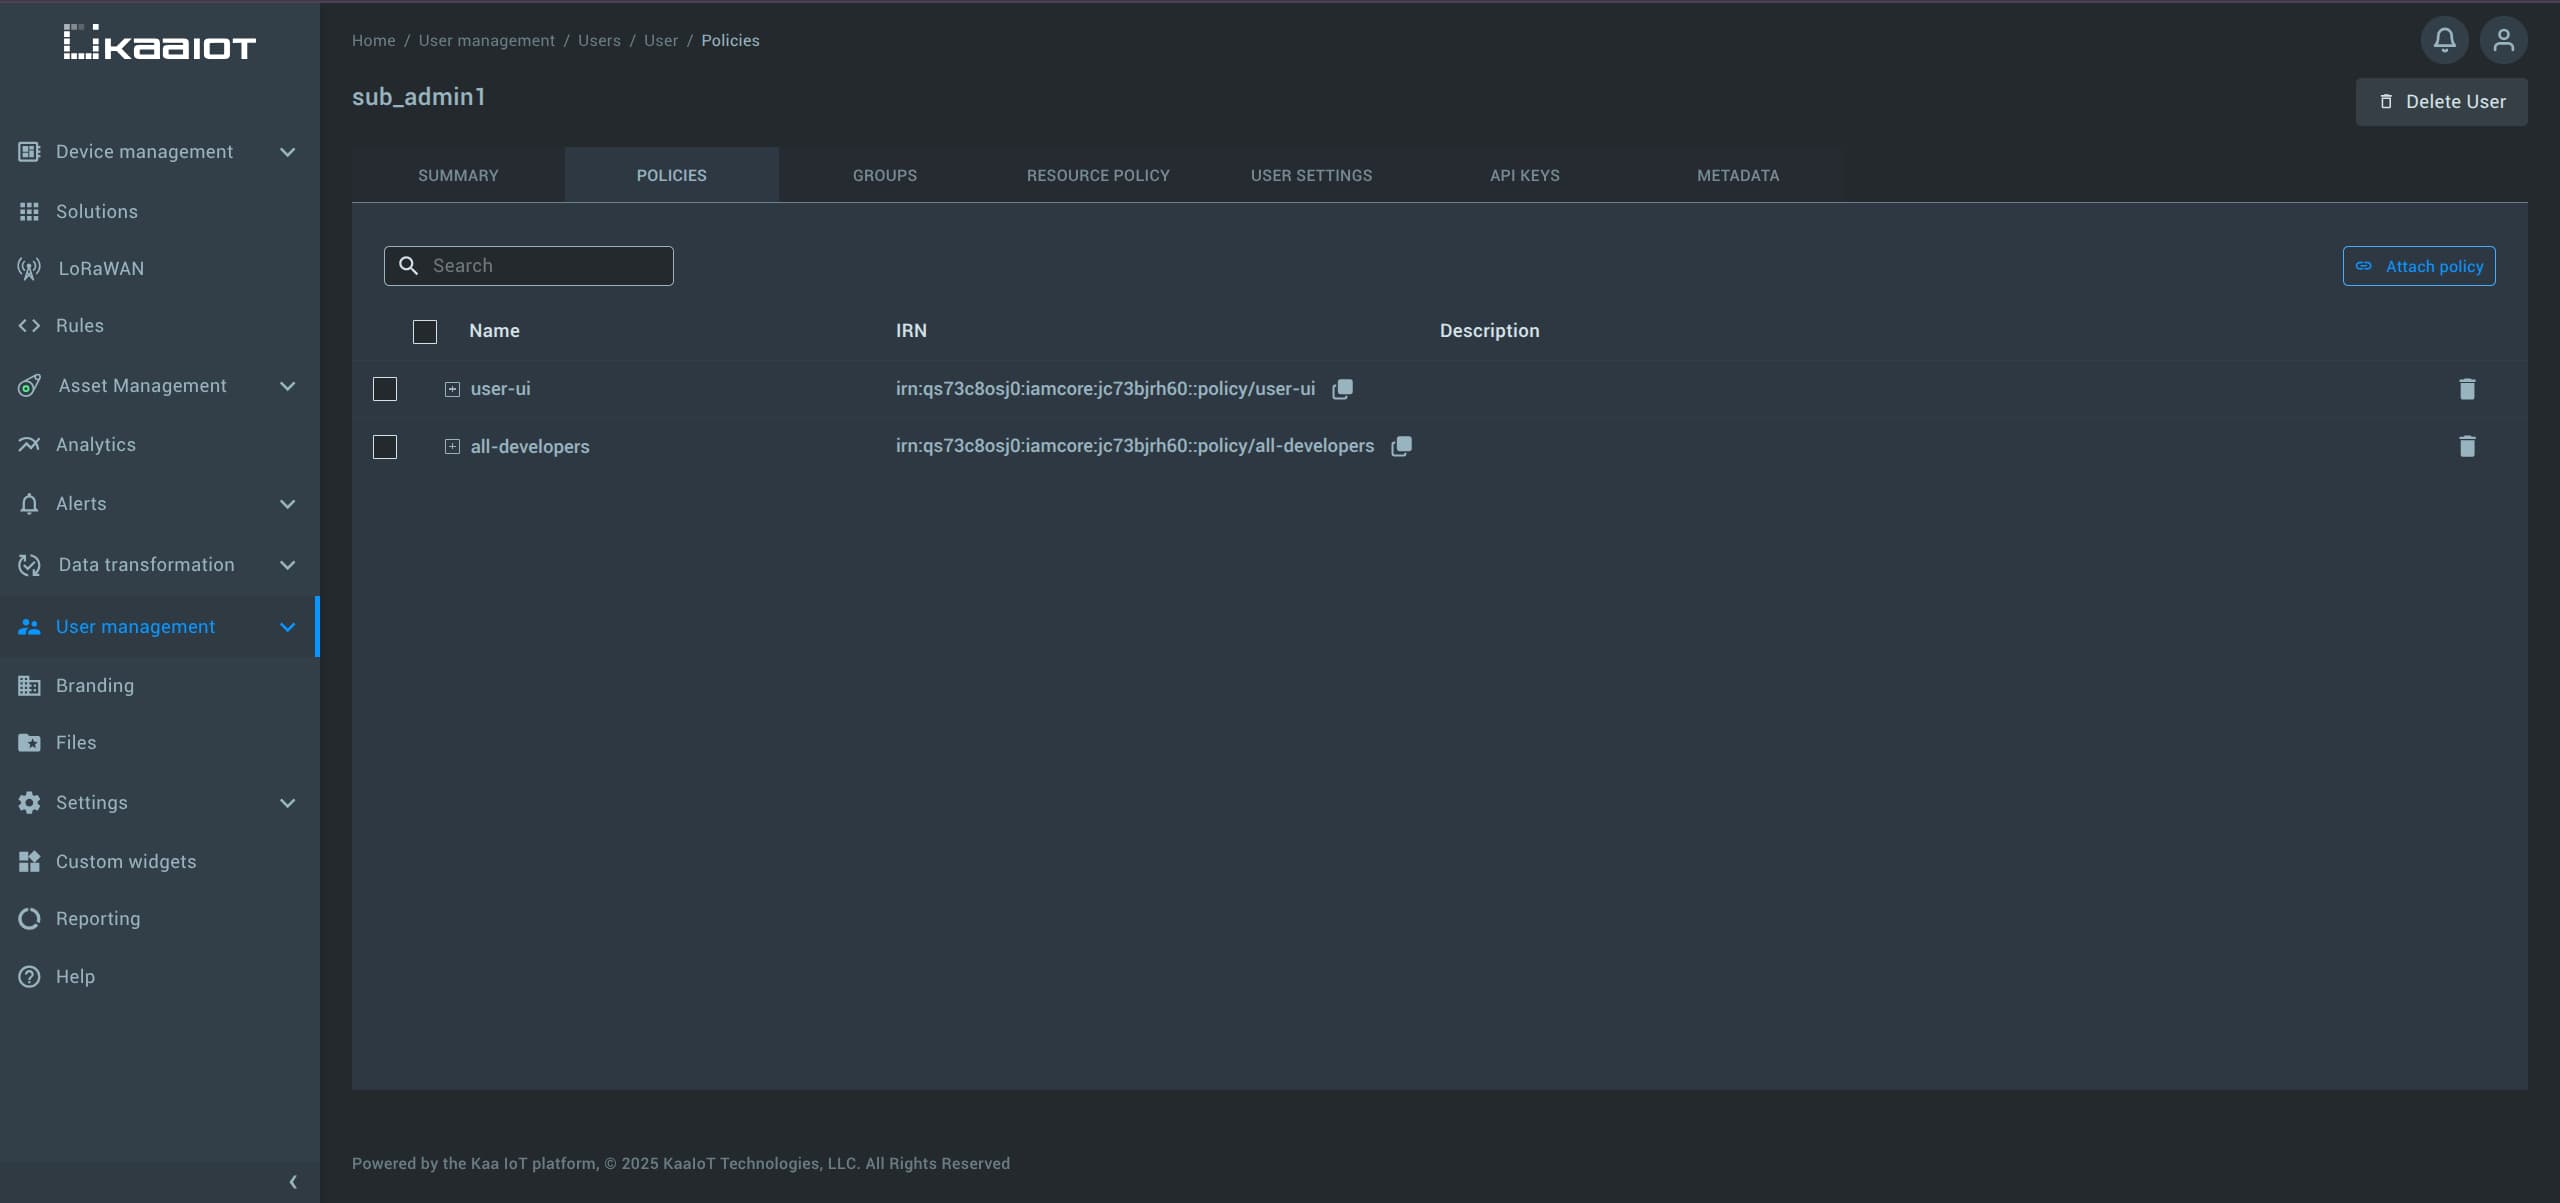
Navigate to “User Management” -> “Users”, select your user from the list, then open the Policies tab and attach a new policy.
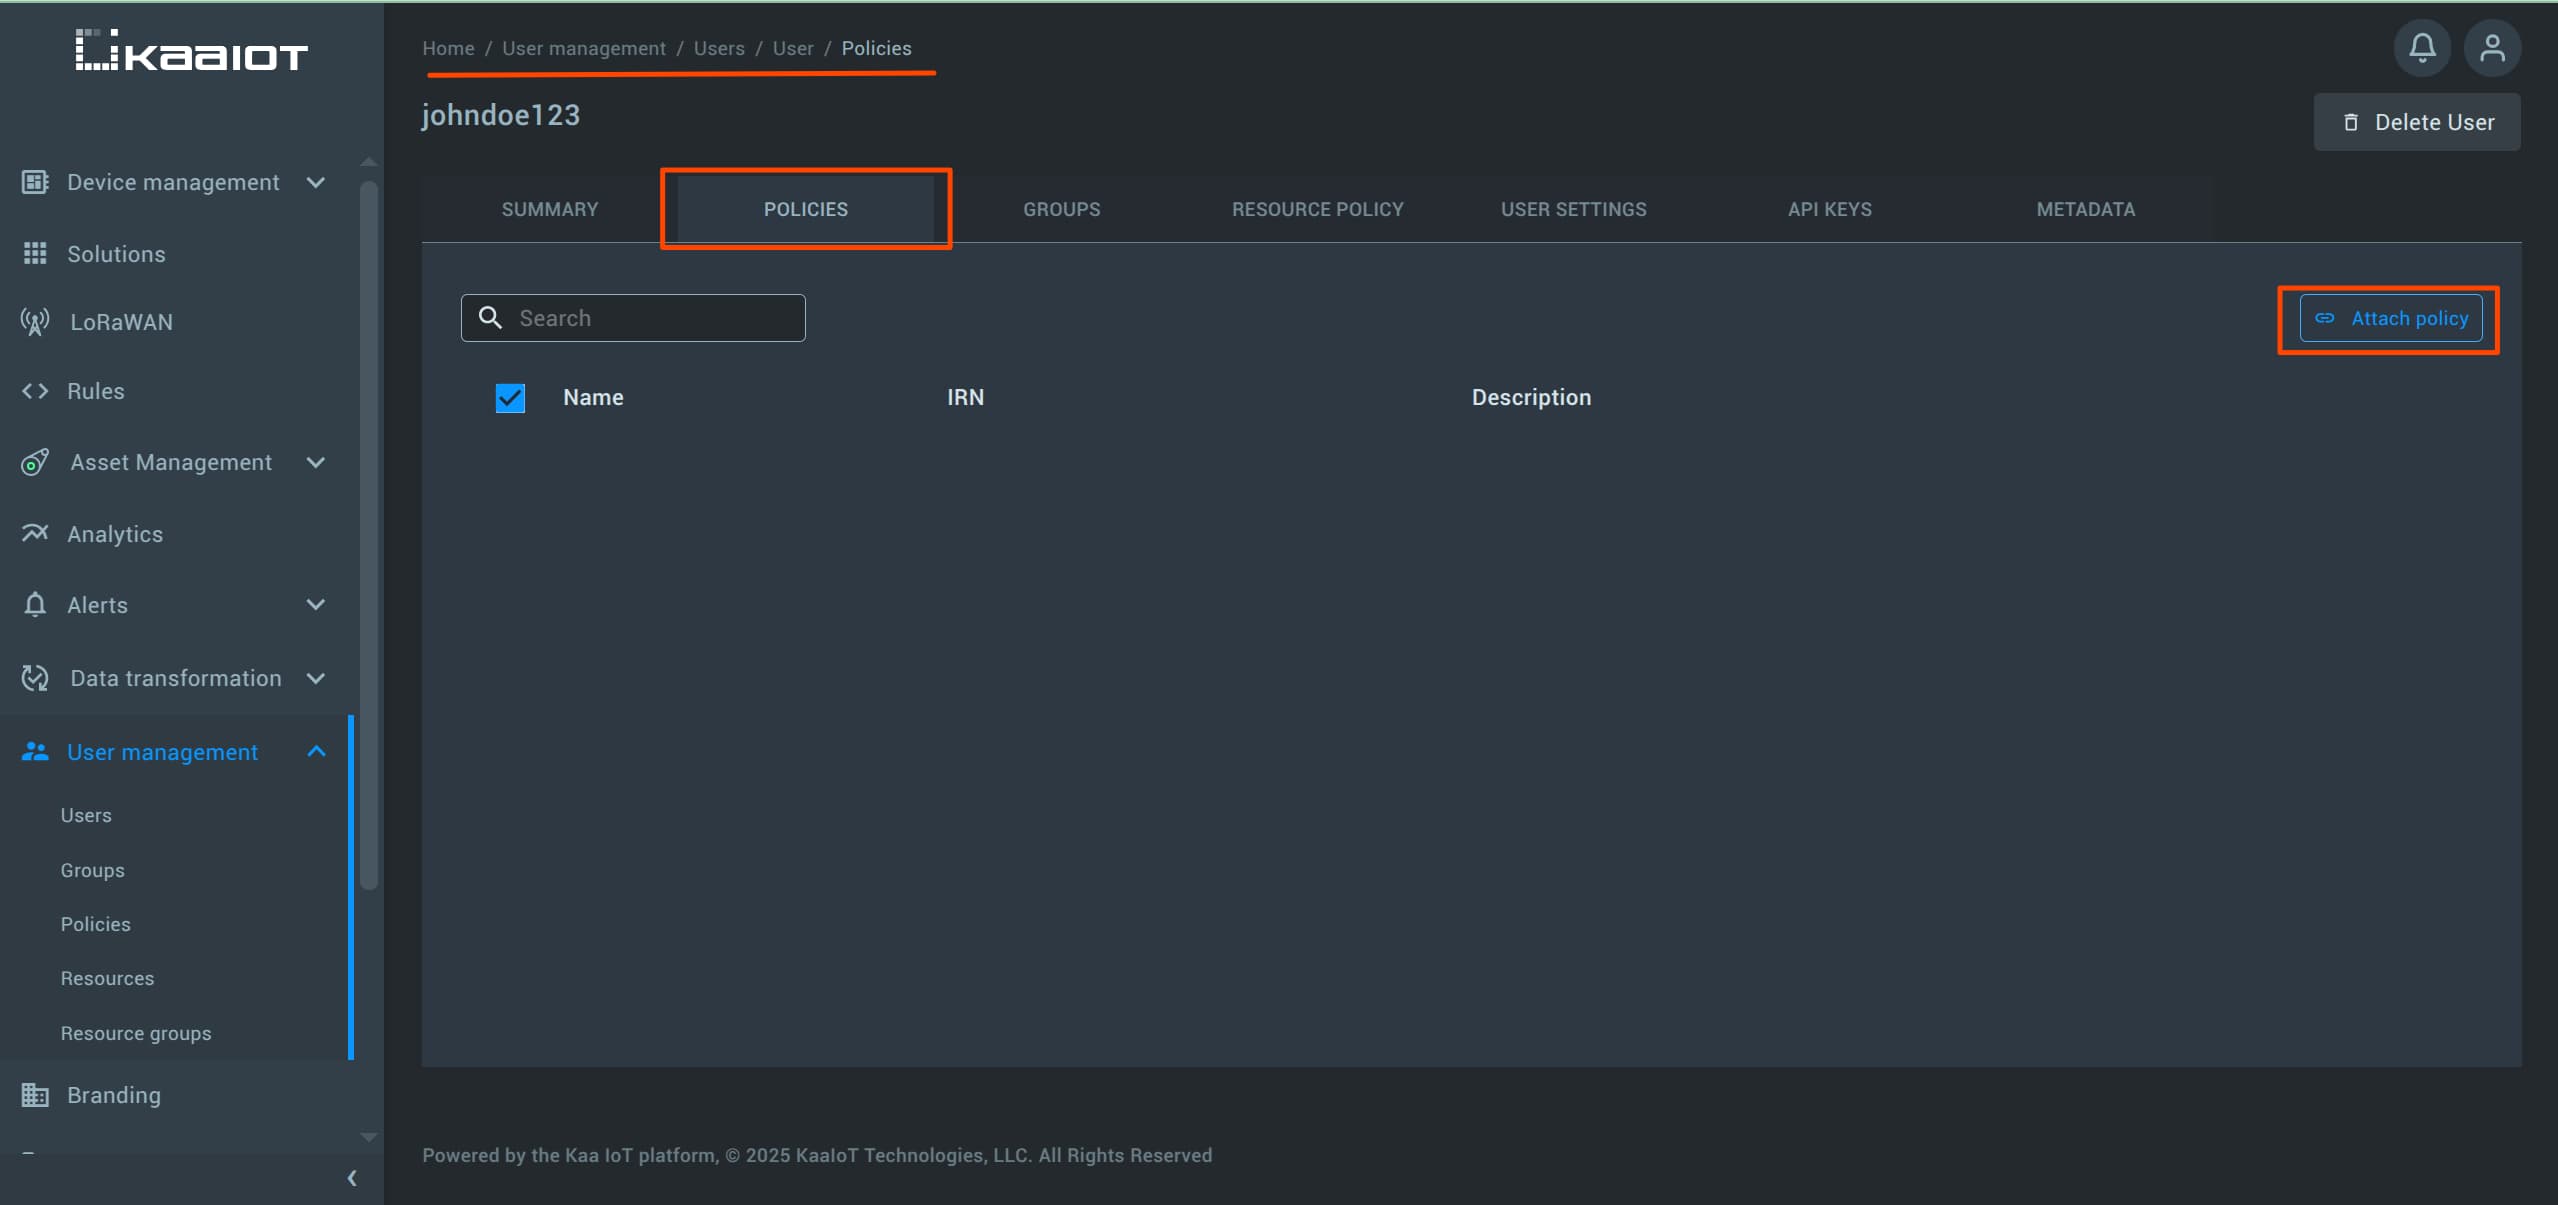
In the policy assignment screen, you’ll be offered a list of default policies.
For now, attach the application-reader policy to your user and log back in to see what’s changed.
This policy grants read access to all applications and their related resources in your tenant.
However, you’ll notice that the user still can’t see anything in the UI.
Why?
Because read access to a resource allows access via the API, but viewing it in the UI requires additional permissions.
Let’s create a UI access policy for the user account.
Create a New Policy
To grant UI access to your user, navigate to “Policies” -> “Add New Policy”.
Provide a name for it (for example user-ui).
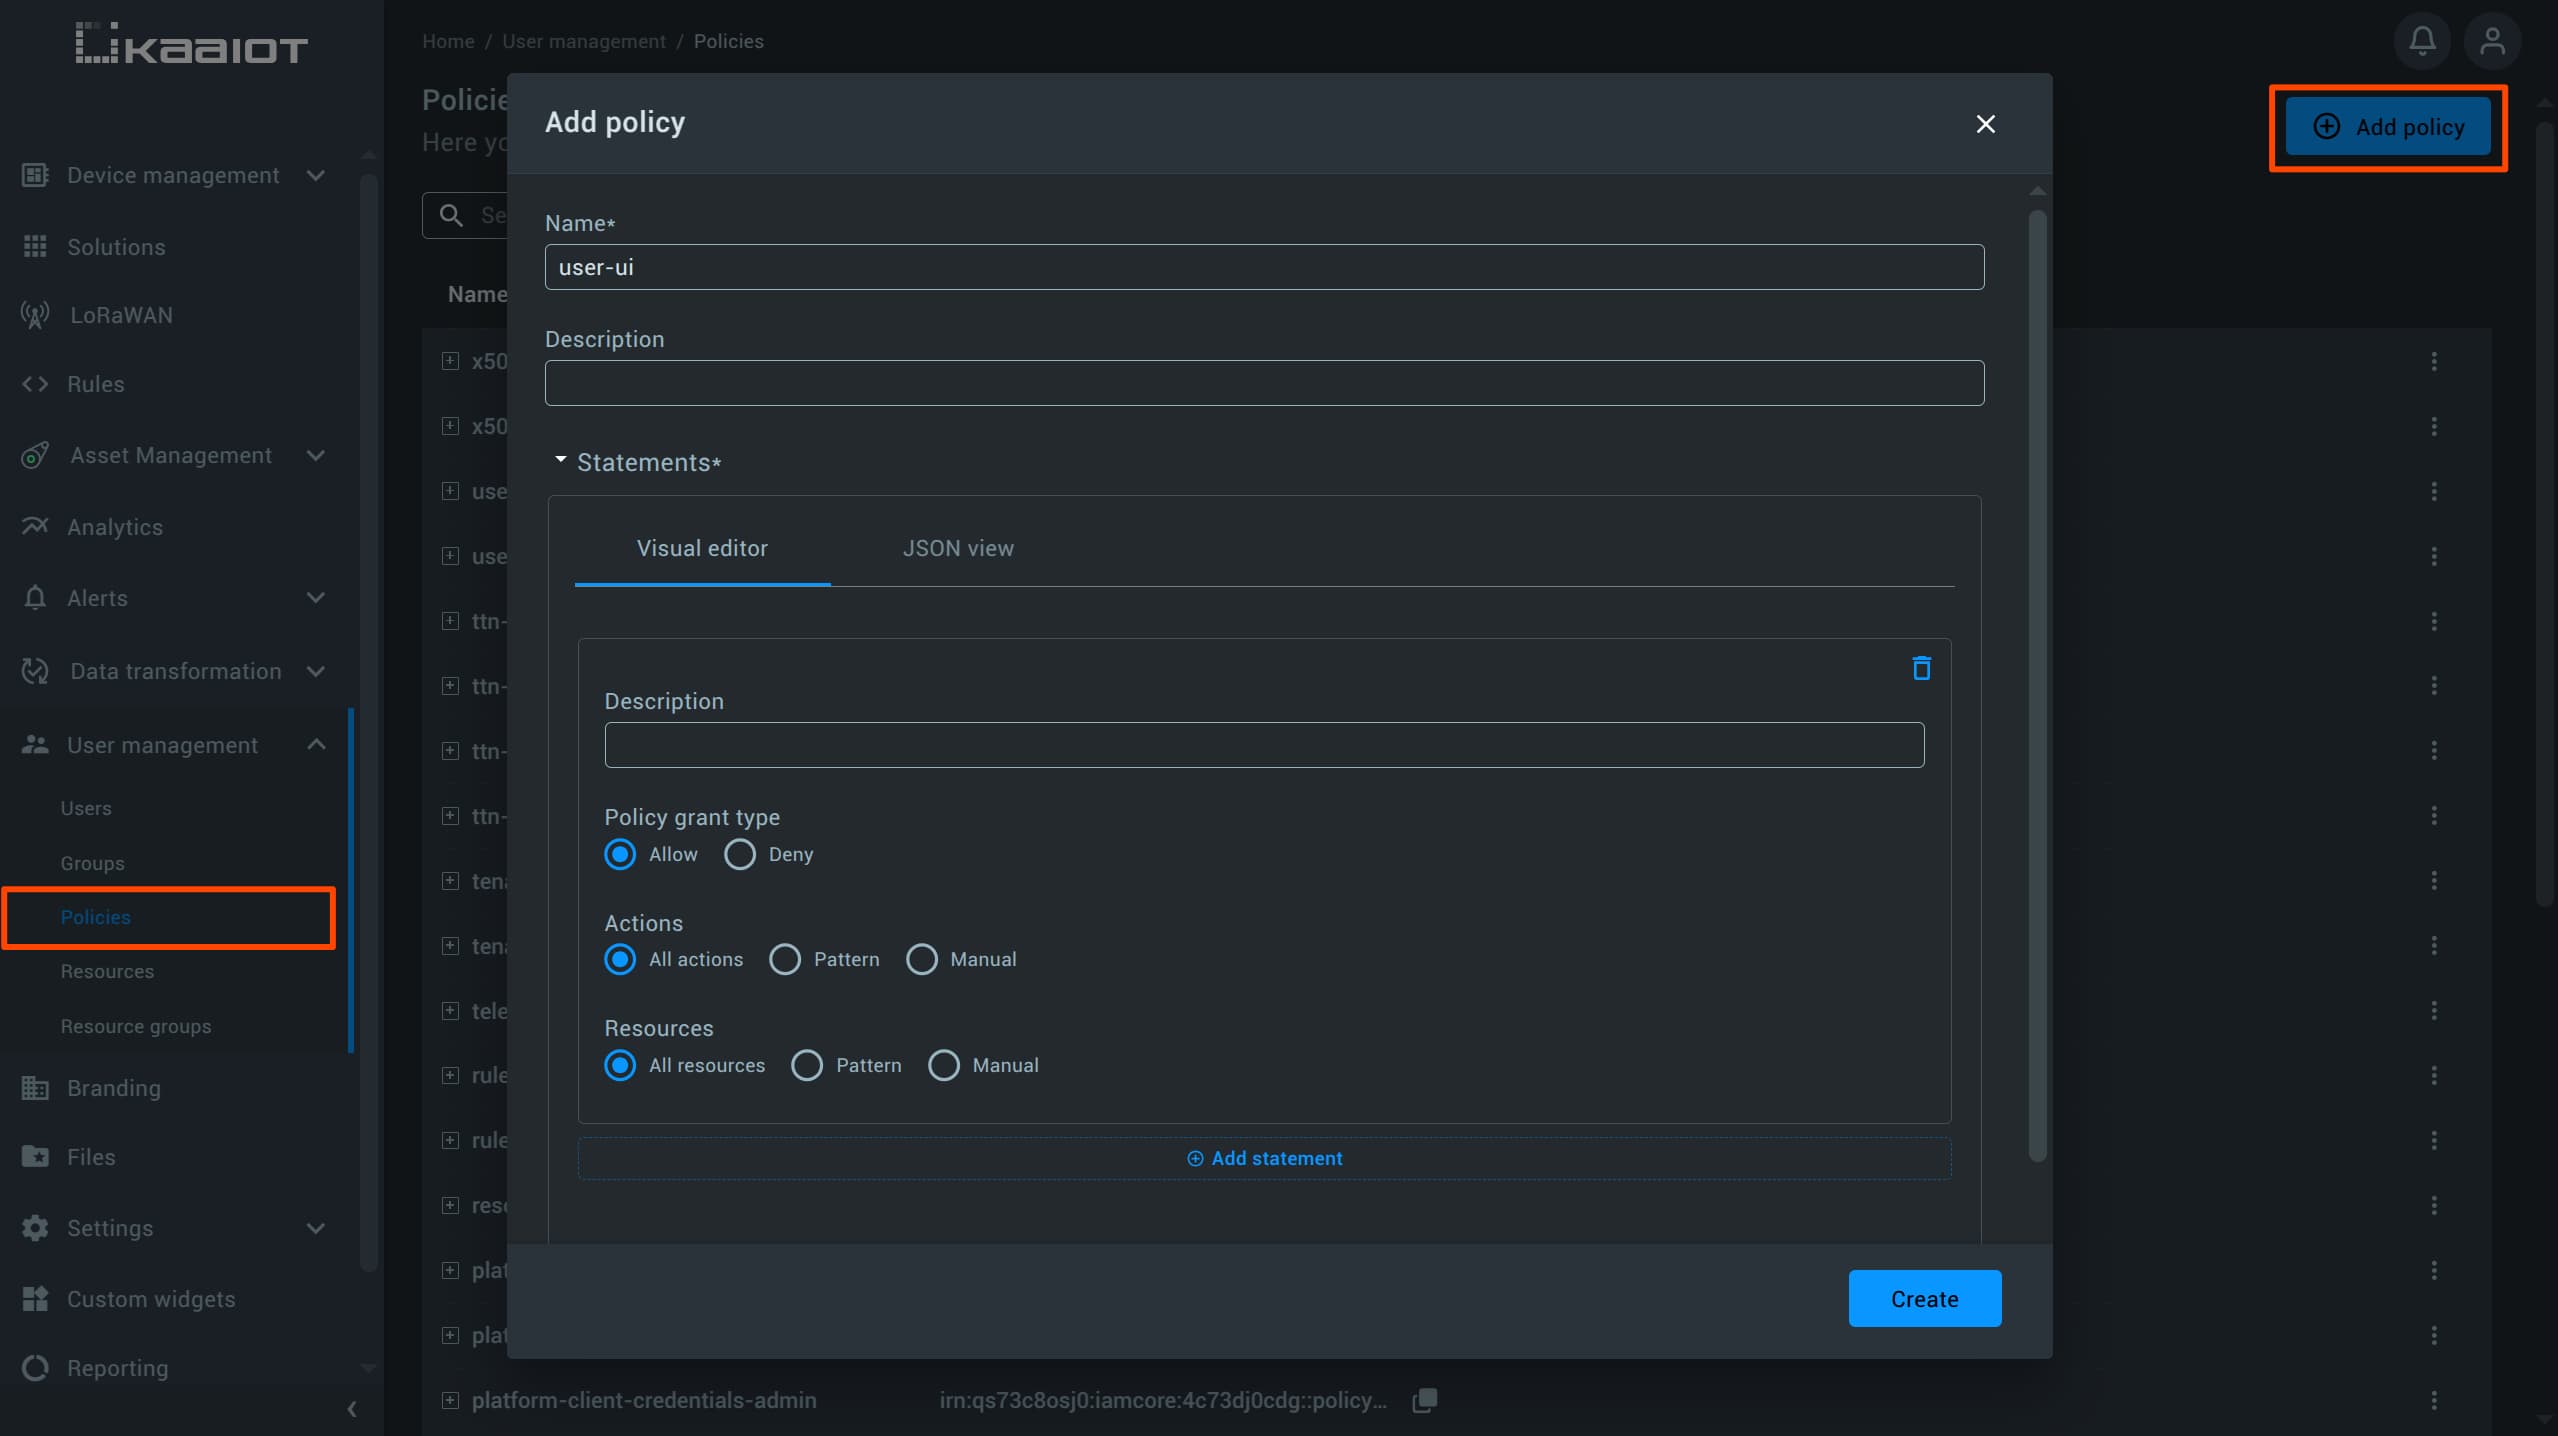
In the Actions editor, choose the type of action.
Select Manual to manually pick specific actions through the UI.
From the list of available actions that appears, check all items under UI-systems.
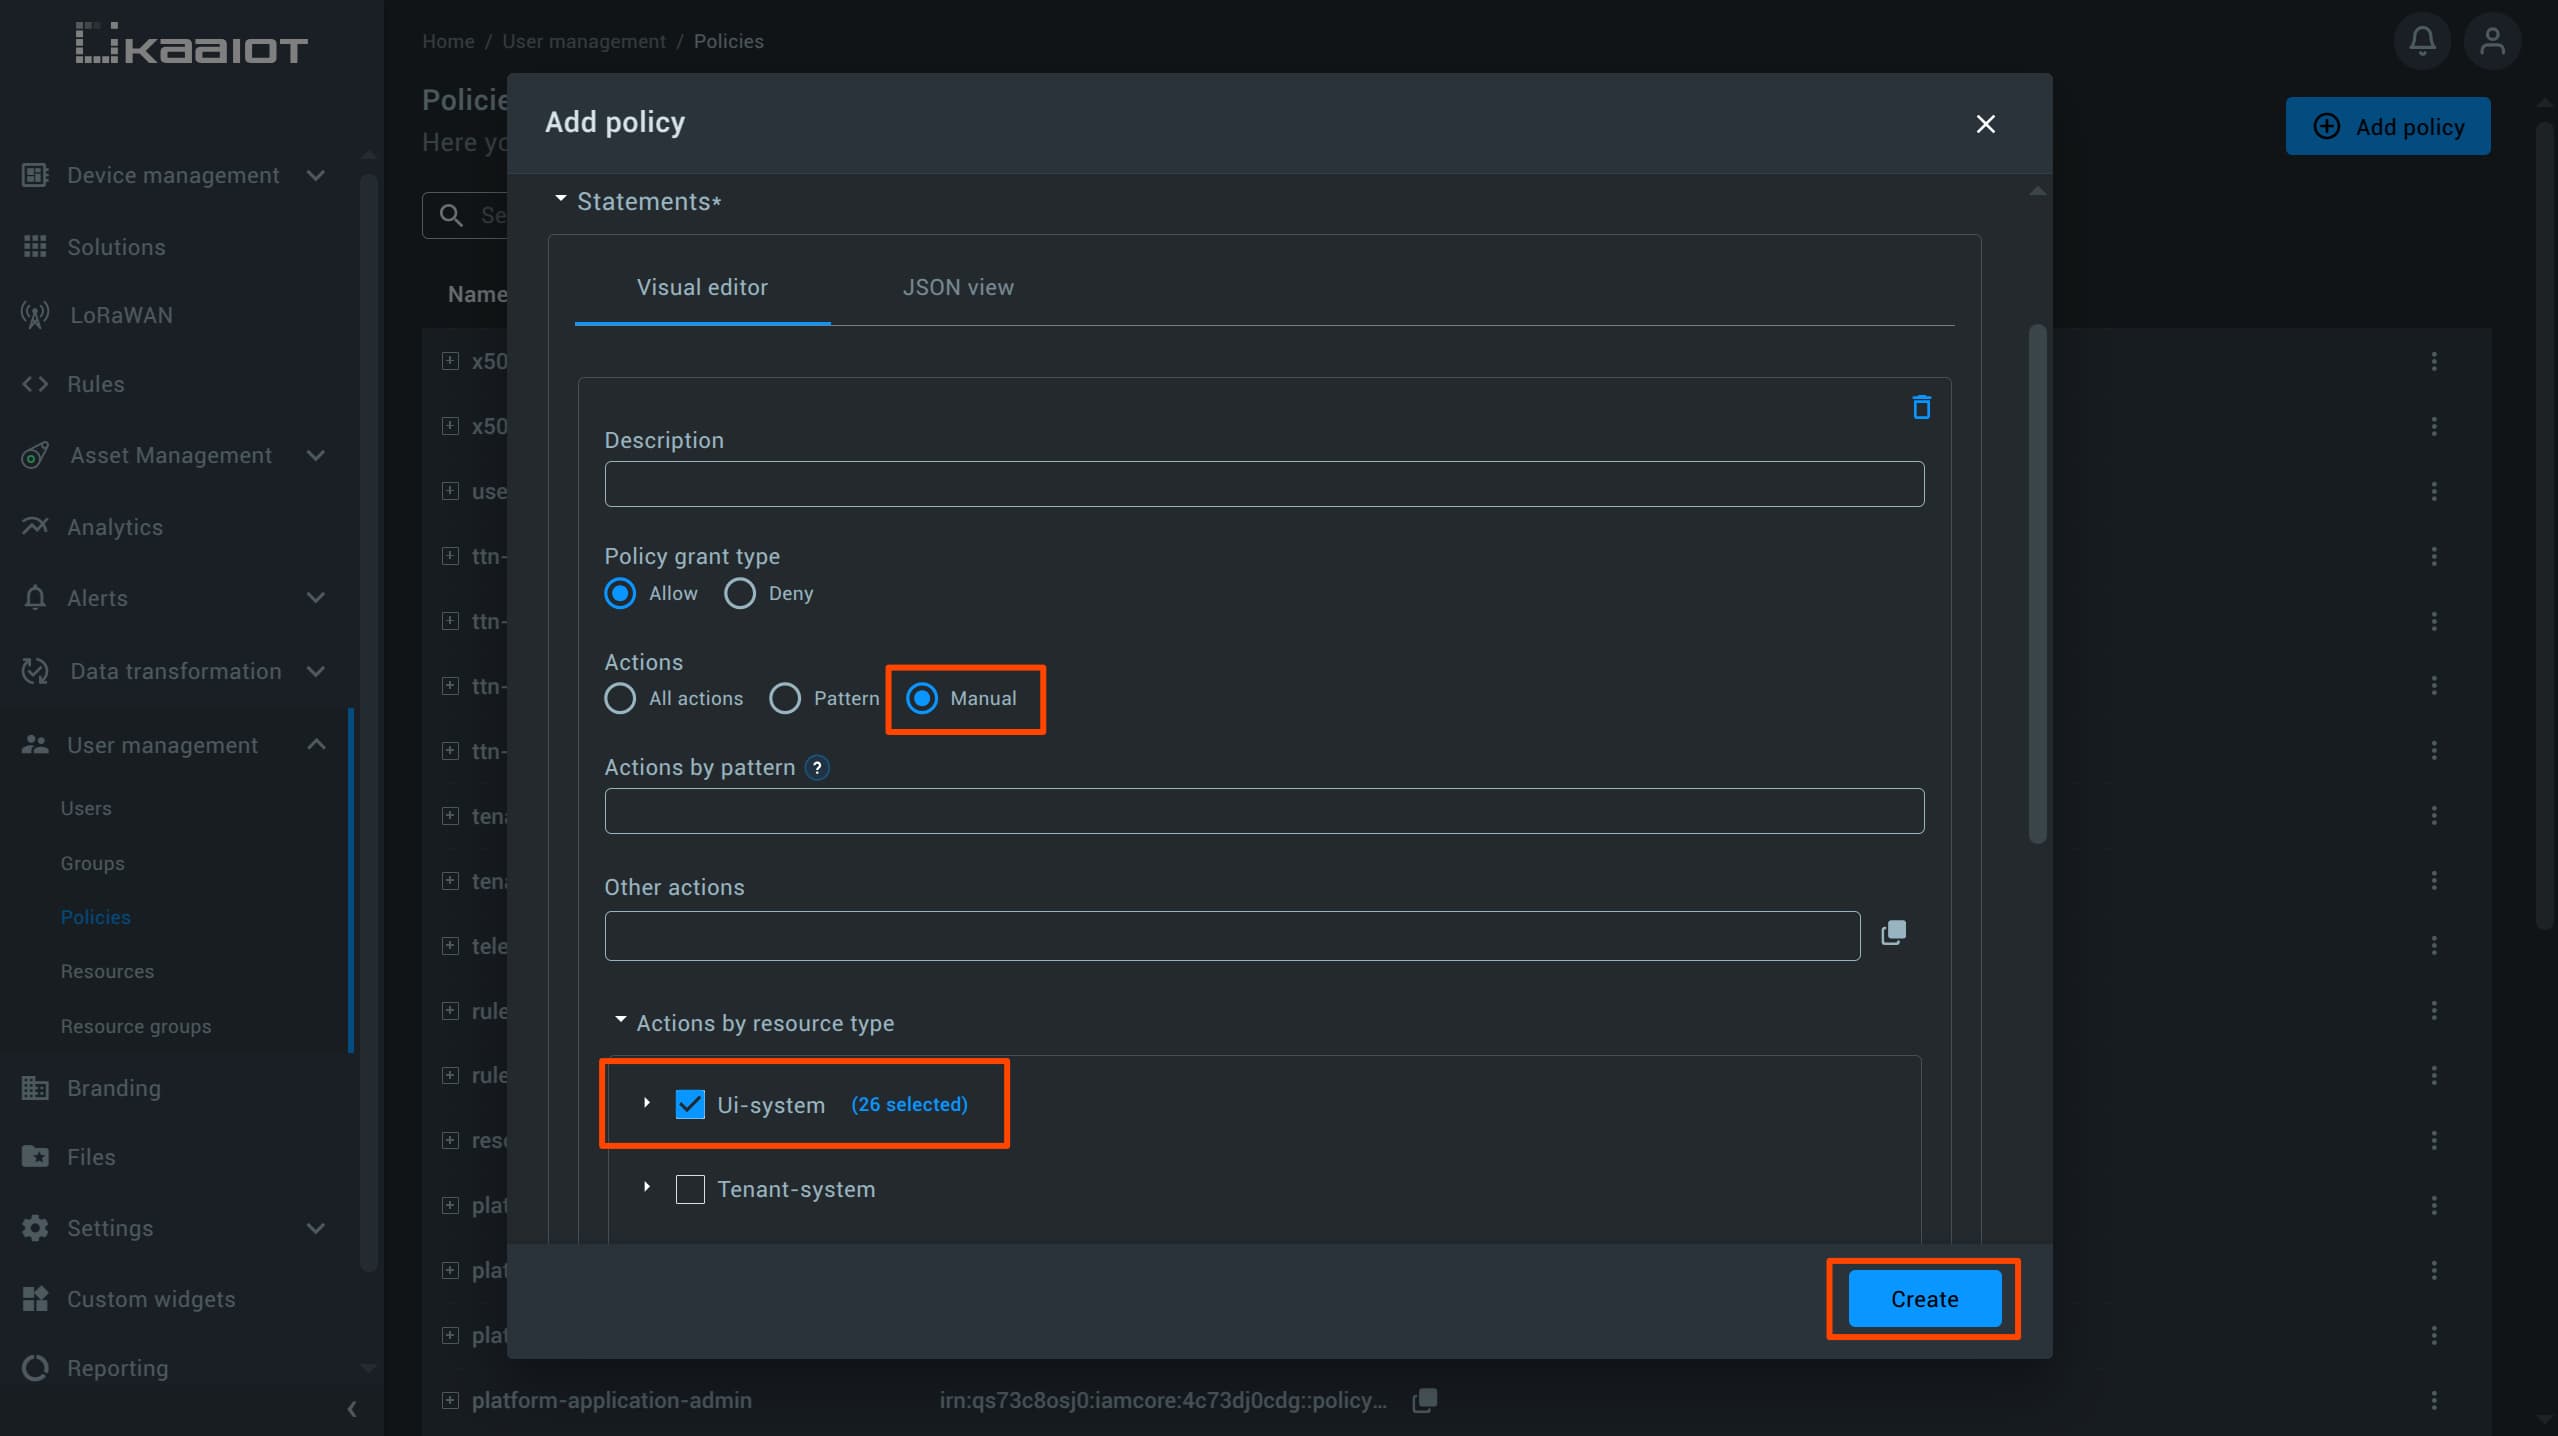
Save the policy, then go back to the Users section, select your user, and attach the newly created policy.

After that, log in again under a new user.
You should now see the full Kaa UI, including all applications and endpoints, but without the ability to edit them.
If that’s the case, it confirms that the policies have been successfully applied.
User Groups
User Groups in Kaa IAM helps manage access when working with multiple users at once.
A group allows you to assign policies once and automatically apply them to all users under that group.
Any user assigned to a group will inherit its group policies.
To create a group, navigate to “User Management” -> “Groups”, and click on “Create New Group”.
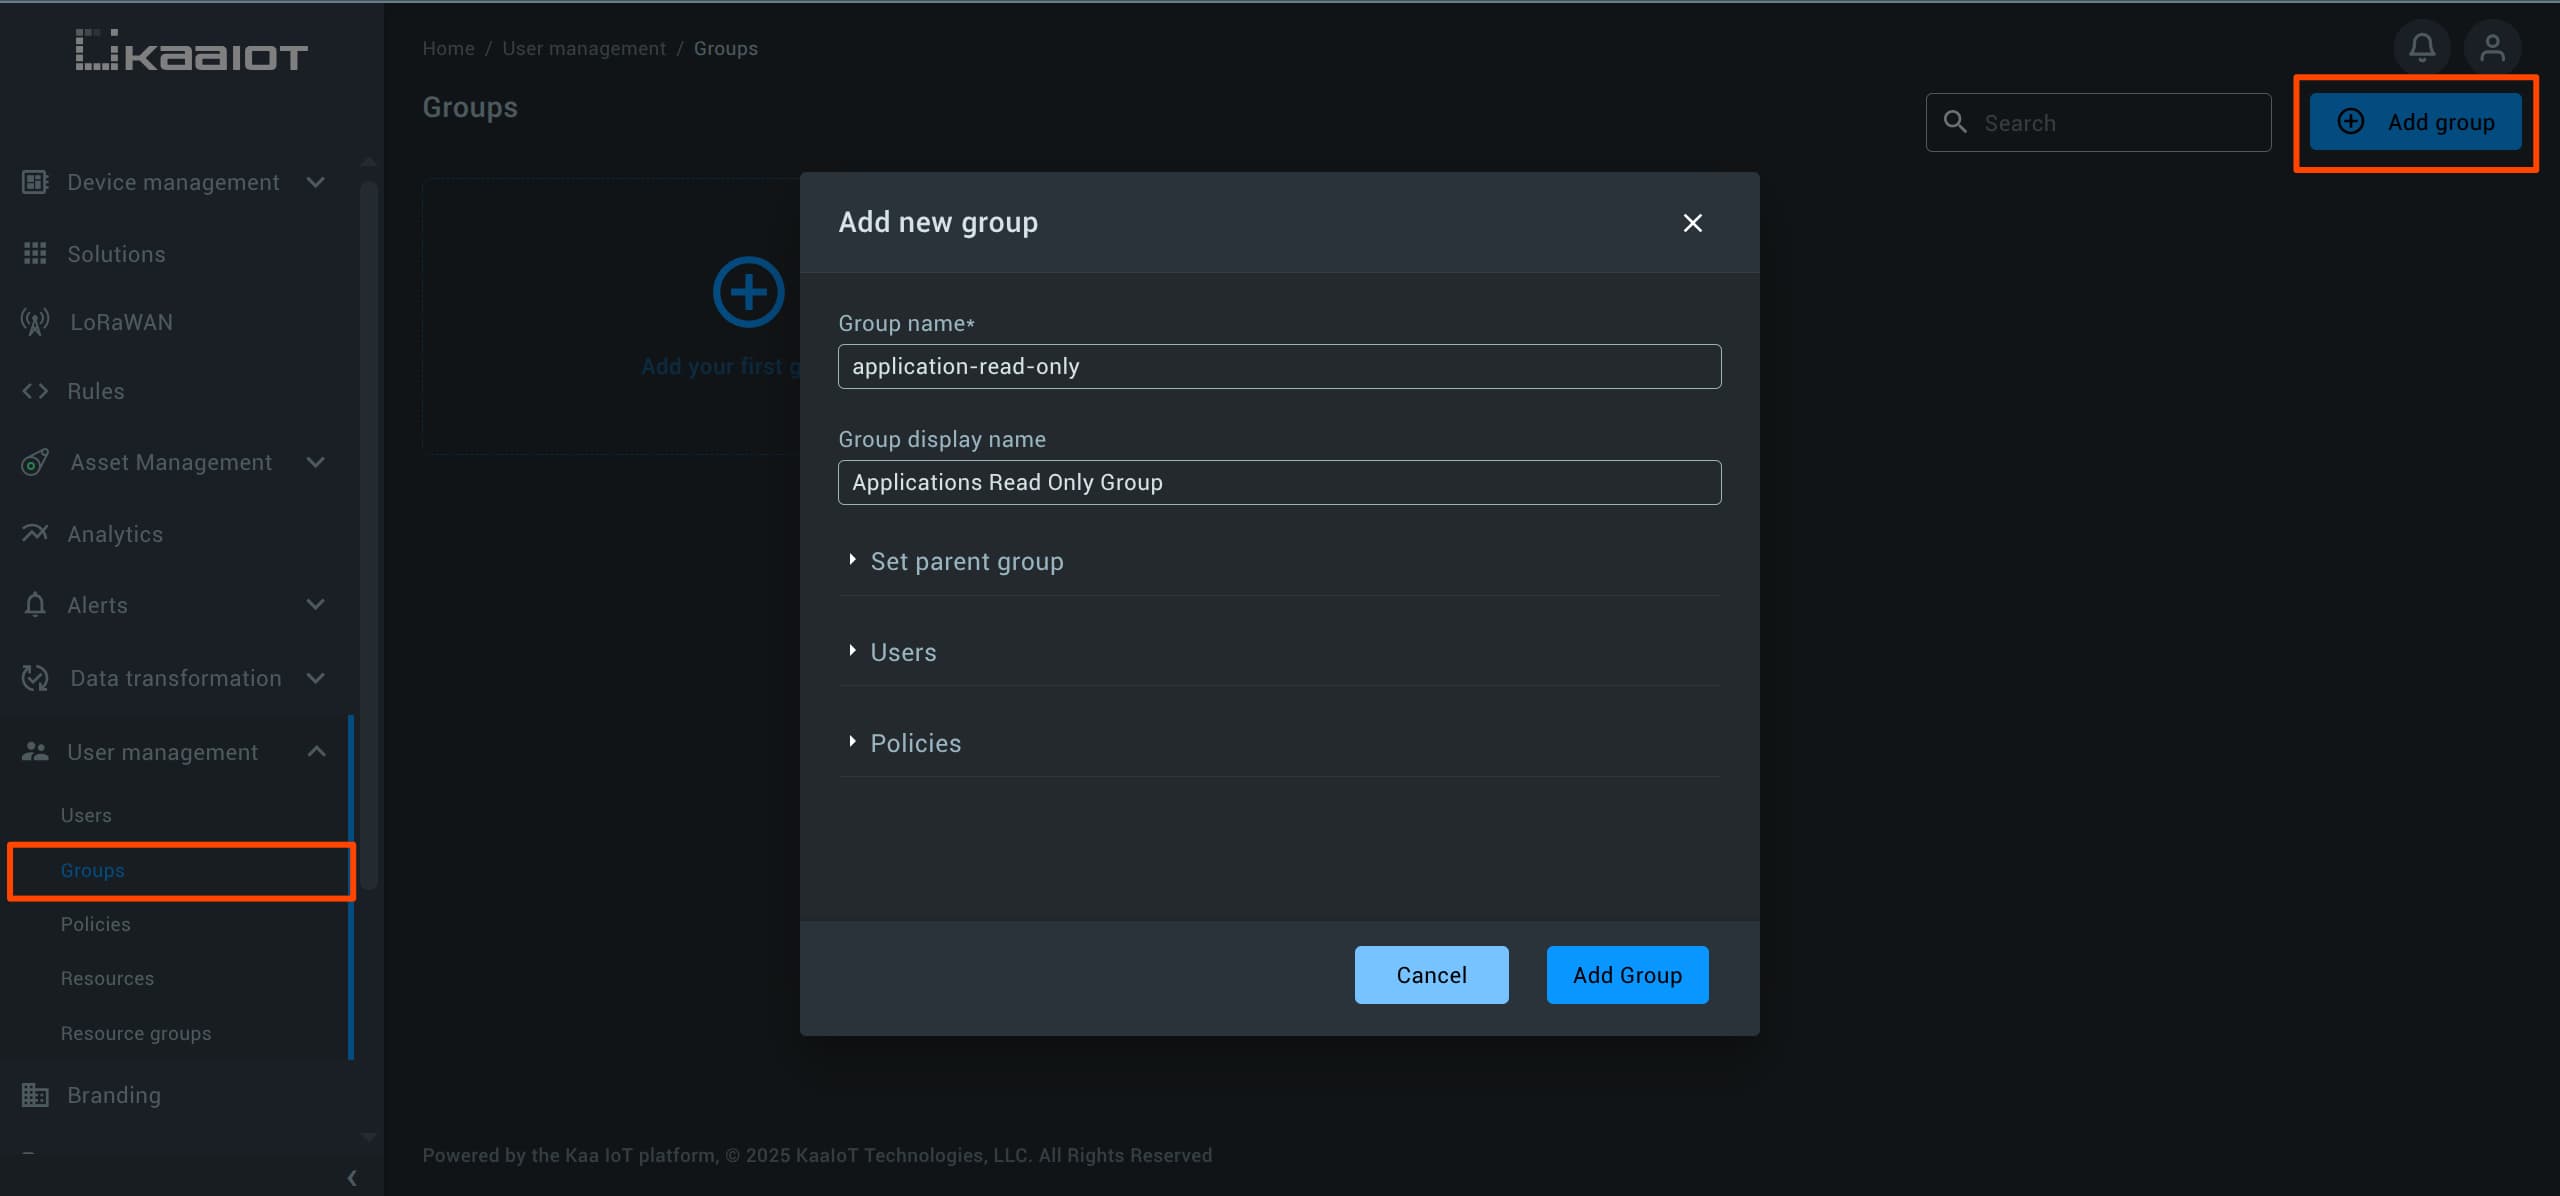
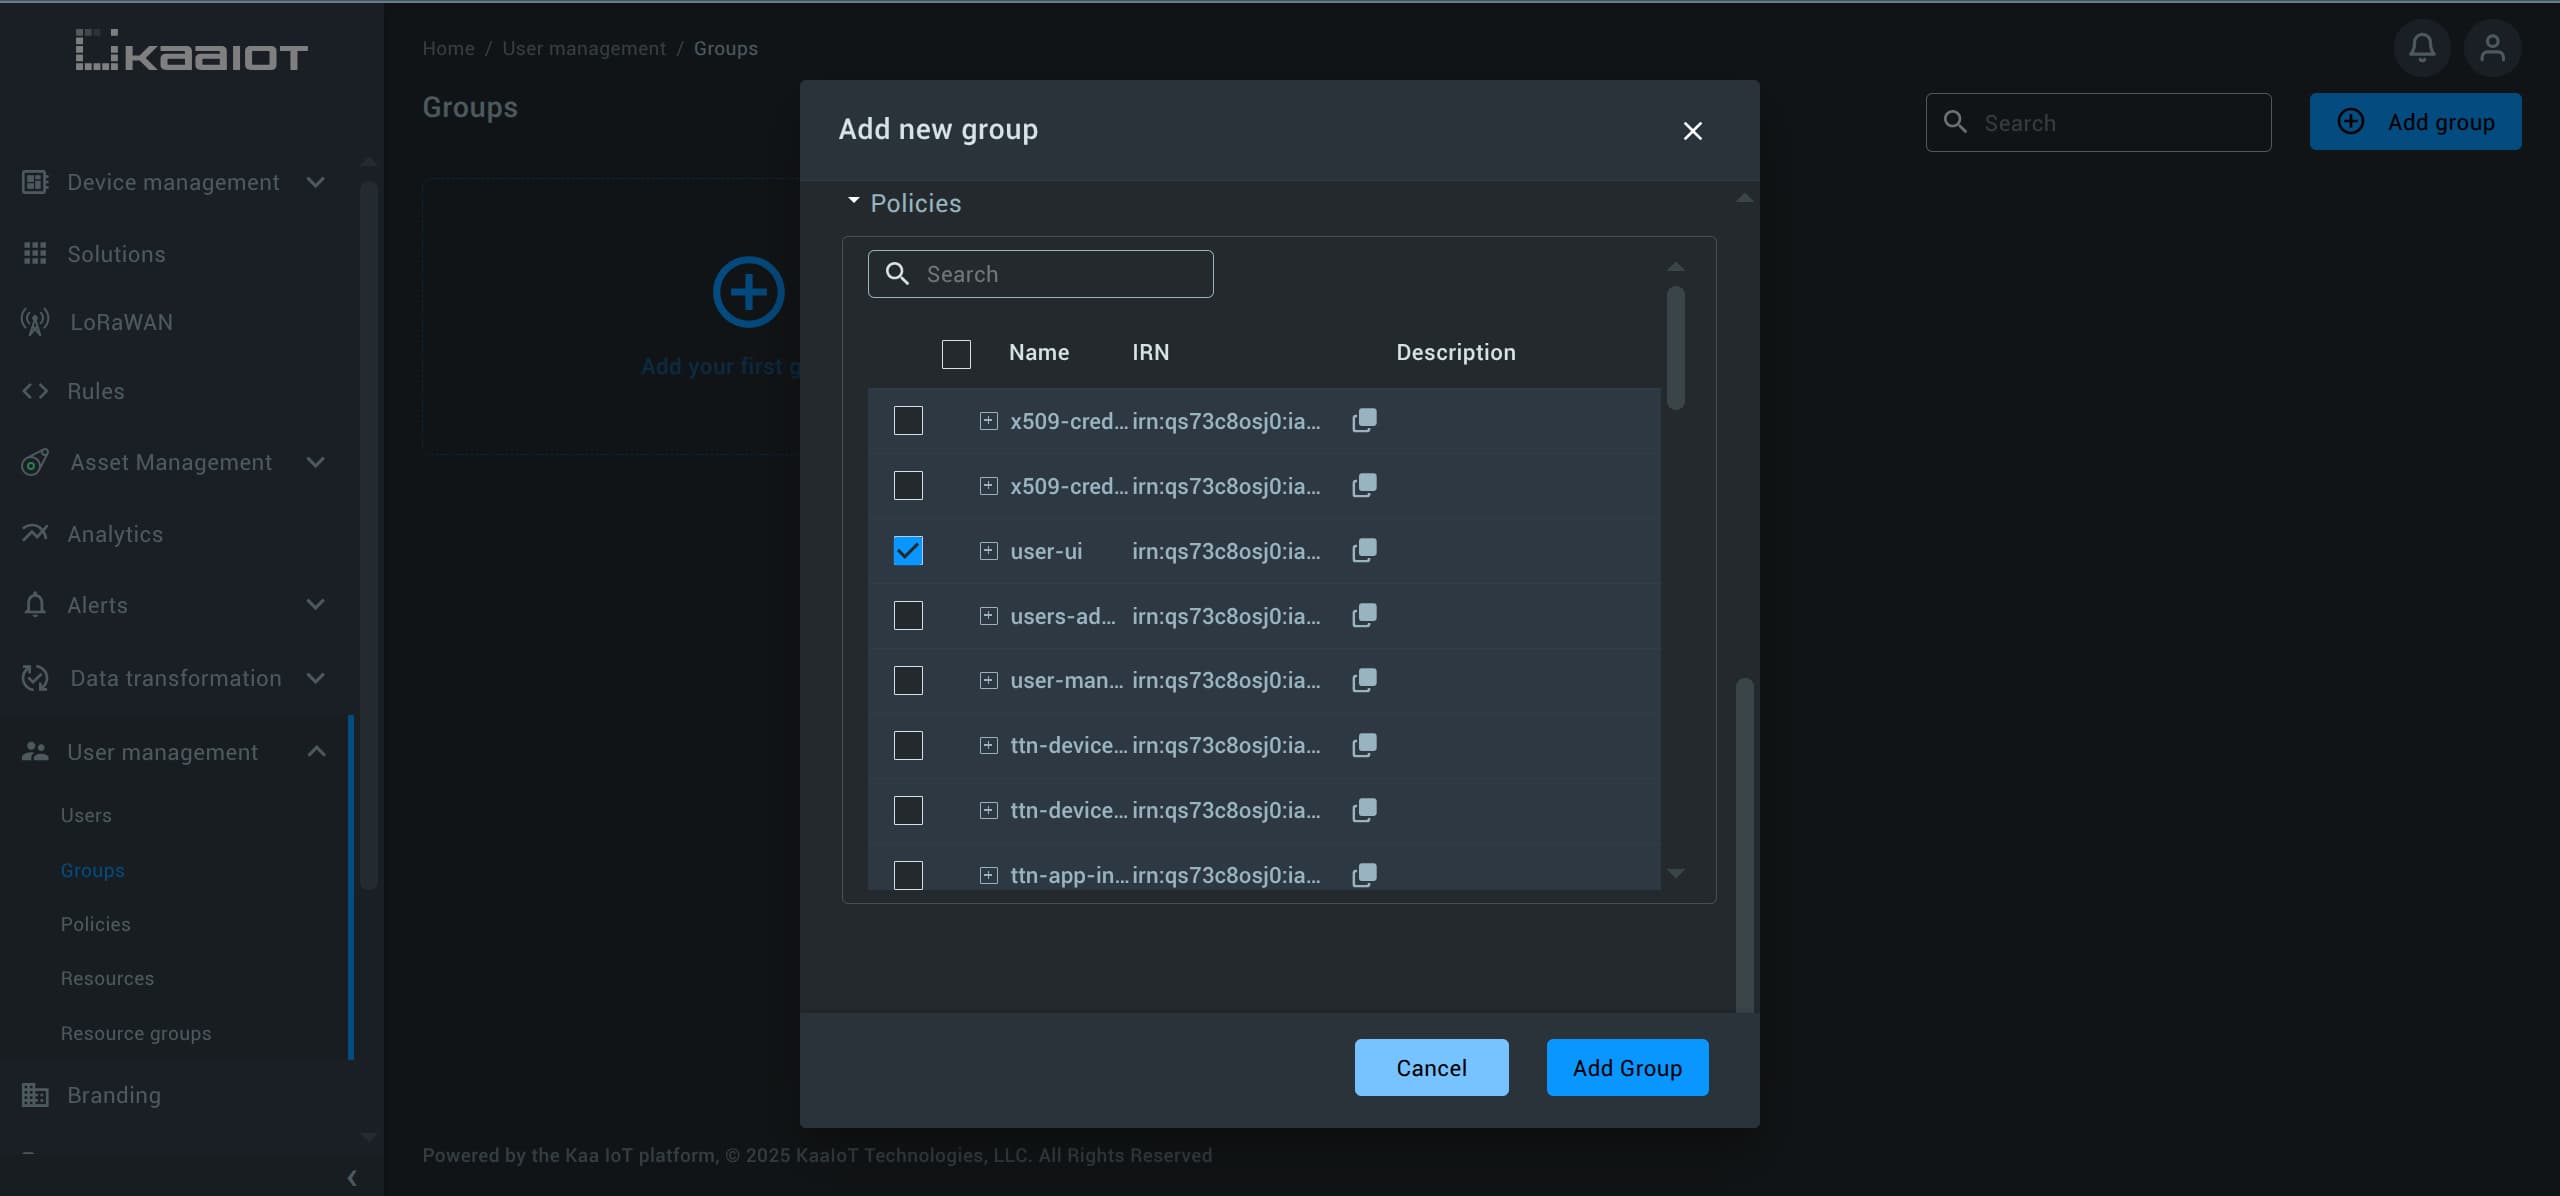
Pick a name for the group, then scroll down and assign a few policies (such as the UI policy we created earlier).
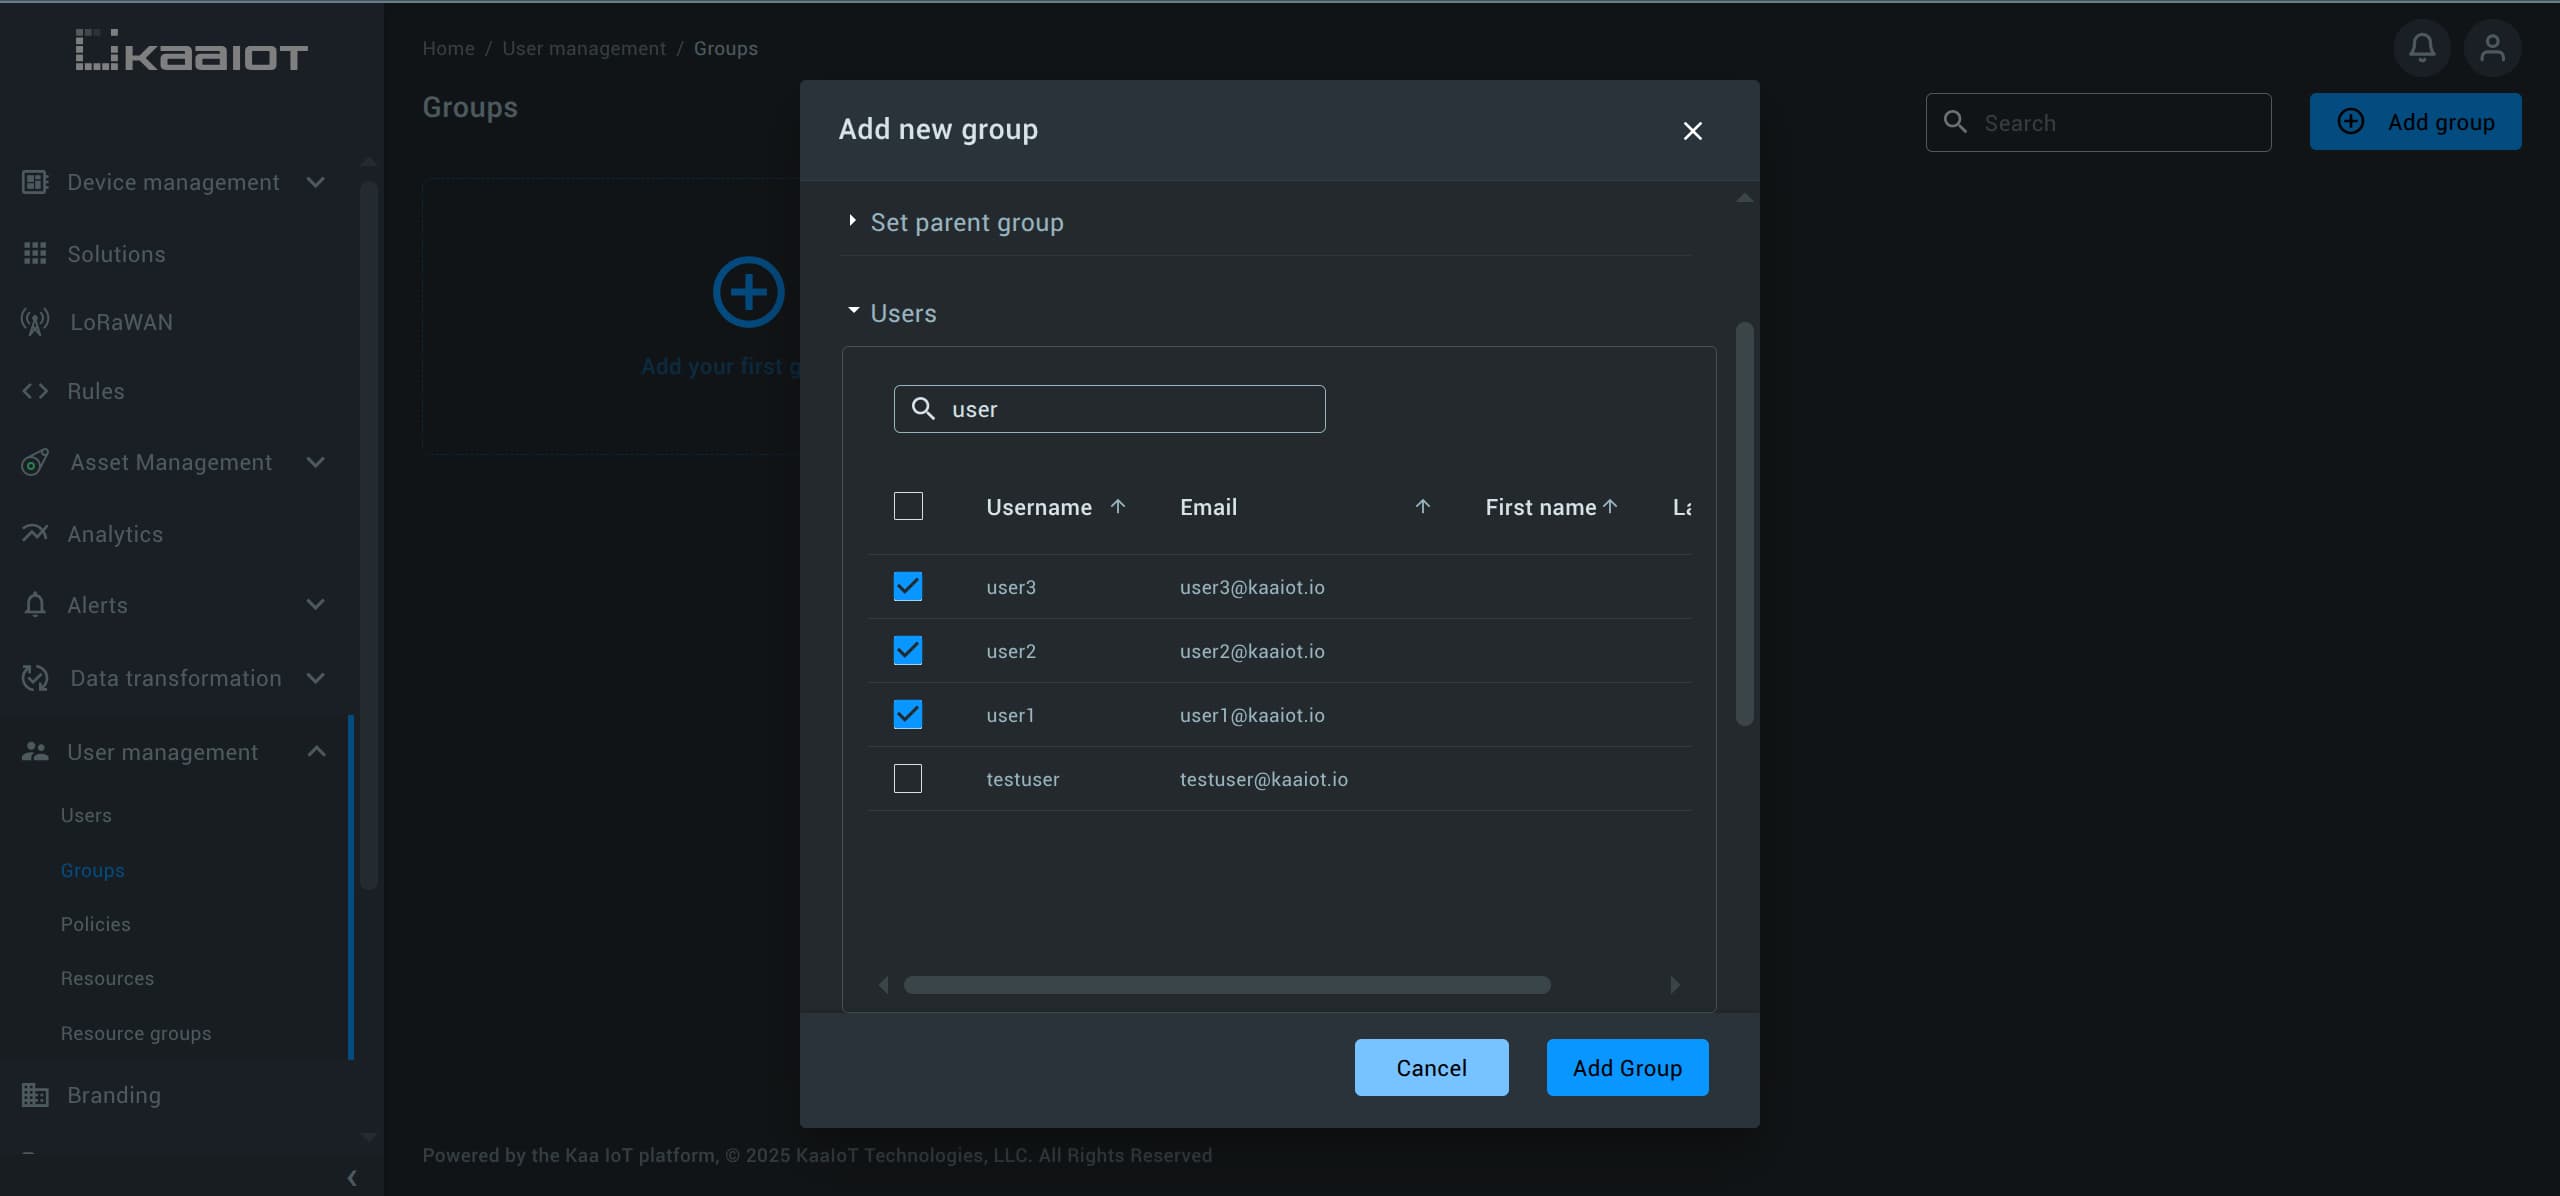
Next, add one or more users to the group.
And add a few policies.
After assigning a user to the group, you can verify the result by going to “User Management” -> “Users” -> [your-user] -> “Policies”.
You’ll see that policies from the group (in our case Applications Read Only Group) are now listed under the user’s policies.
Resources
In Kaa IAM, a resource refers to a secured resource within the platform. There are two main types of resources:
- iamcore resources
These resources owned by iamcore.
Examples include:
- Users
- Groups
- Resource Groups
- Policies
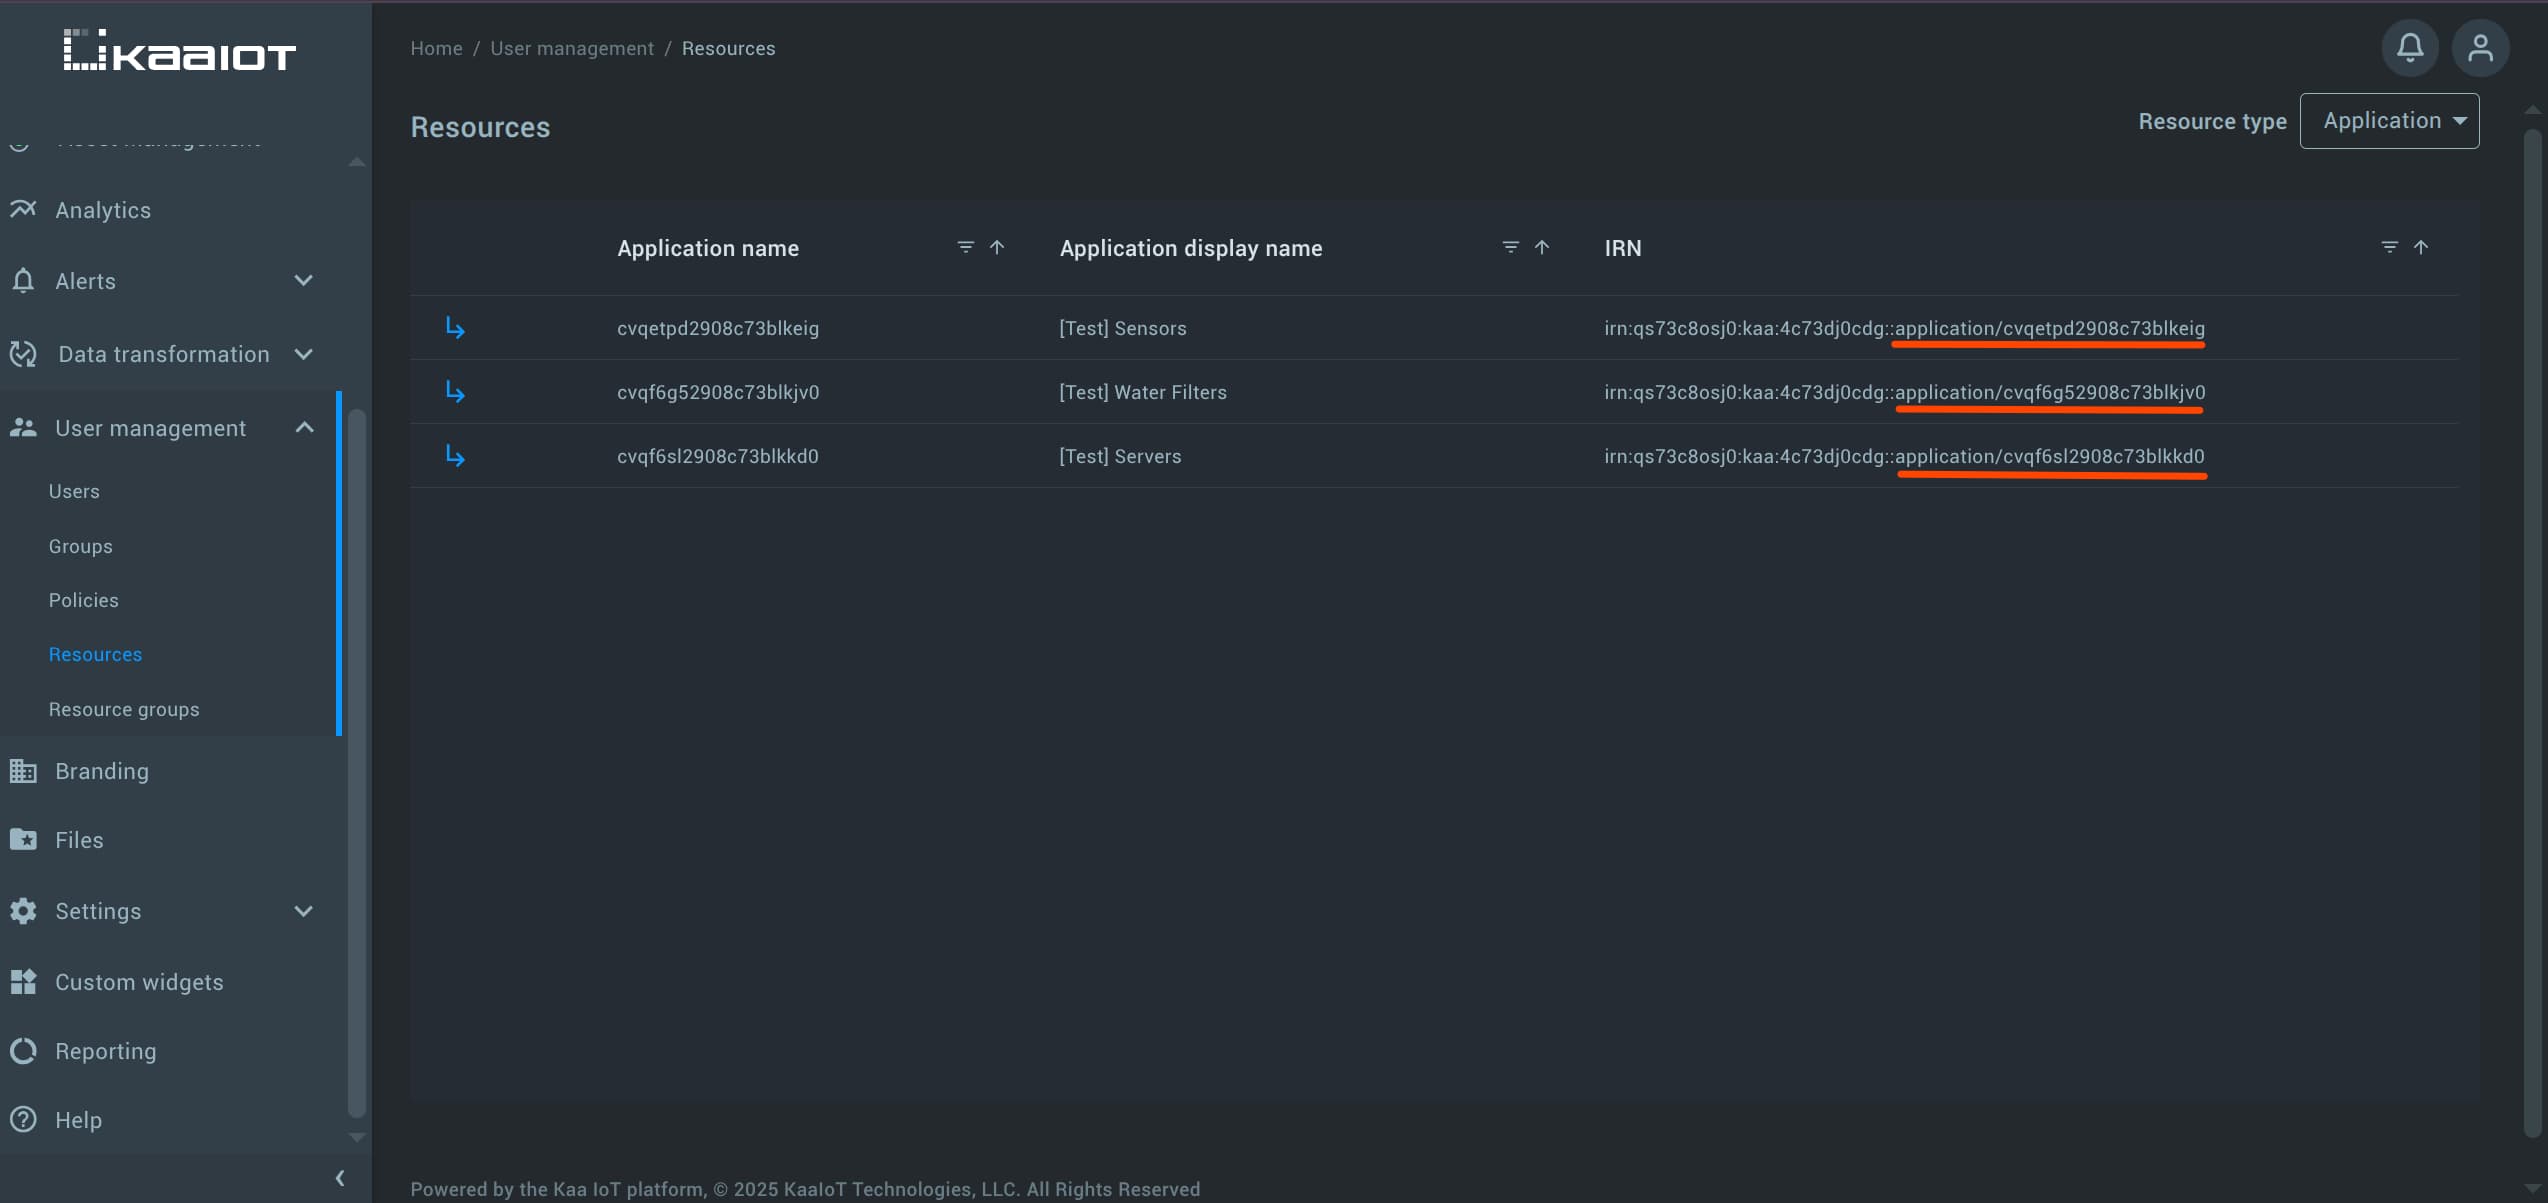
- Kaa Platform resources
These resources owned by Kaa platform:
- Endpoints
- Applications
- Dashboards
- Assets
By default, a resource is owned by the user who created it, but it can be shared with other users depending on the policies and actions assigned.
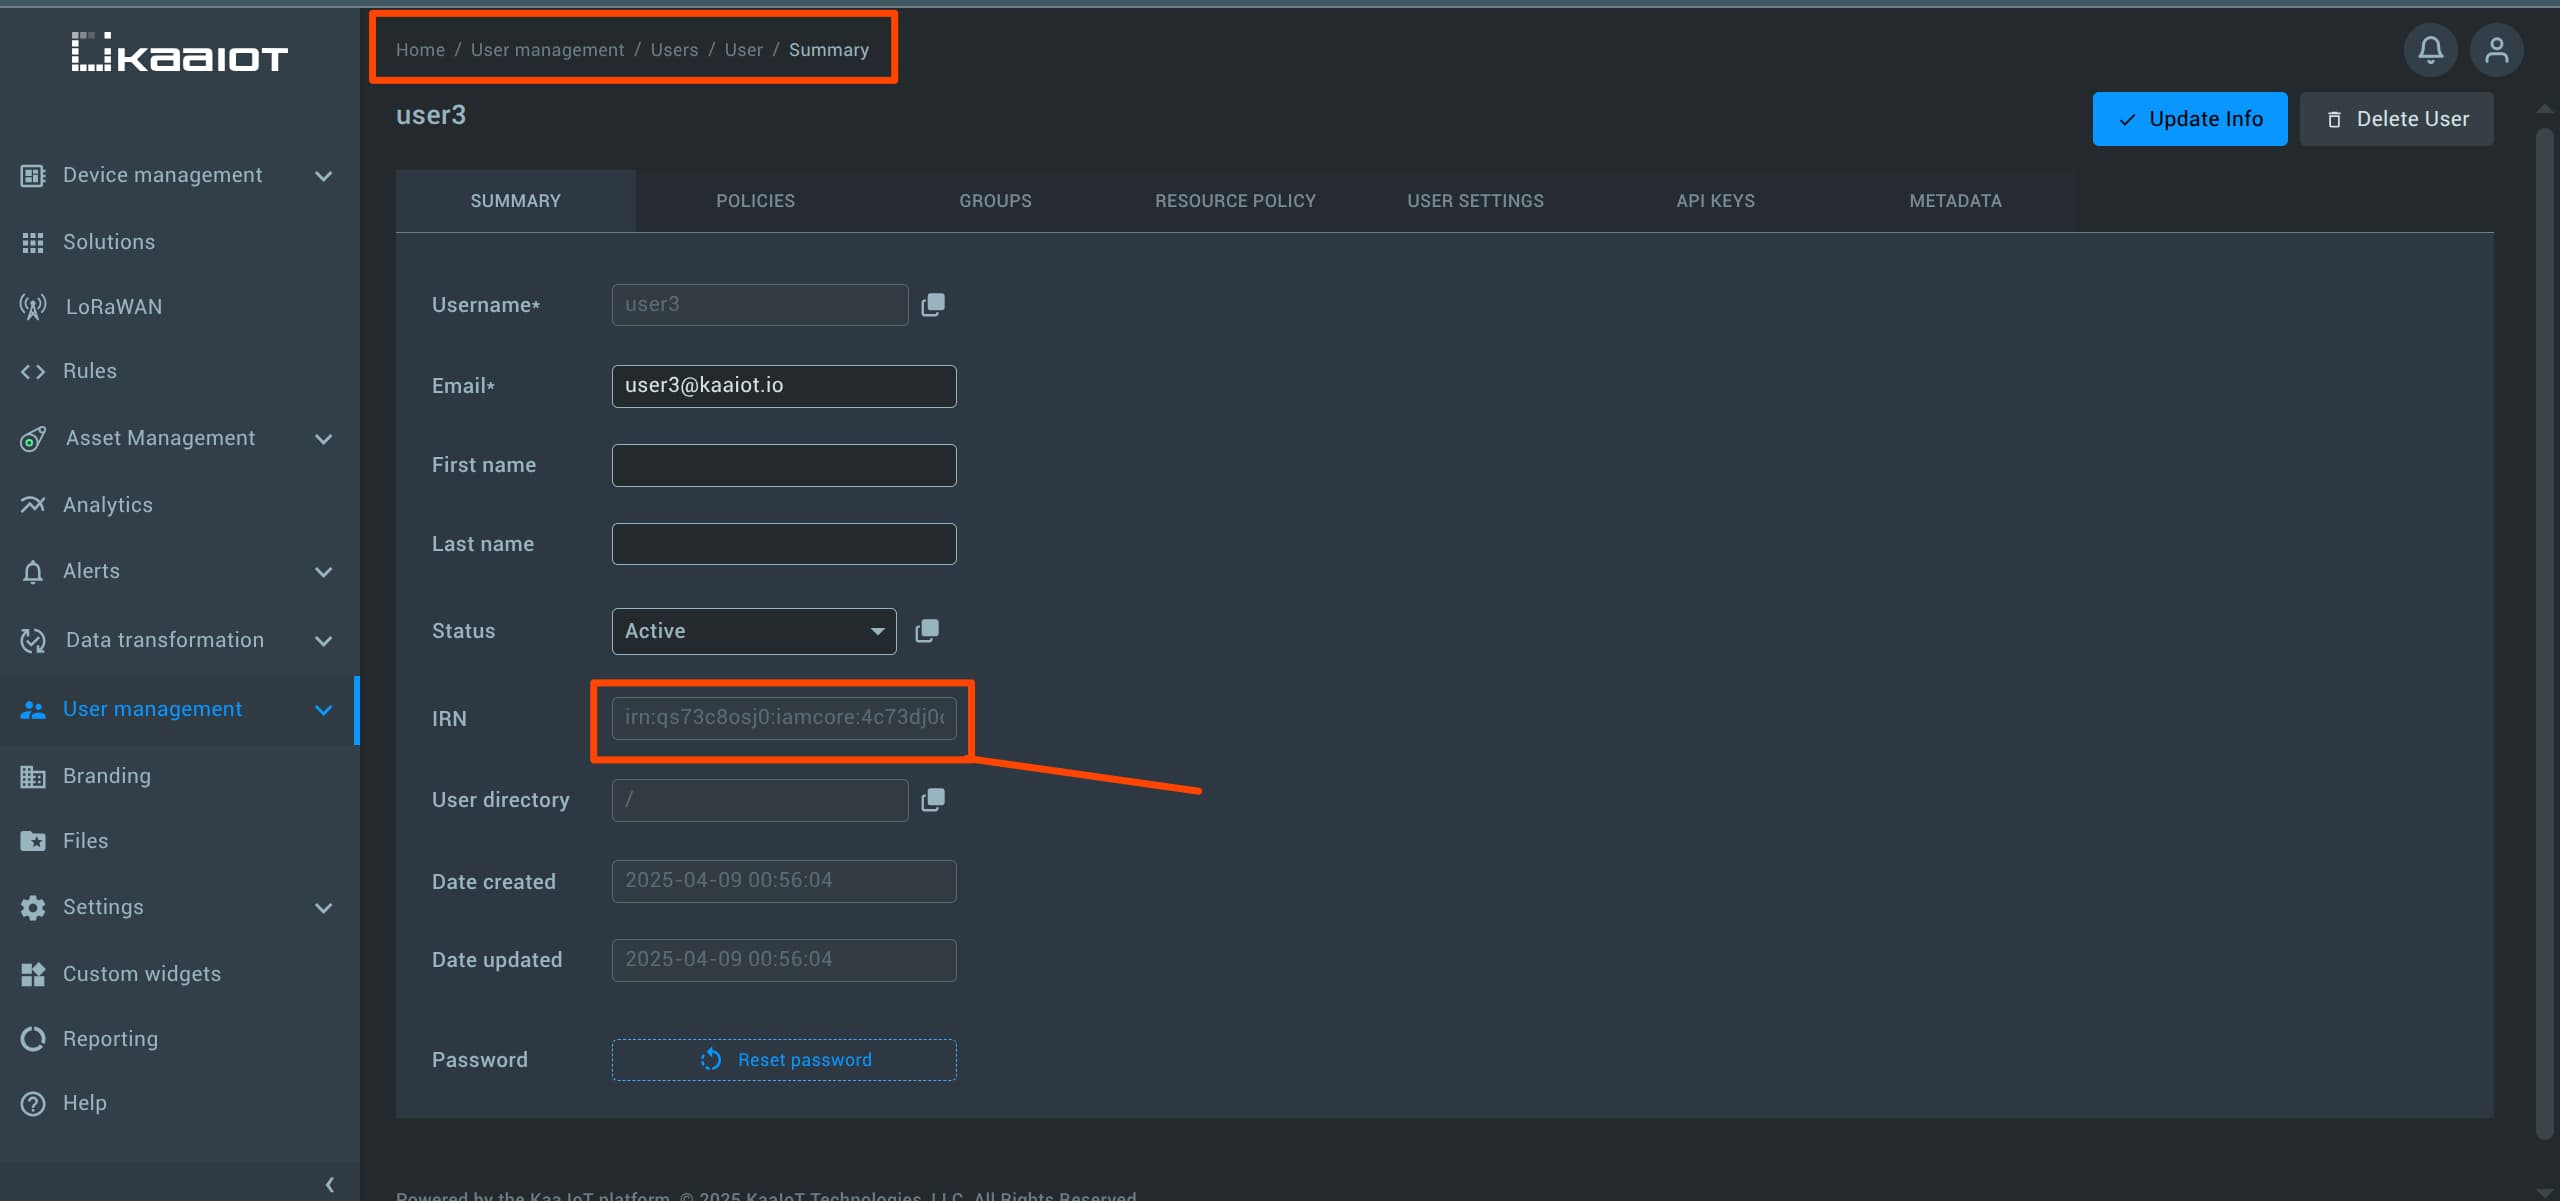
Resource IRN
Each resource in Kaa has its own unique identifier called an IRN (iamcore Resource Name).
IRNs are used to reference specific resources when writing advanced policies, especially when you need to target individual resources or define precise access rules.
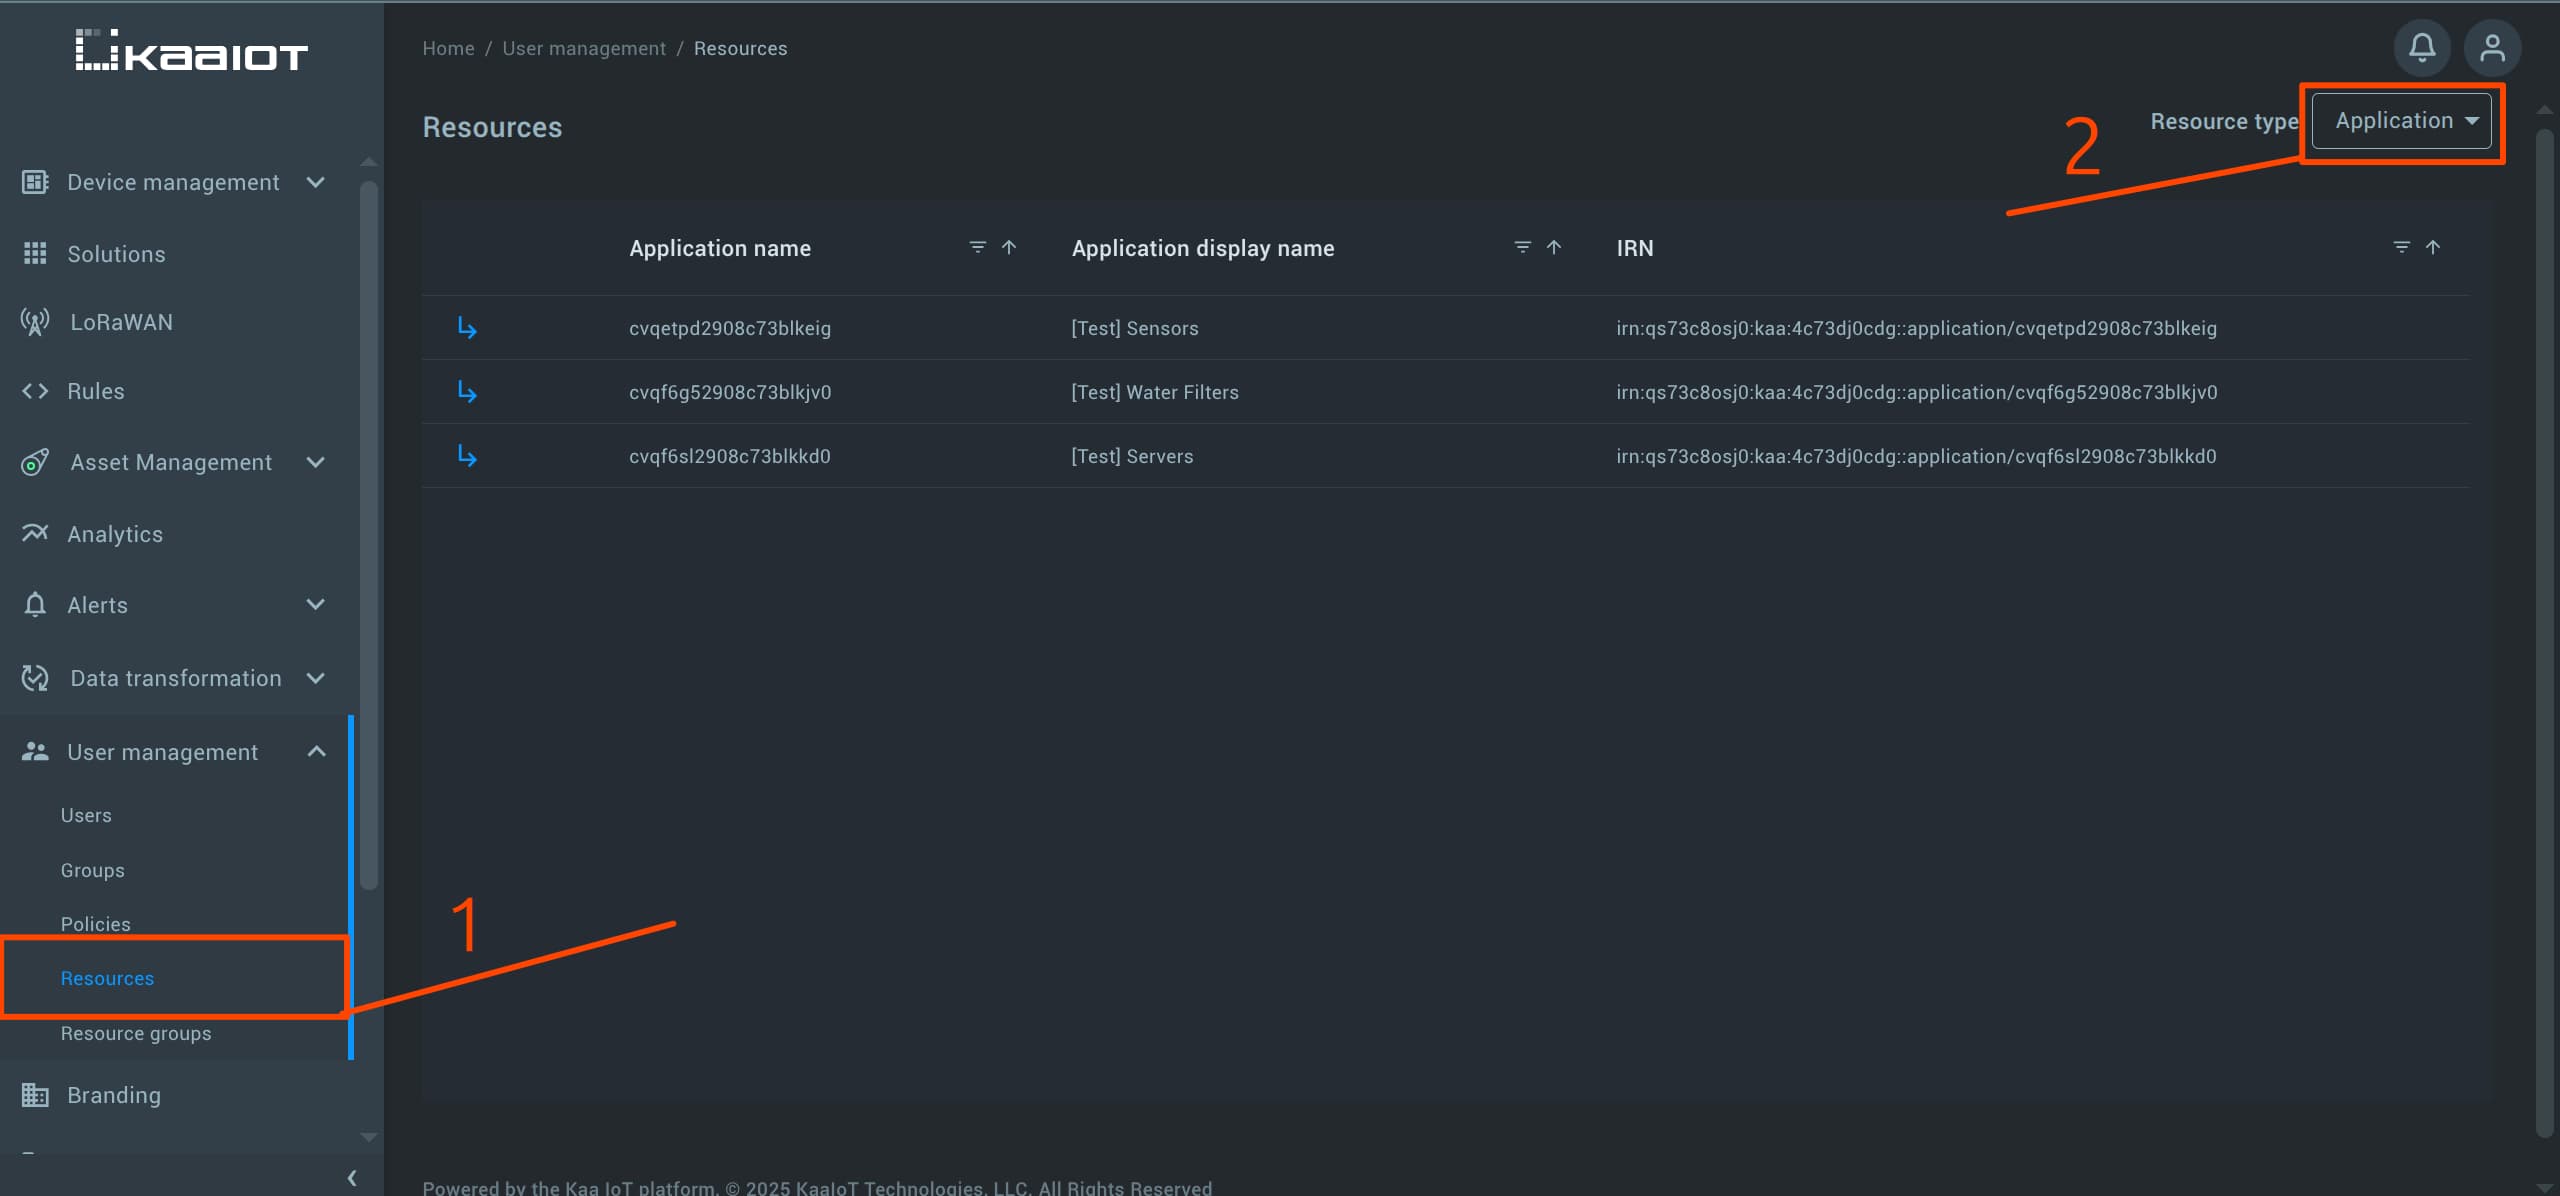
You can view the IRNs of Kaa Platform resources by navigating to “User Management” -> “Resources”.
Use the dropdown menu in the top-right corner to navigate between the types of resources.
IRNs for iamcore resources are available in the User Management:
- User Management -> Users -> [user] -> Summary
- User Management -> Policies -> [policy]
- User Management -> Groups -> [group] -> Summary
- User Management -> Resource Groups -> [resource group] -> INFO tab
Directories
Directories are used to organize resources into hierarchy (like folders and files on file system). This allows us to write policies that target those directories or subdirectories.
You can view the directory of a resource in the last part of its IRN.
User Directories
User Directories allow us to logically separate users and define a clear user hierarchy (e.g., super_admin -> admin -> super_user -> user). This structure helps isolate users and makes it easier to write access policies.
To showcase the advantages of using user directories, let’s create a few additional accounts:
- A couple of sub_admin users placed in the
/sub_admindirectory - A few developer users placed in the
/developerdirectory
With these users organized into their respective directories, we can write a single policy that applies to all users within a directory, instead of specifying each user individually.
Creating a Policy for the User Directory
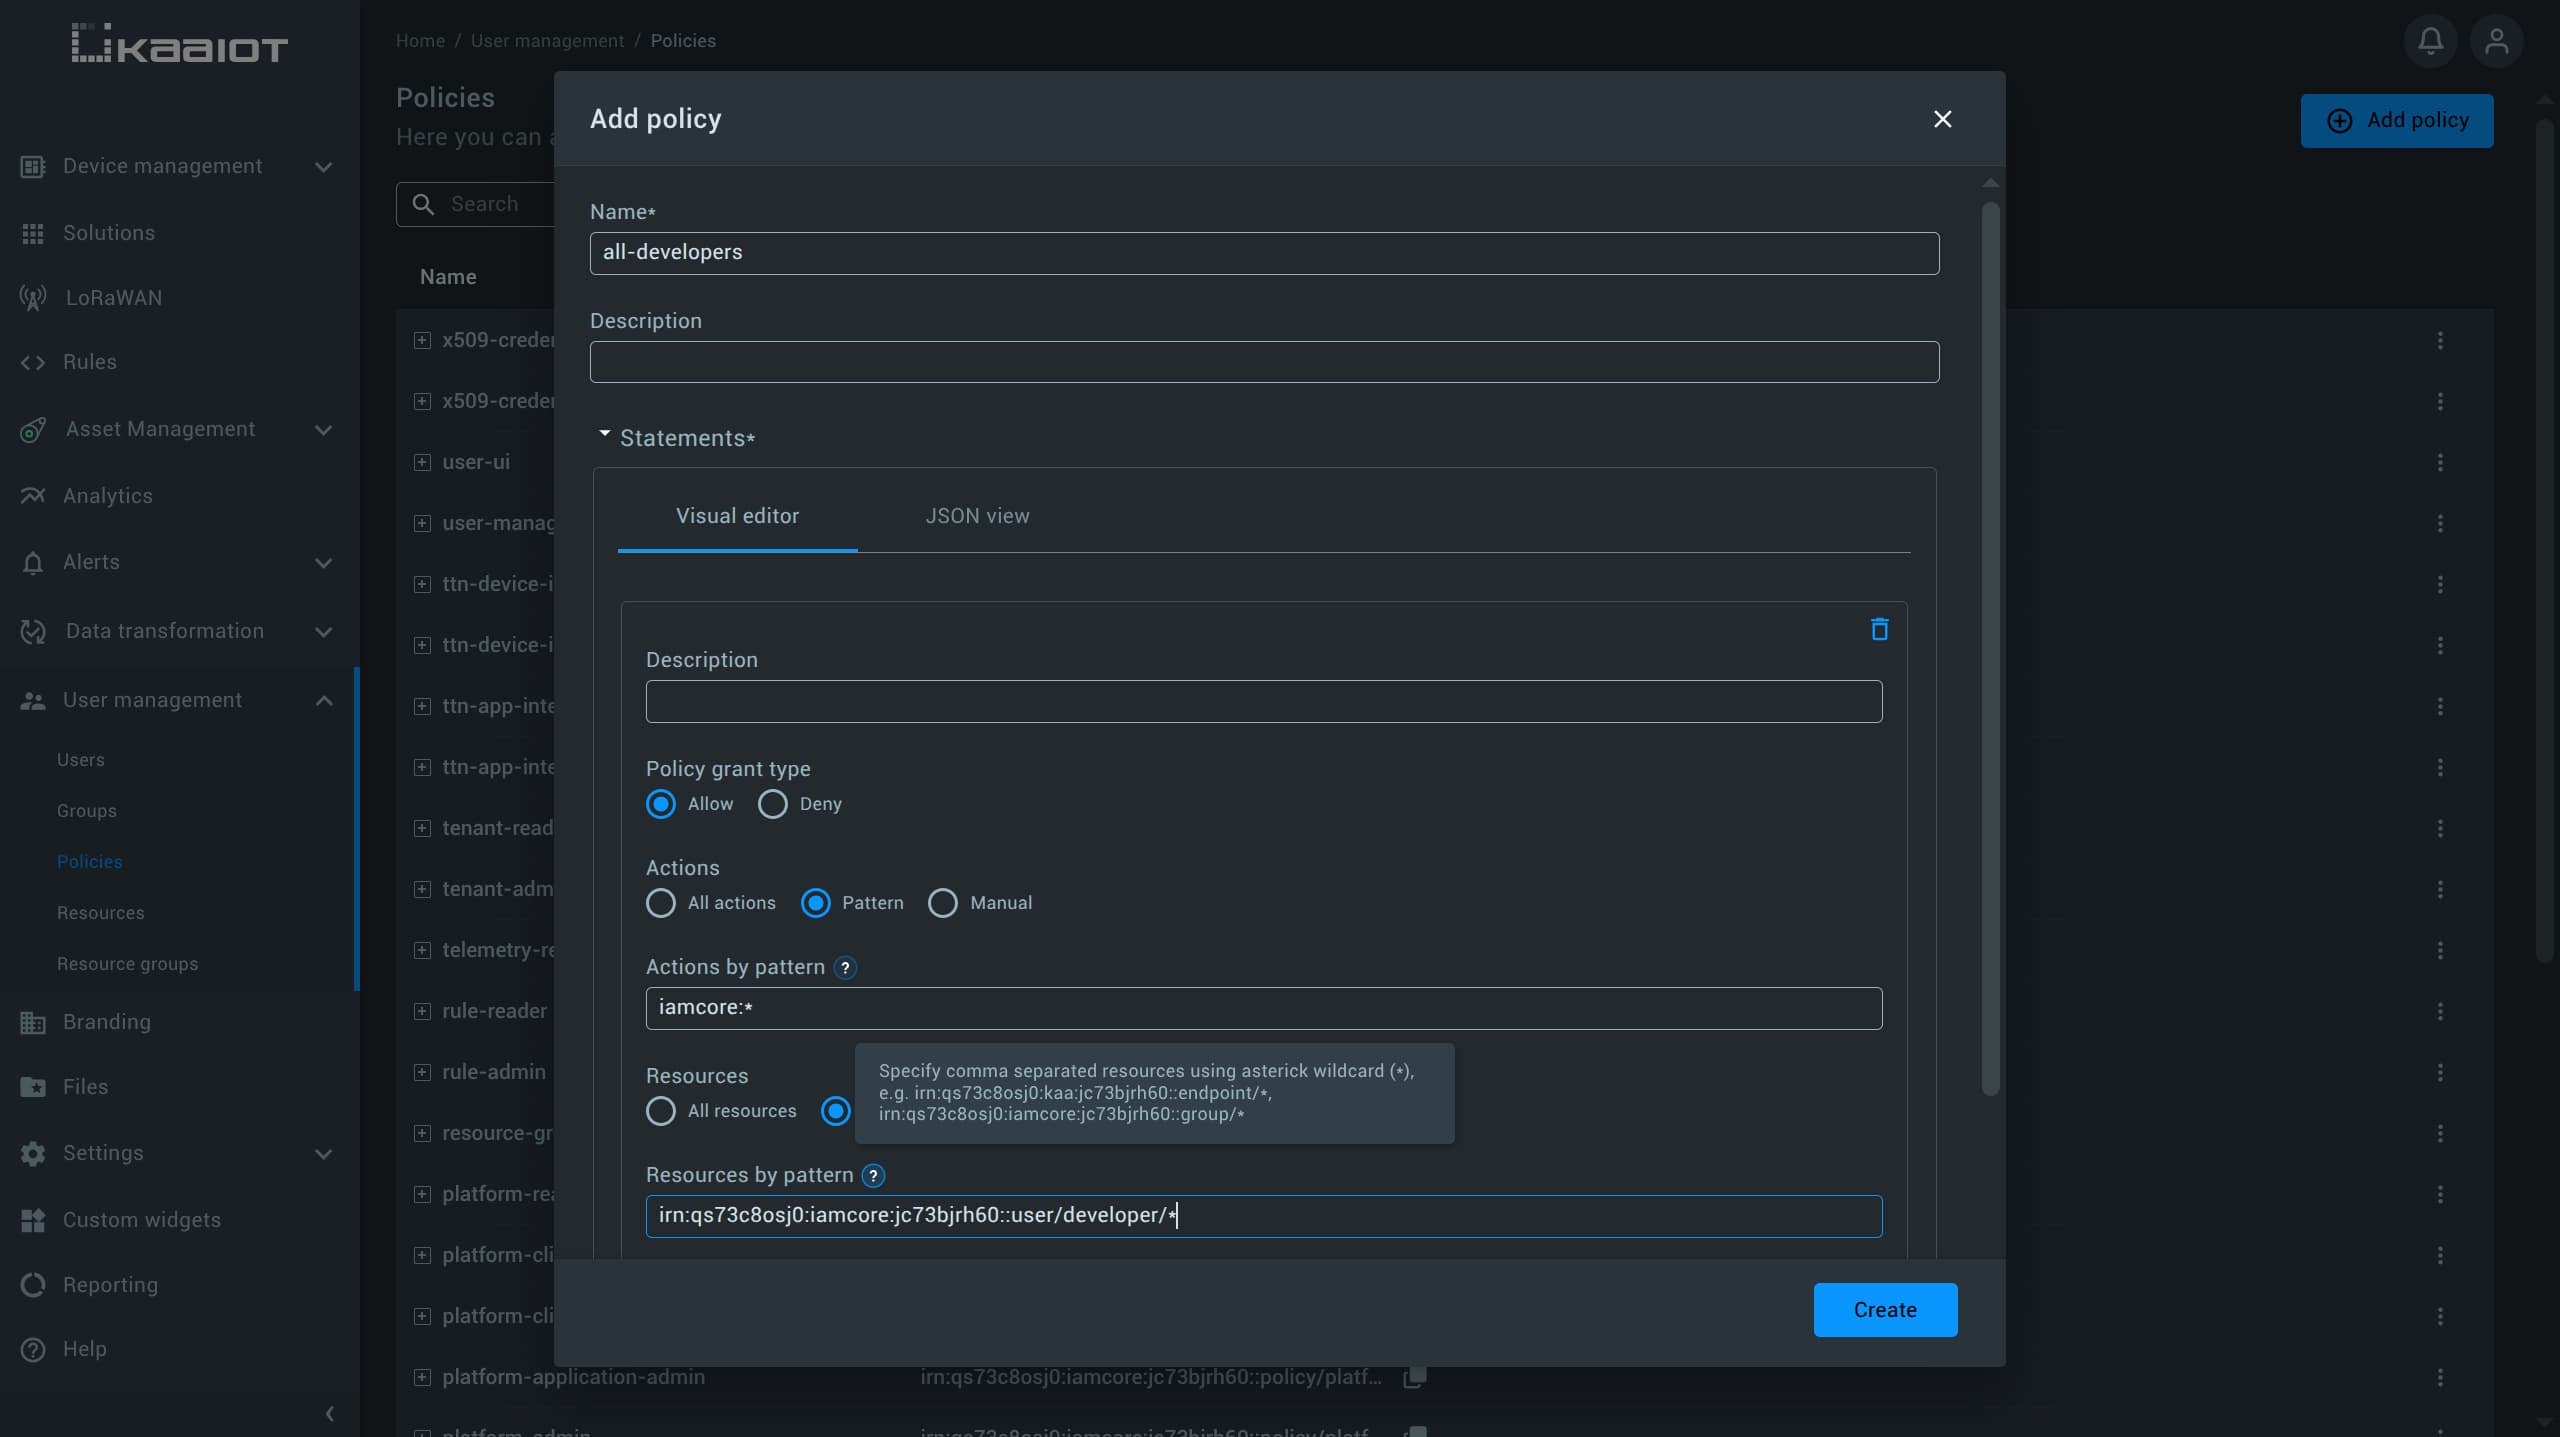
We’ll create a policy that grants full access to all users in the /developer directory.
Follow the steps described in the Policies section to create a new policy, with the following specifics:
- For Actions, choose Pattern and enter:
iamcore:user:* - For Resources, choose Pattern and enter the IRN that matches the
/developerdirectory.

If you’re unsure how the IRN should be structured, click the question mark icon in the UI:
After entering the pattern, save the policy and assign it to one of the sub_admin users. Make sure to also include user-ui.
To verify the changes log in as the sub_admin user.
If everything is configured correctly, the sub_admin should now be able to view and manage all developers in the /developer directory.
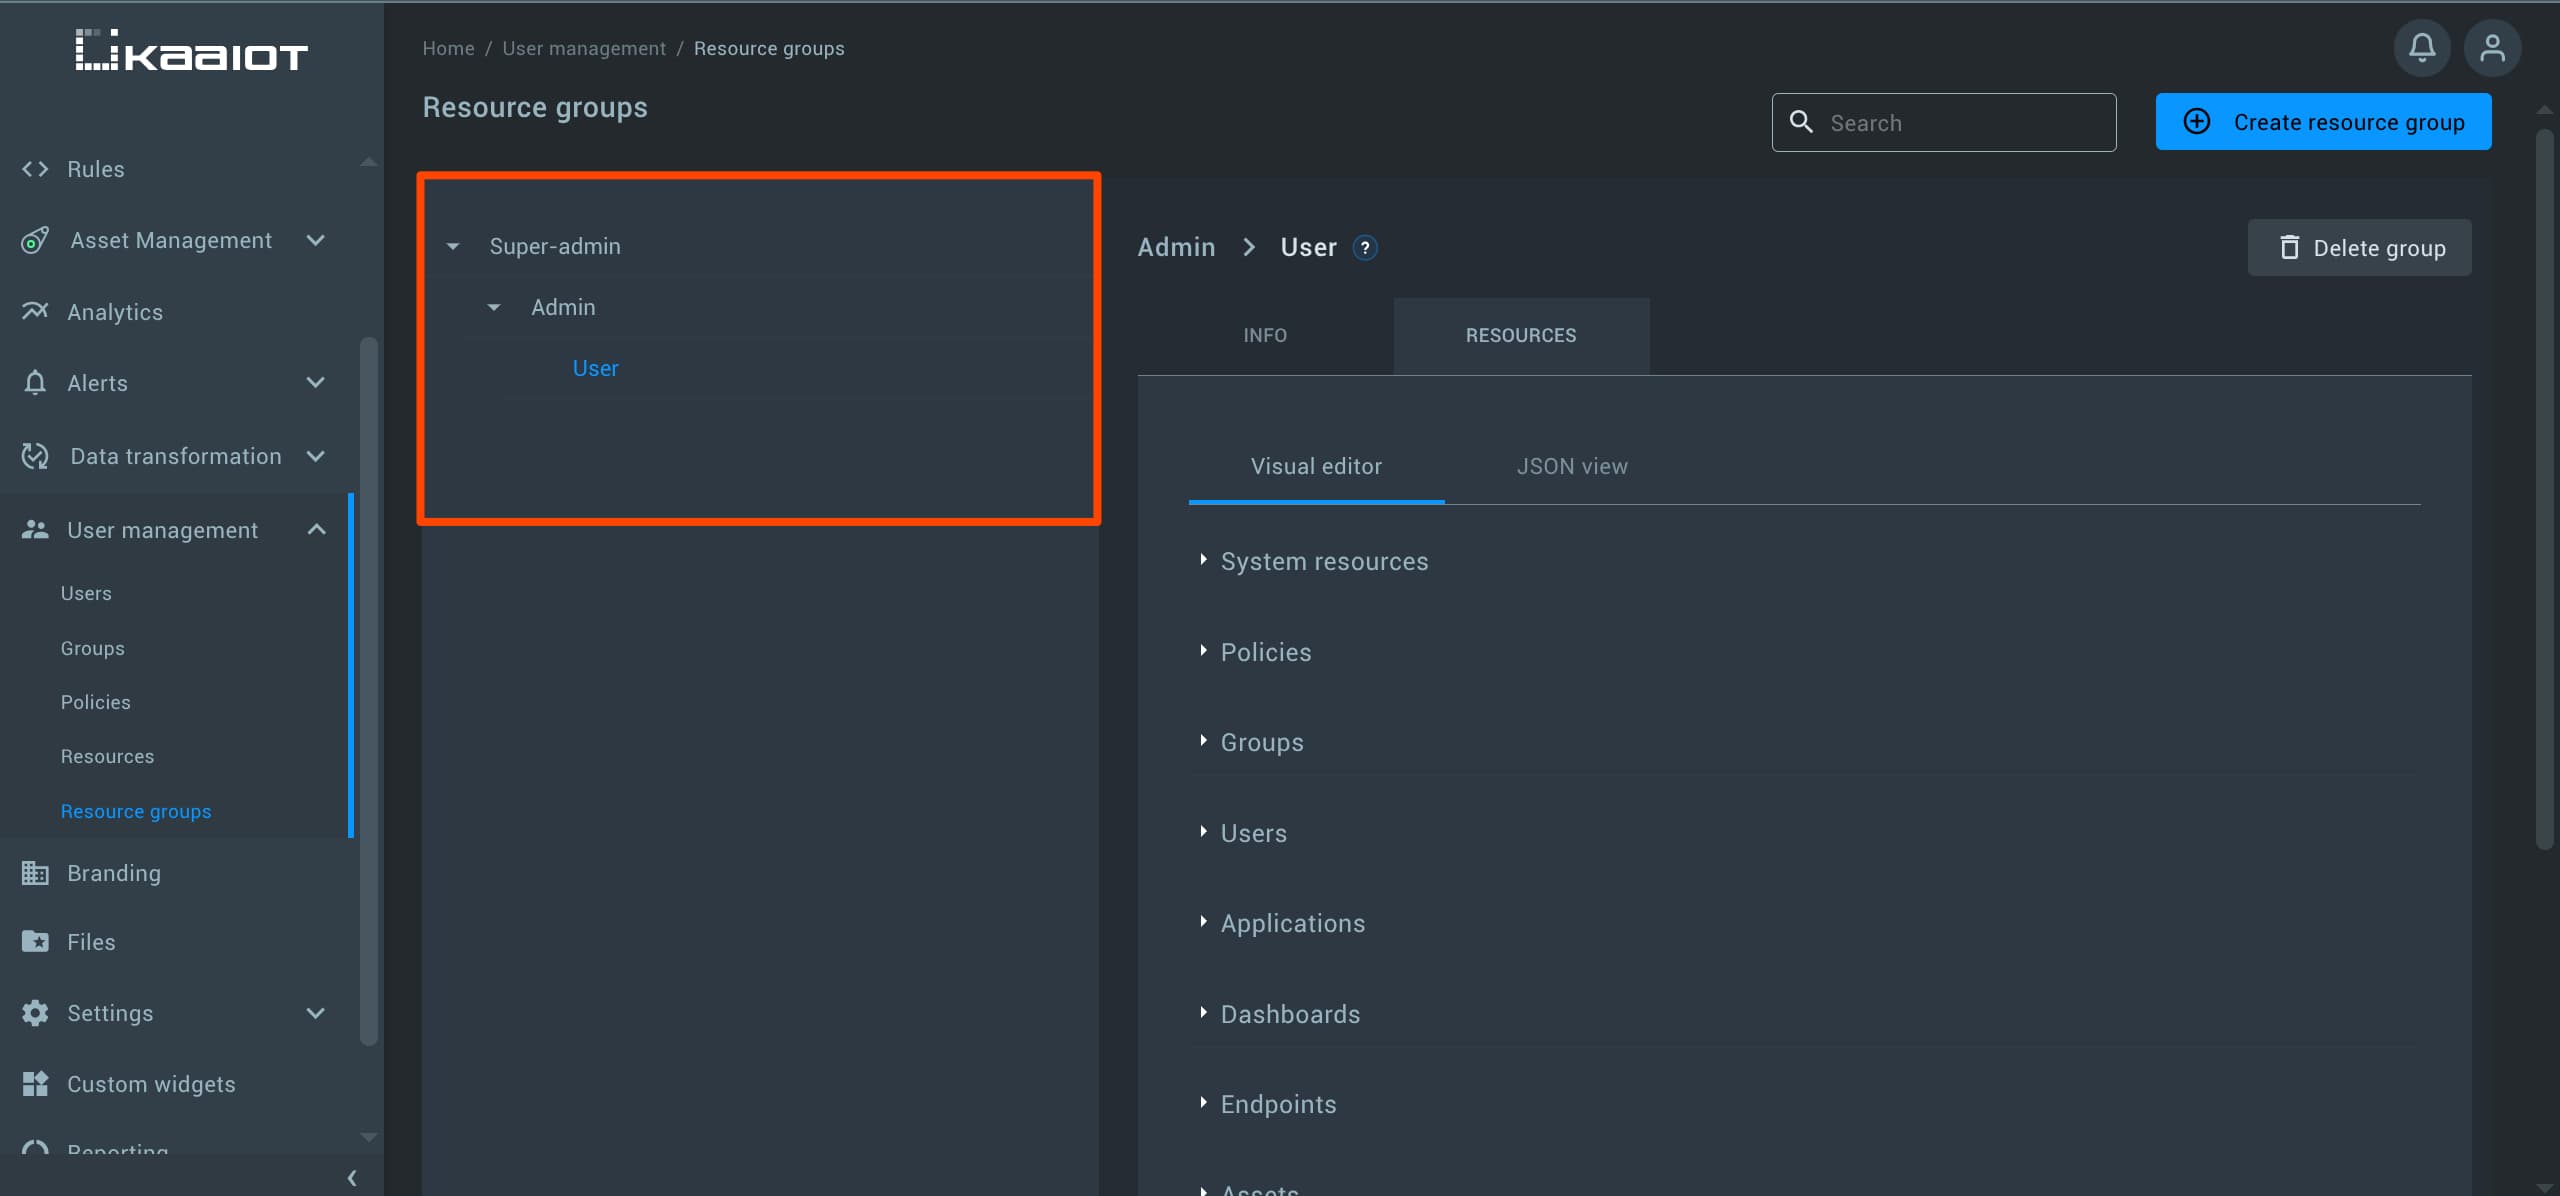
Resource Group (Pool)
Resource Groups (also referred to as pools) allow you to group multiple resources together, making it easy to create reusable collections that can be referenced across different policies.
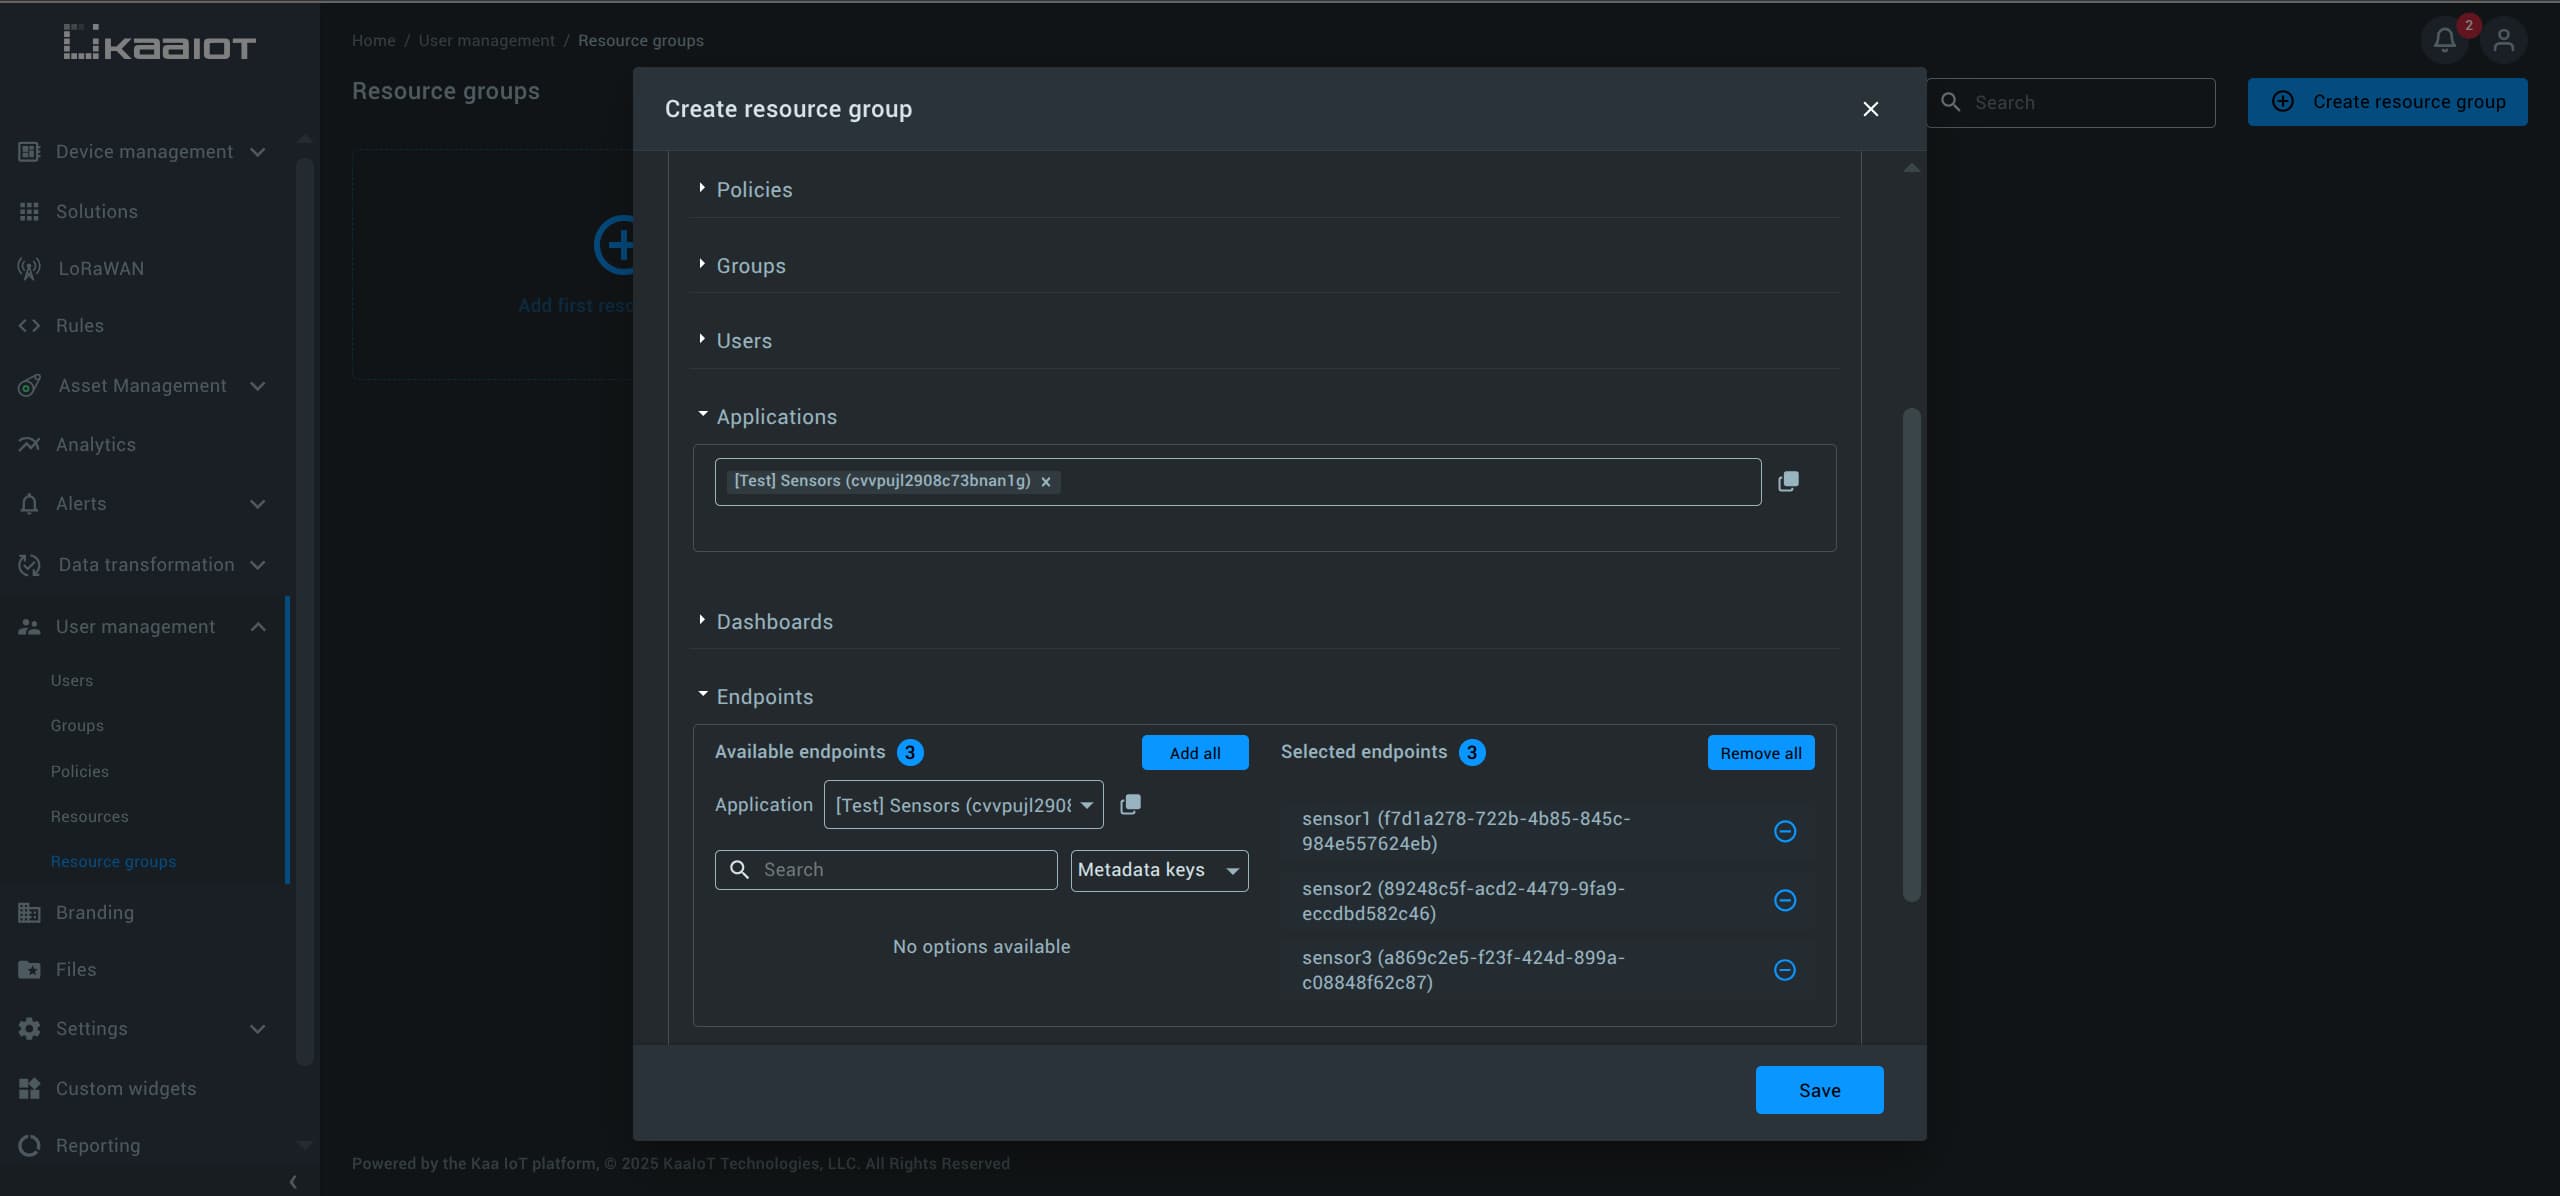
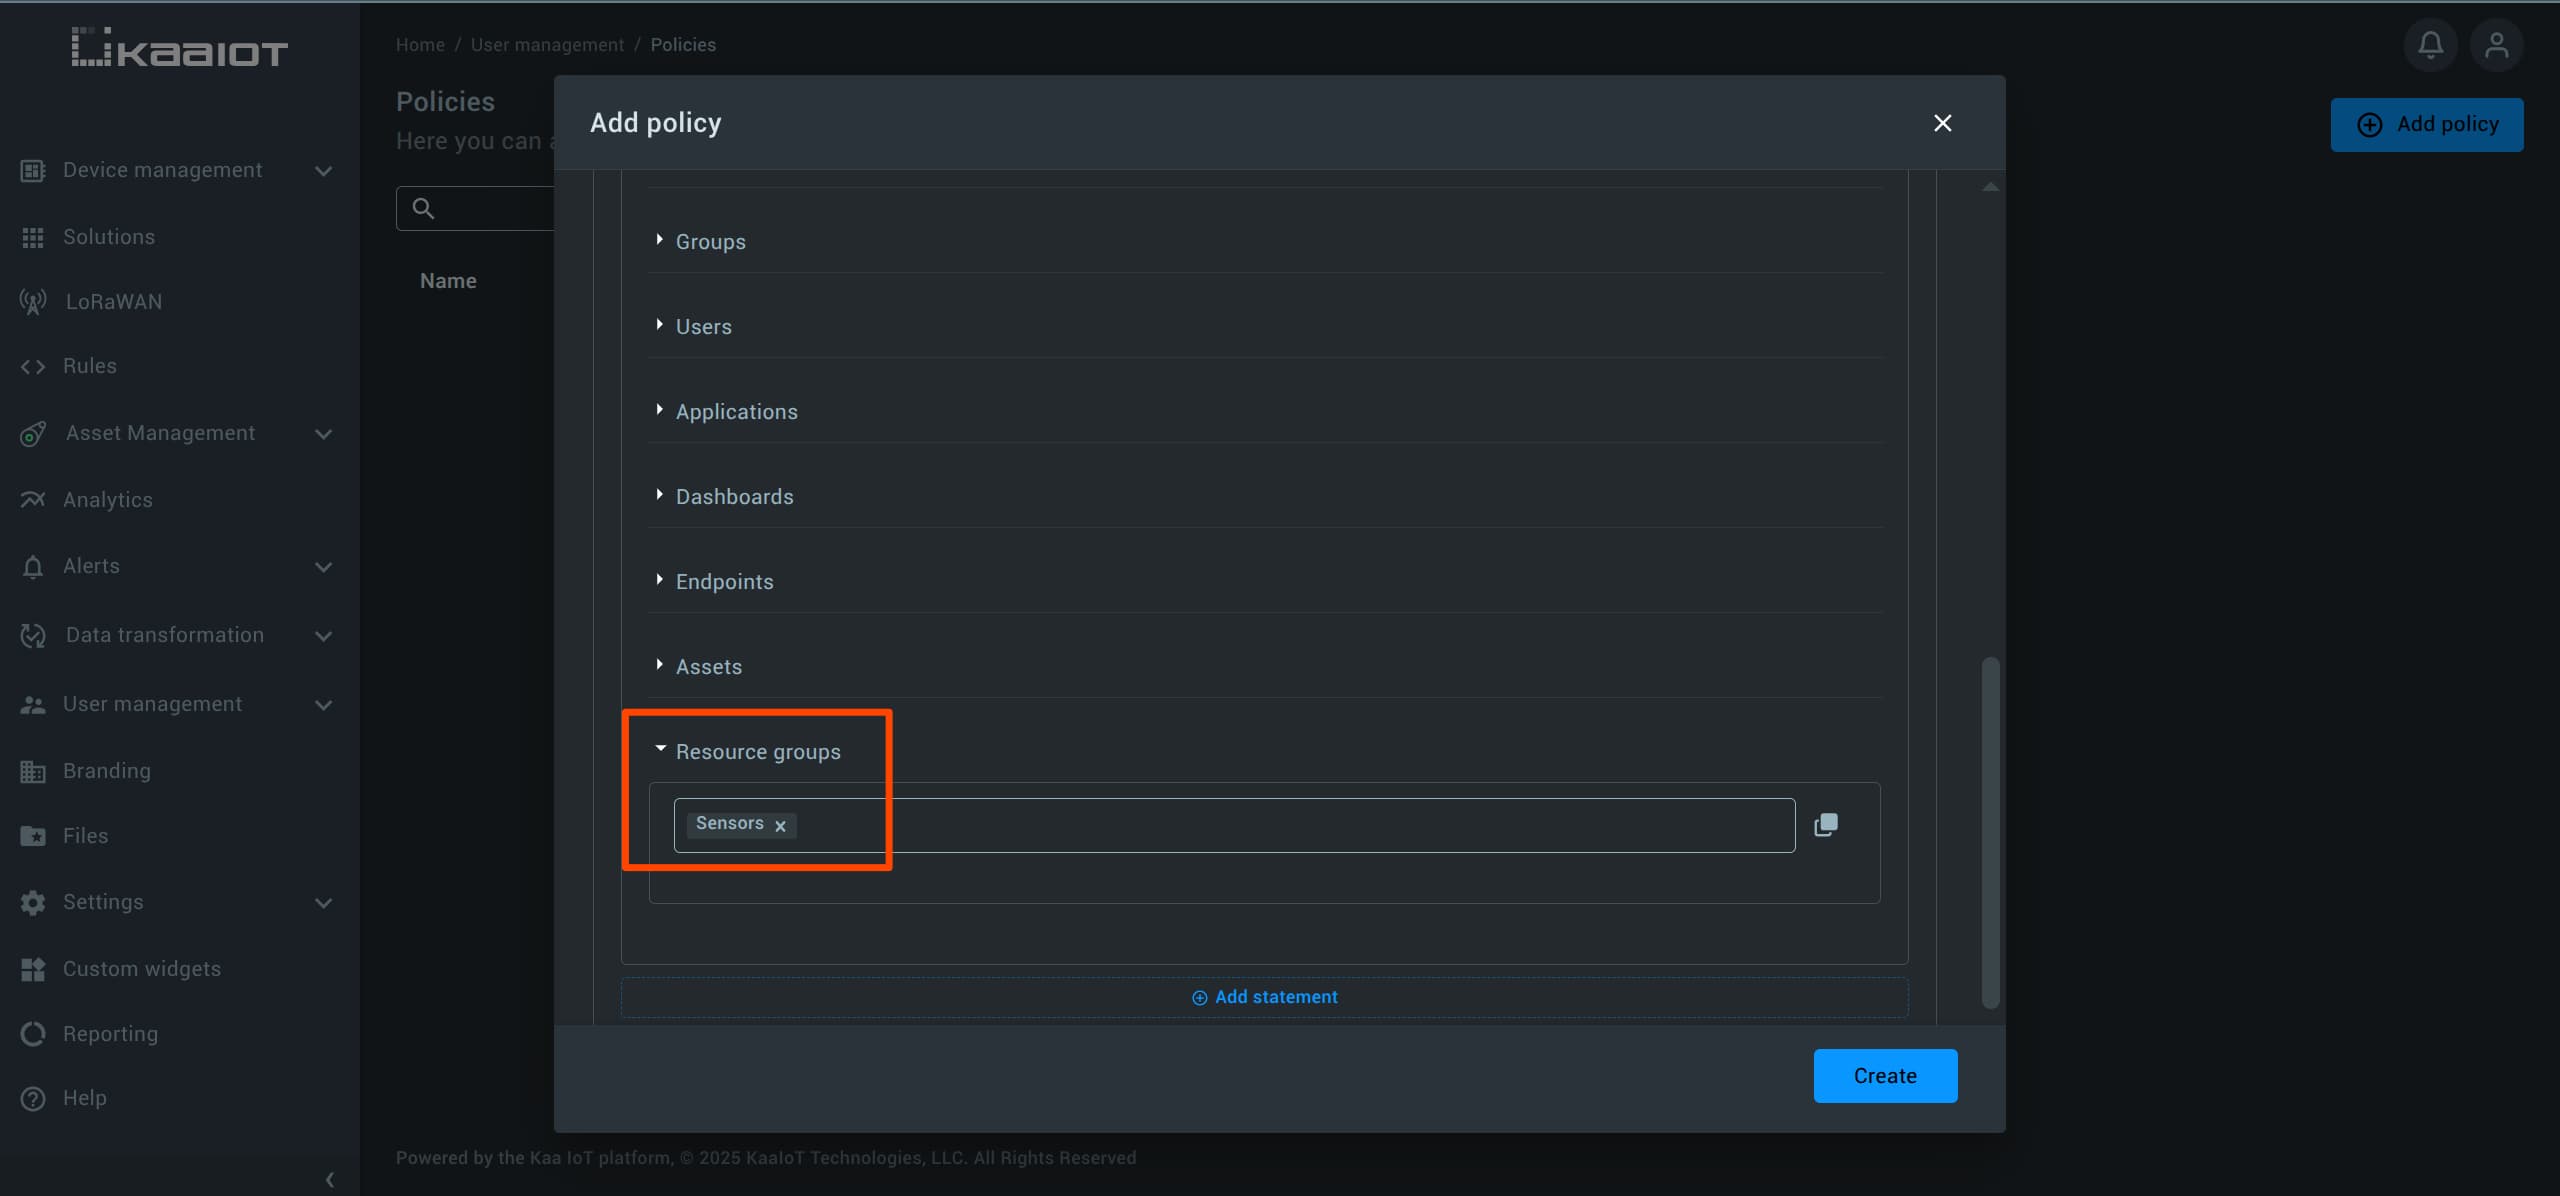
To create a Resource Group, navigate to “User Management” -> “Resource Group”, and click on “Create Resource Group”.
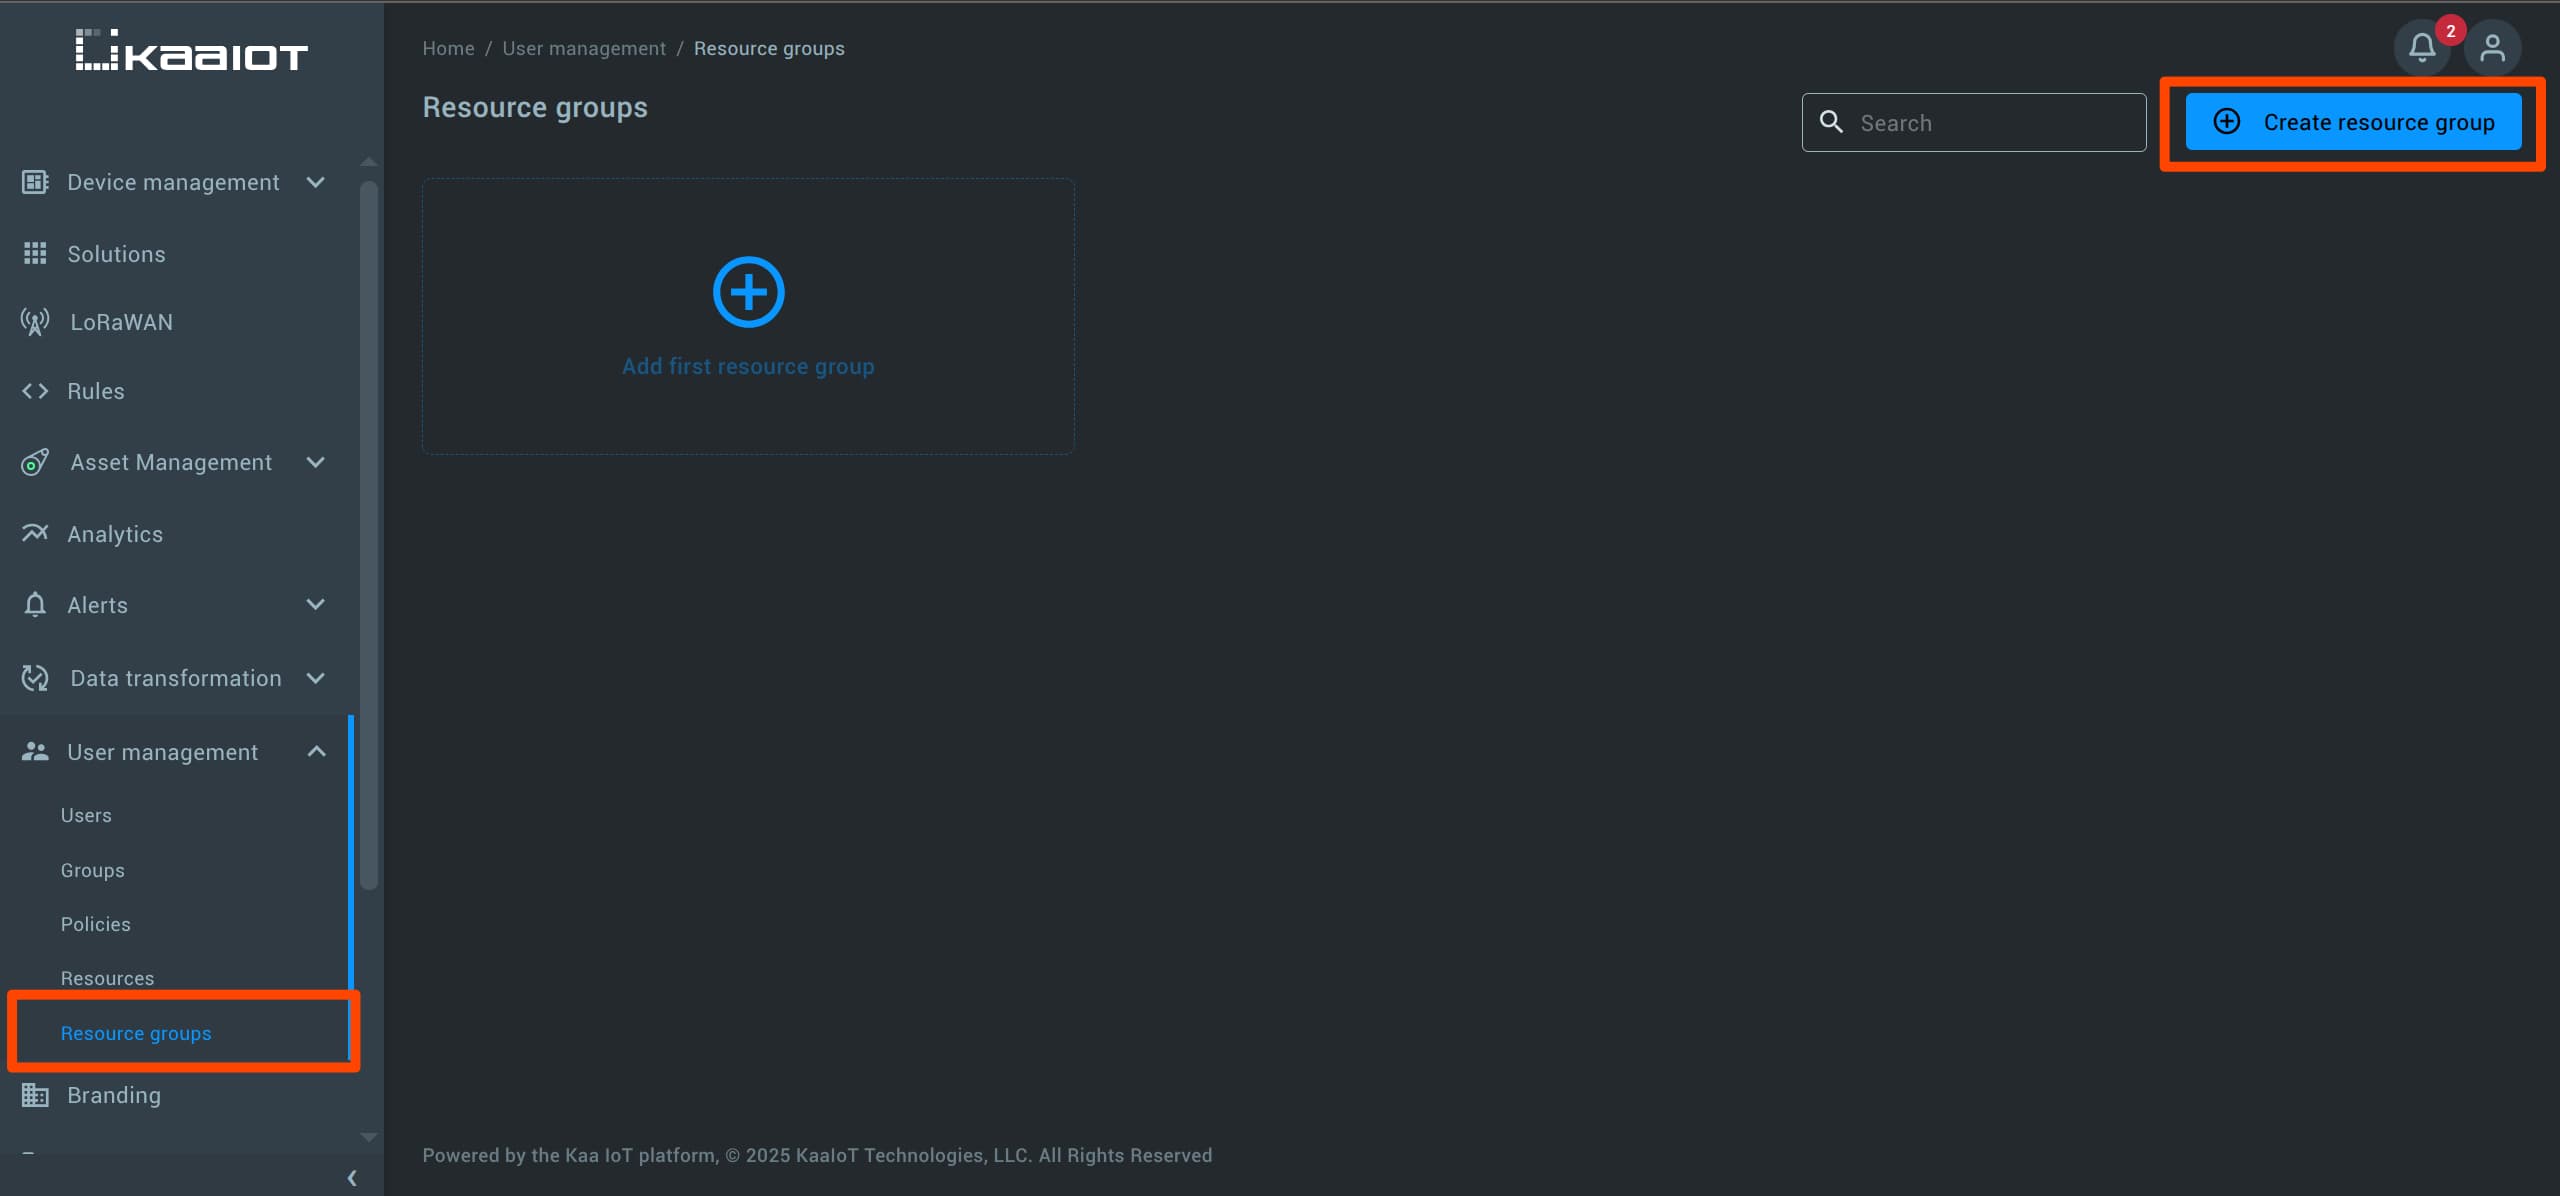
Give your group a name and add the relevant resources.
In this example, we’ll include only the [Test] Sensors application and its endpoints.
Create a Policy for the Resource Group
Next, we need to create a policy that grants access to all resources in the group.
Navigate to “User Management” -> “Policies”, and click on Add policy.
For Actions, you can choose All actions to grant full access to the selected resources.
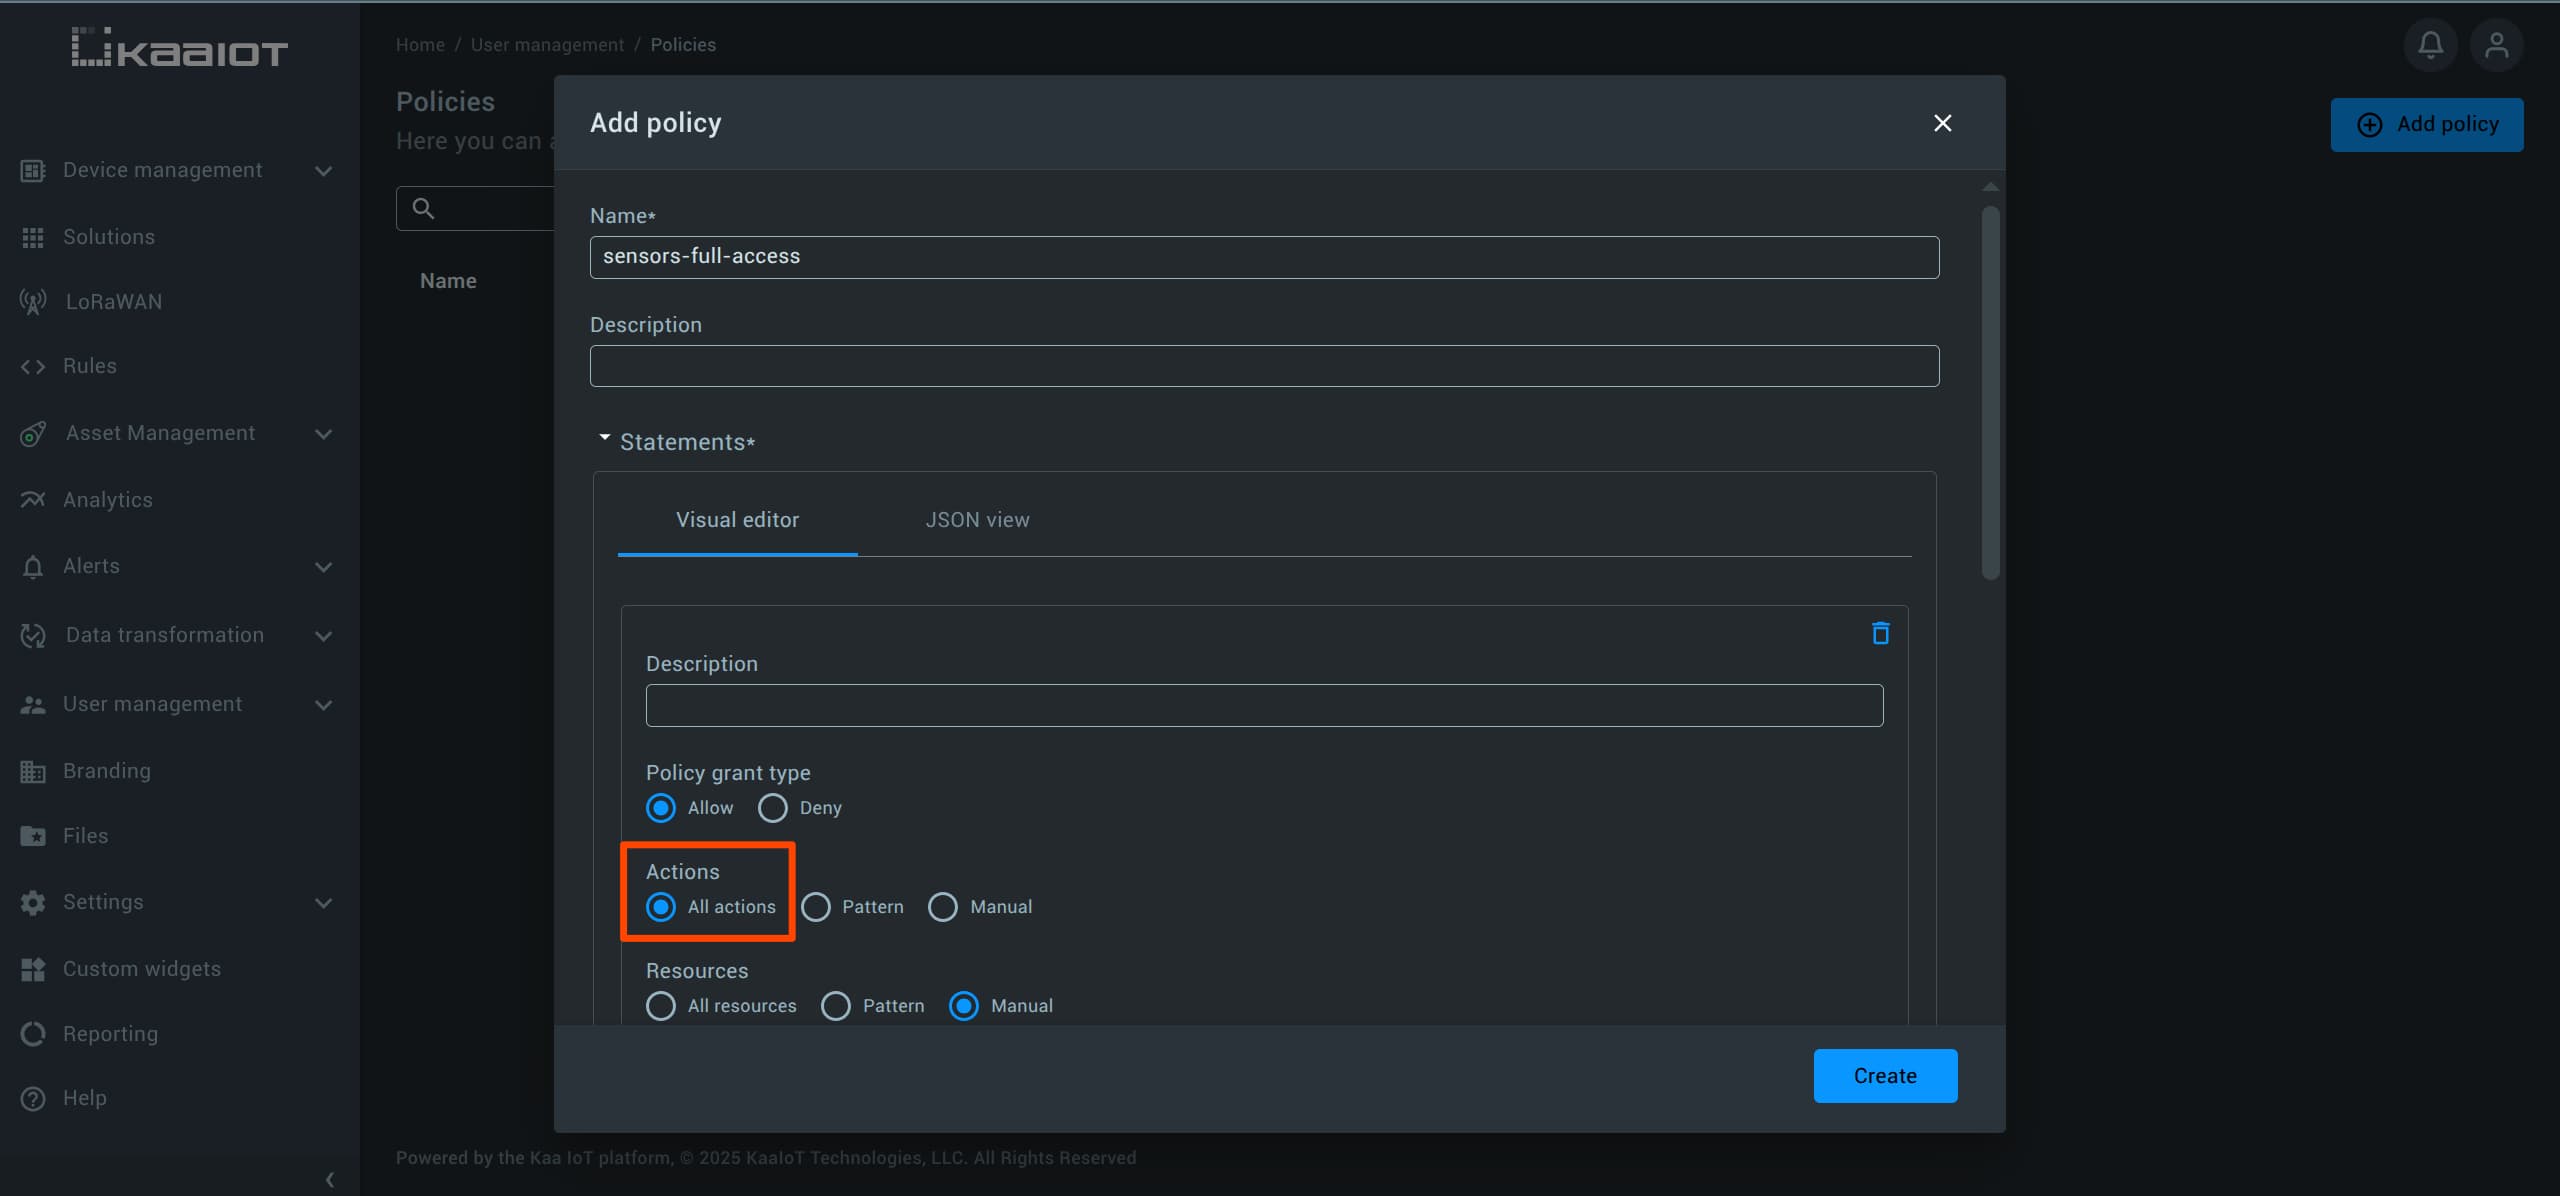
For Resources, tick Manual, scroll down and pick the Resource Group that you just created.
After creating the policy, attach it to your test user.
Also, don’t forget to attach the user-ui policy we created earlier to grant UI access.
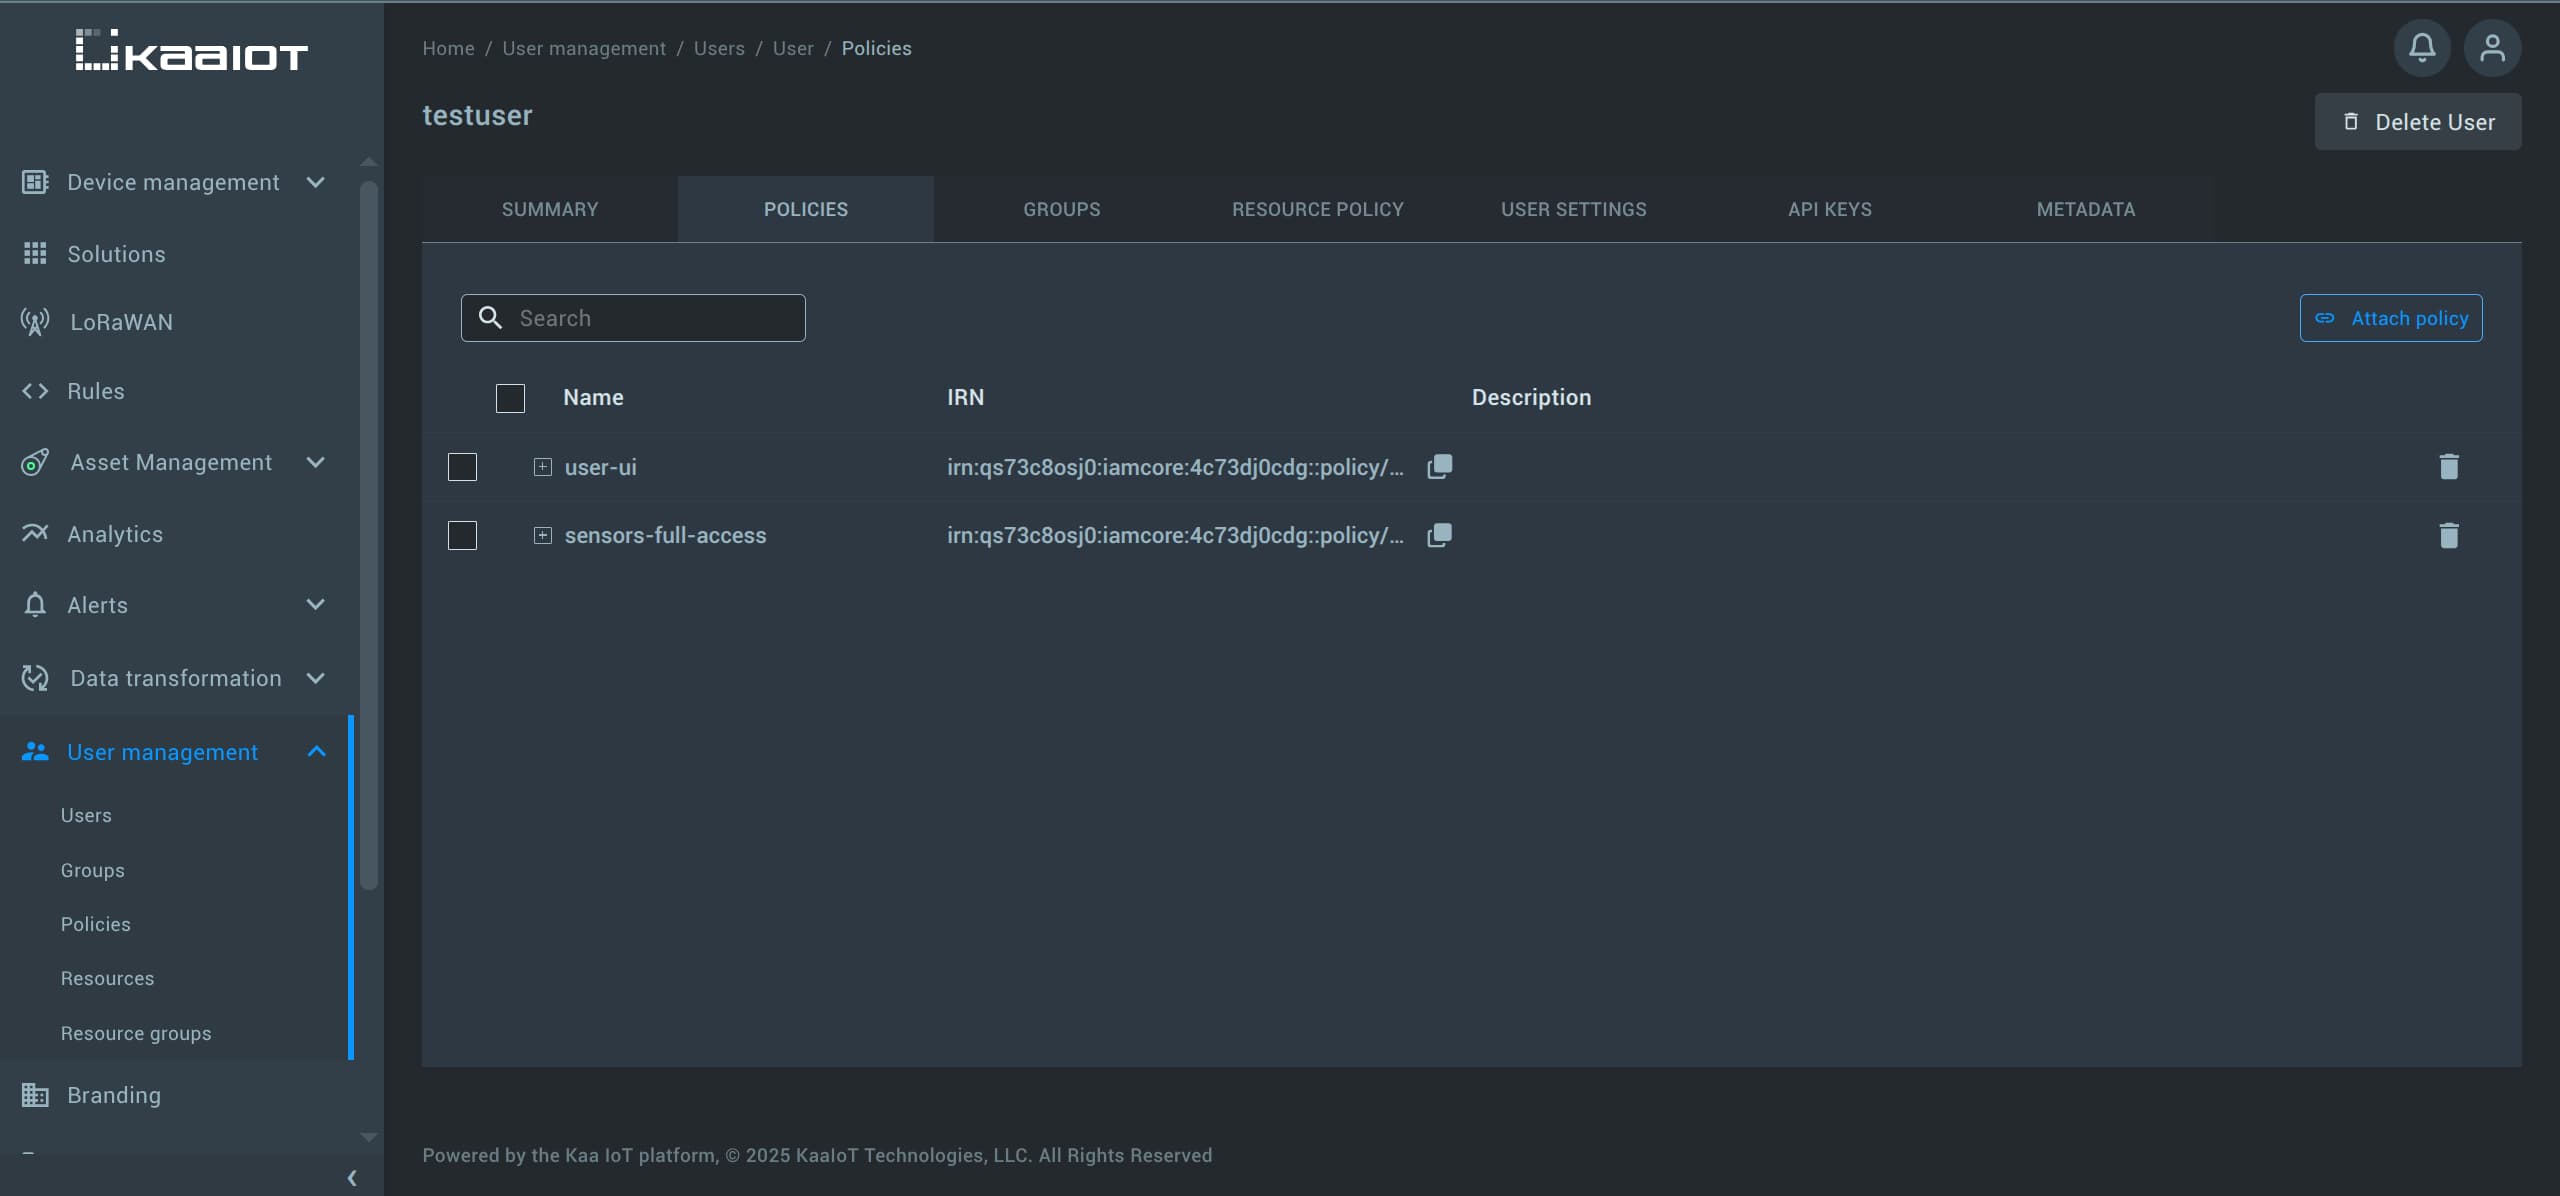
Log in again with your user account.
You should now see the resources specified in the Resource Group with full access to them.
Resource Group Hierarchy
Additionally, you can create hierarchy of resource groups by assigning one group as a child of another.
The child group will inherit all resources from its parent, allowing you to create hierarchical access structures.
This is especially useful when designing permission levels that range from broad admin access to more restricted roles, such as basic users, with each level progressively narrowing access.